Repair System is an in-store ordering tool that allows Home Depot associates to order parts for customer or rental fleet tools.
My Role
After working on TRIO, I was placed on the repair team with two new product managers and led the team through the discovery and framing process. At the time, I was a User Experience Designer working up to a Senior User Experience Designer position. I spent two months with the team, teaching the value of UCD methods. As a team we worked through structuring scripts, conducting interviews, synthesizing and pulling valuable insights.
Over a handful of weeks, the new product managers and I traveled to nearly twenty stores to talk to associates and technicians about the repair experience.
Findings
In general, we found that repair technicians feel overworked because their performance is reviewed by the number of repairs they are able to complete. Their responsibilities, however, end up being to repair tools while simultaneously covering the front counter. Due to this staffing issue, repair technicians are unable to get the visibility they deserve because their performance metrics do not reflect everything they are responsible for.
Next Steps
From a Repair IT standpoint, the product managers and I completed a time analysis to gain an understanding of the repair process. Our main goal was to find which parts of the process are taking the most time out of the Tool Technician's day, so he can accomplish more and get the recognition he deserves.
In this analysis, we developed three tasks that were tested between the current fleet and customer repair systems.
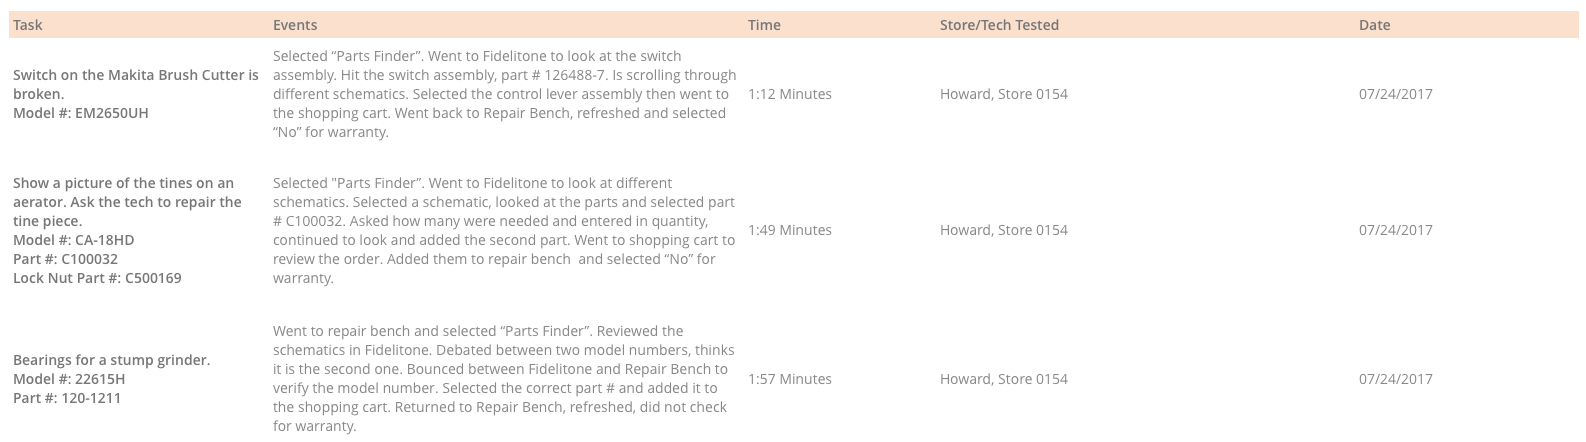
Fleet Test Example
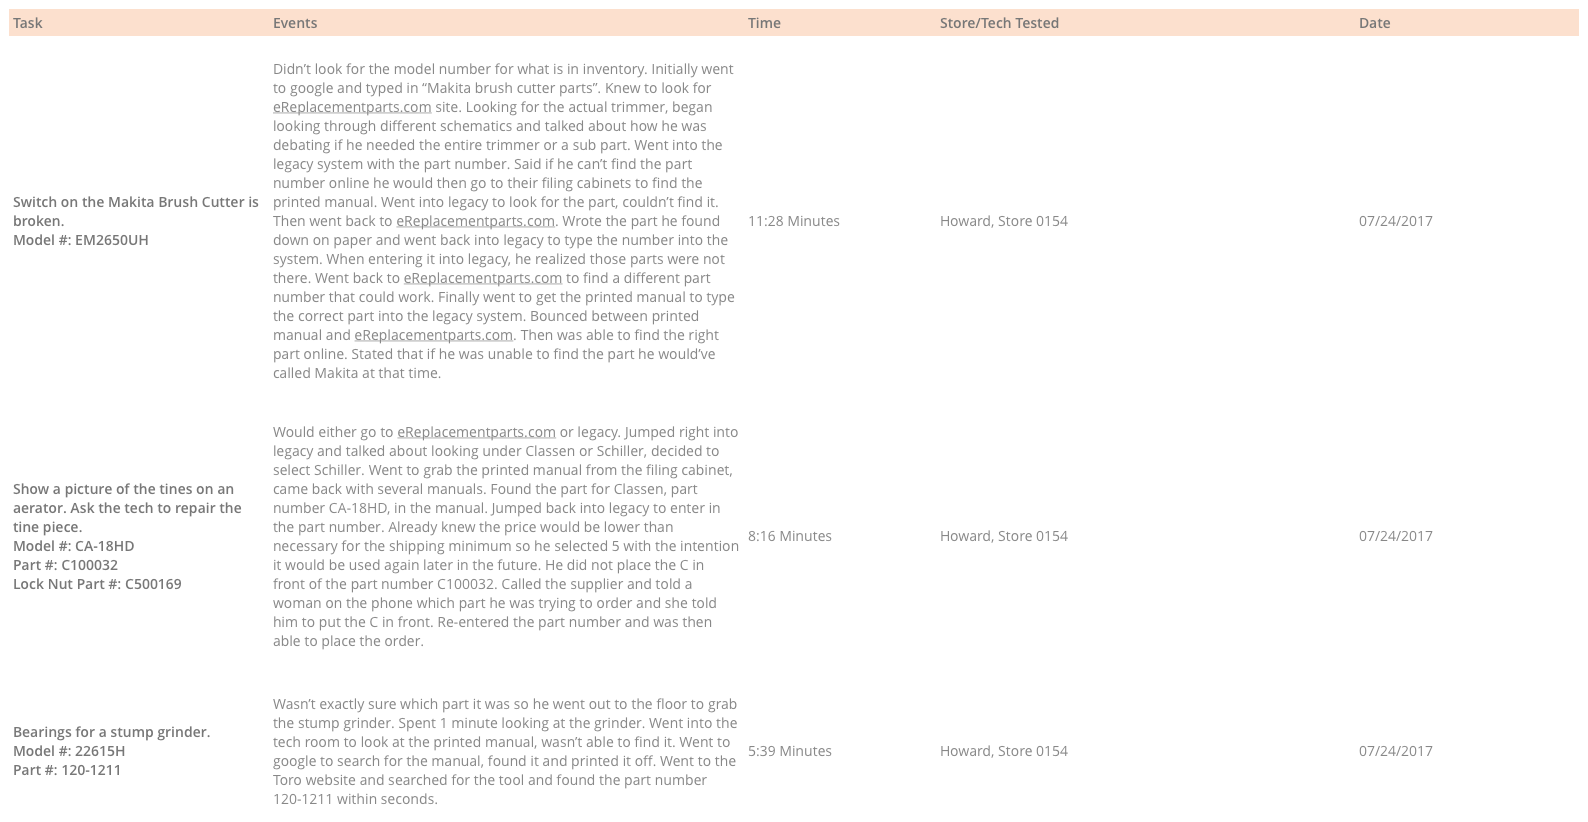
In this test we created three tasks in which technicians would find and order the correct part.
Below is an example of the results of a test we did with a technician named Howard from store 0154.
Fleet Time Analysis
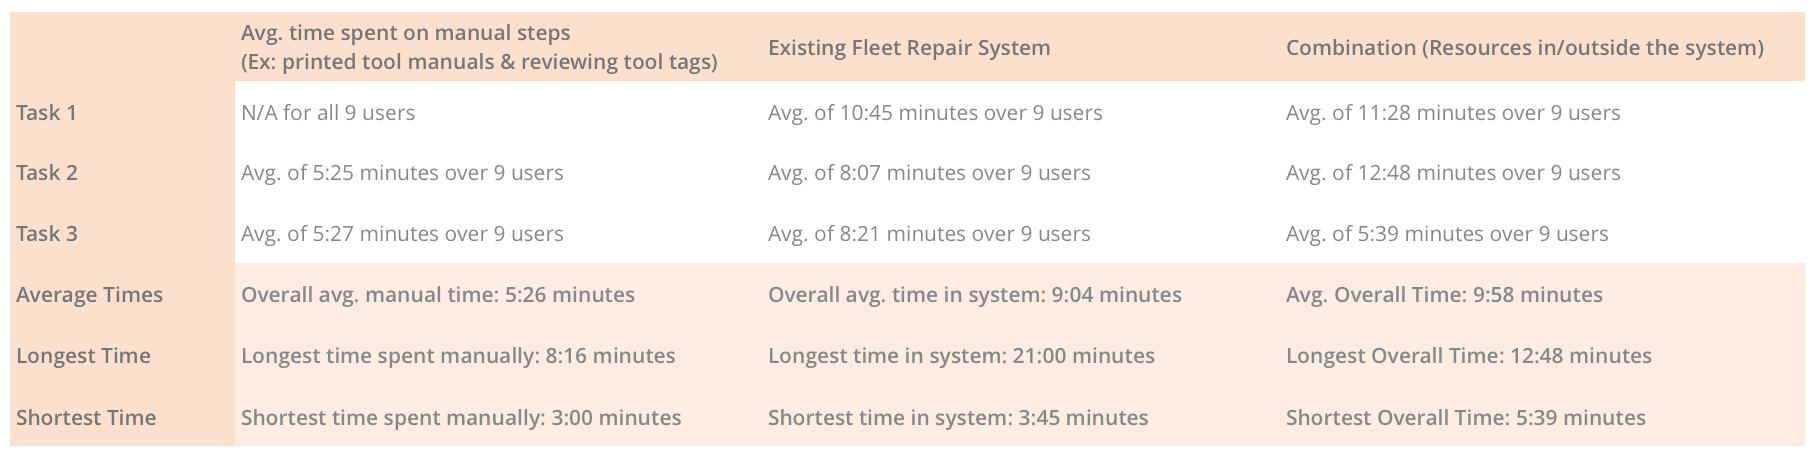
After completing the same test with 8 other technicians, we then went through and analyzed the results.
We found throughout this test technicians were mostly able to find and order the correct part by taking steps both inside and outside of the current system. Steps outside of the system include finding the tool on the floor, reviewing the model number then going to a filing cabinet where a printed manual is stored. Occasionally a call to the supplier is required.
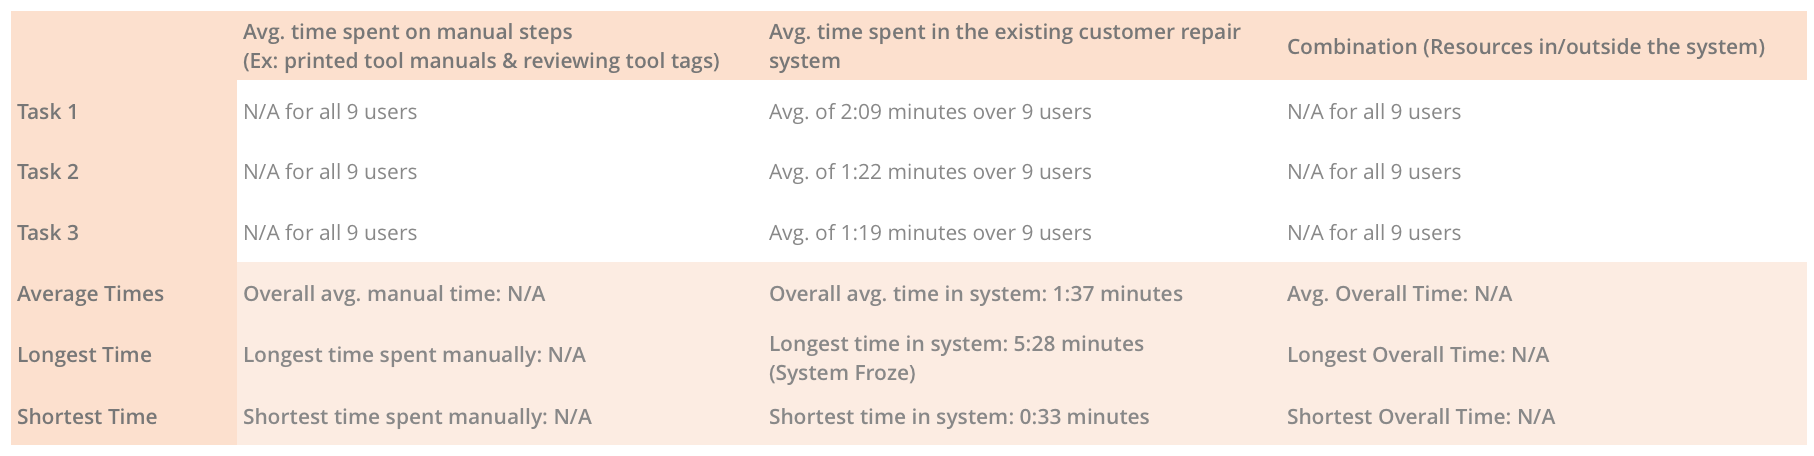
Below is a summation of the average amount of time required for all 9 technicians to complete each task, as well as the overall average and the longest and shortest times.
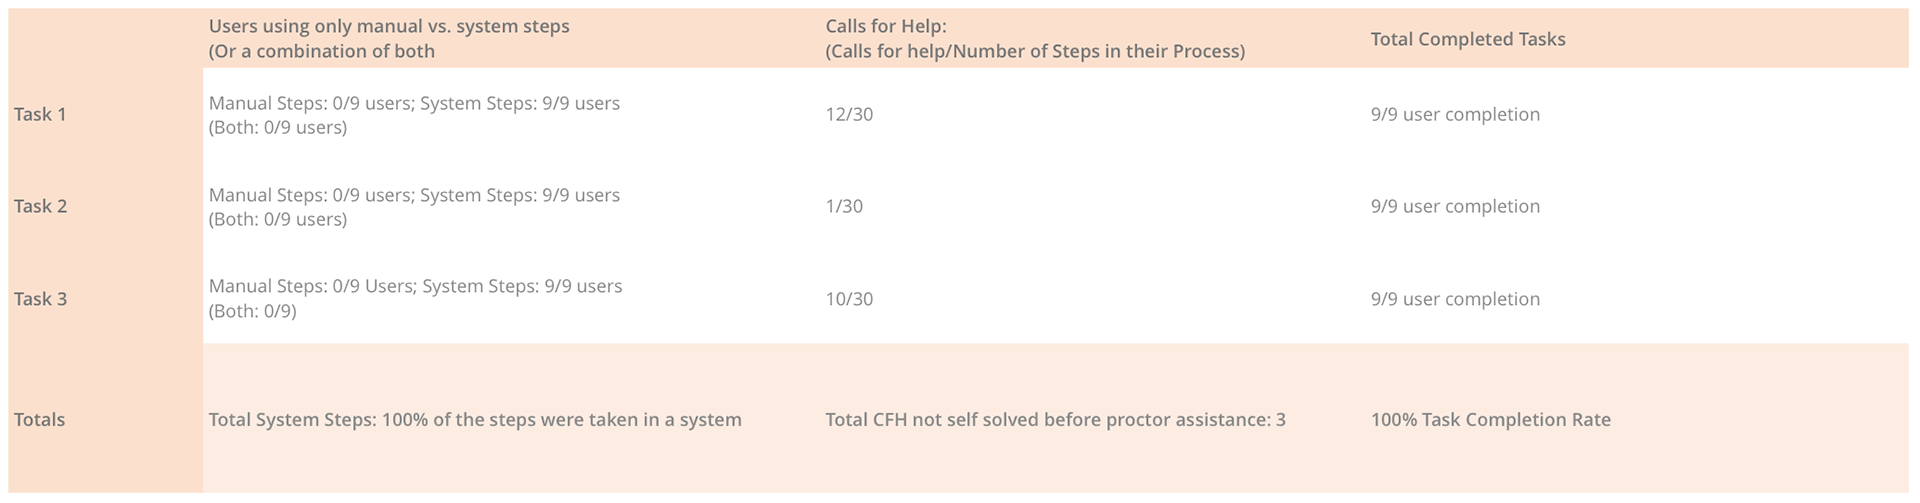
Fleet Overall Impact
Below is a summation of: the number of users who used manual and/or system steps to complete each task, the number of calls for help among the total number of steps in their process and the number of users who were able to complete each task.
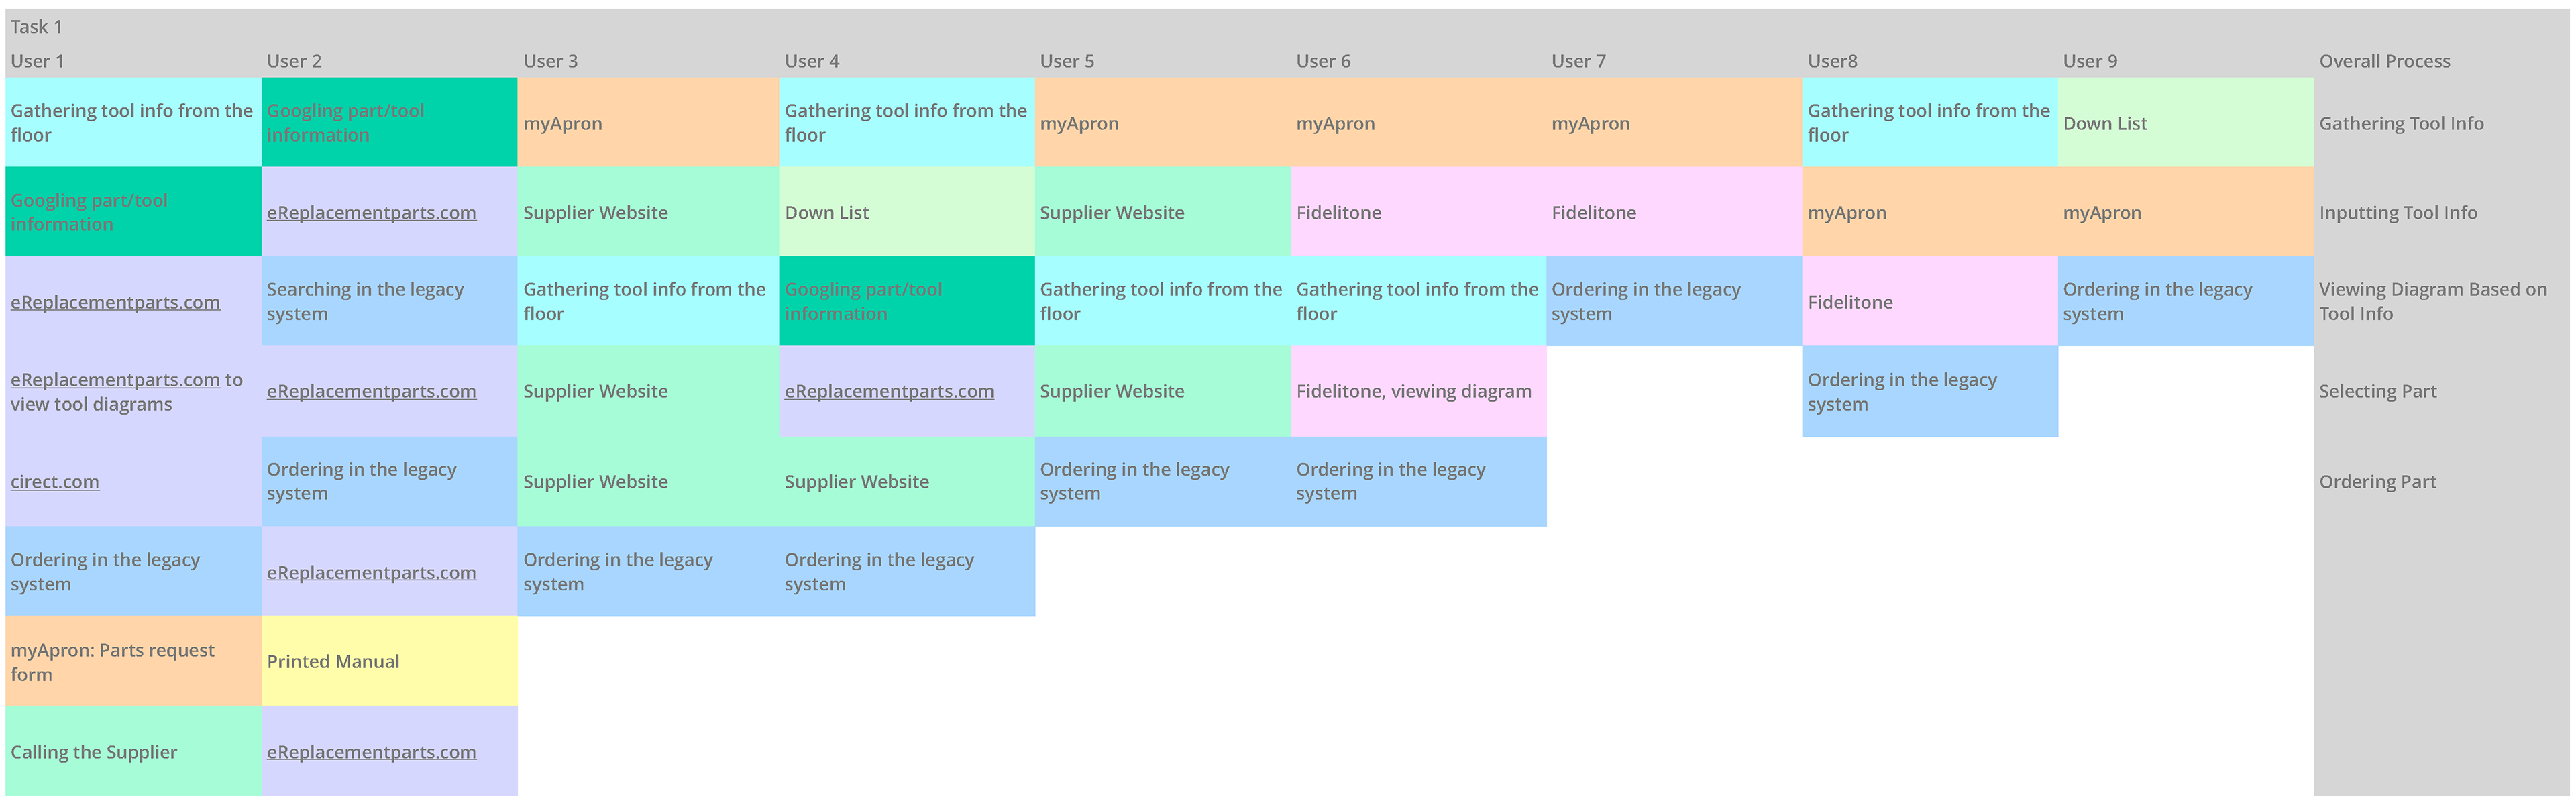
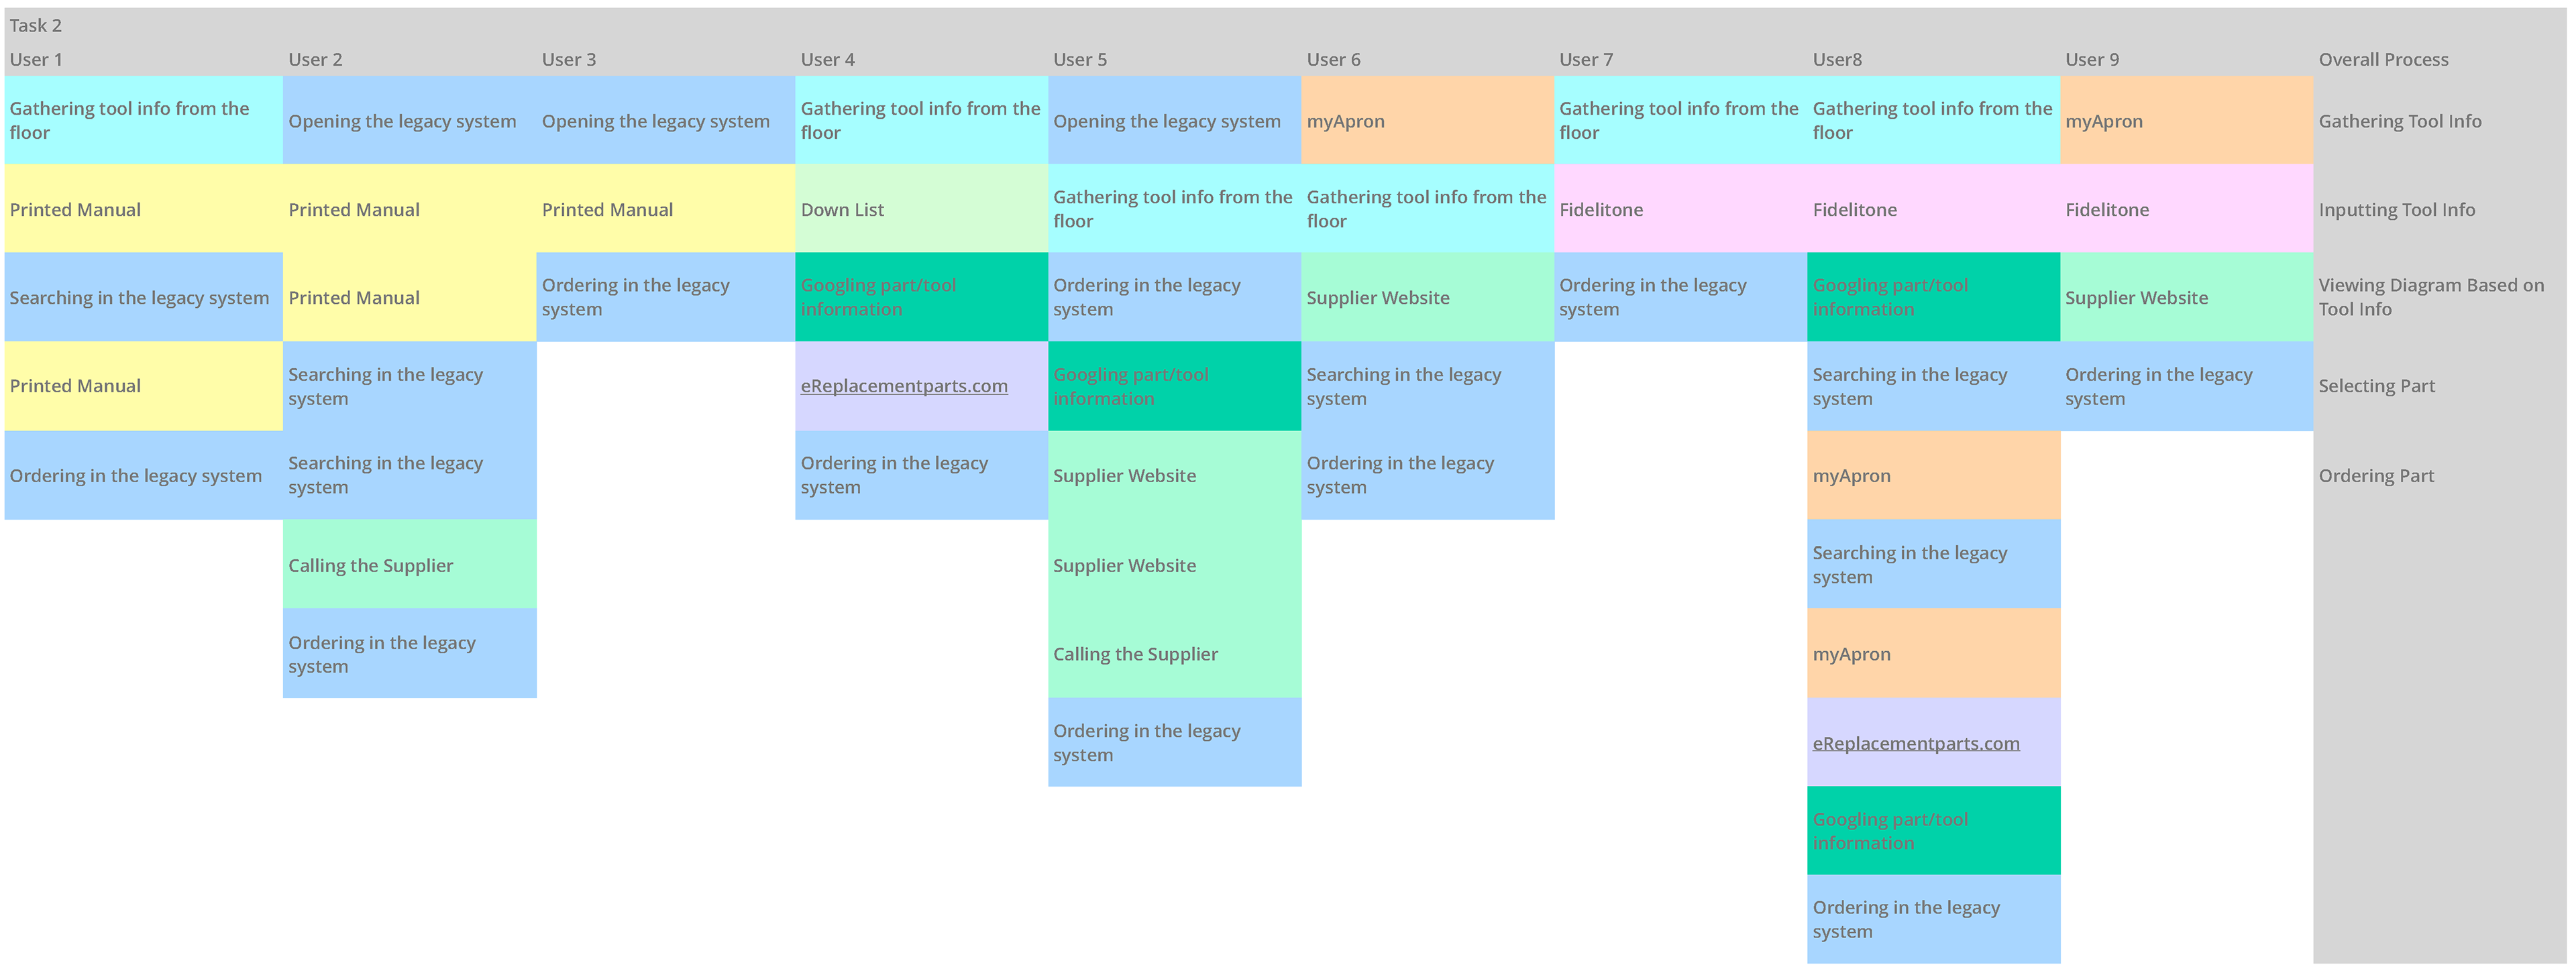
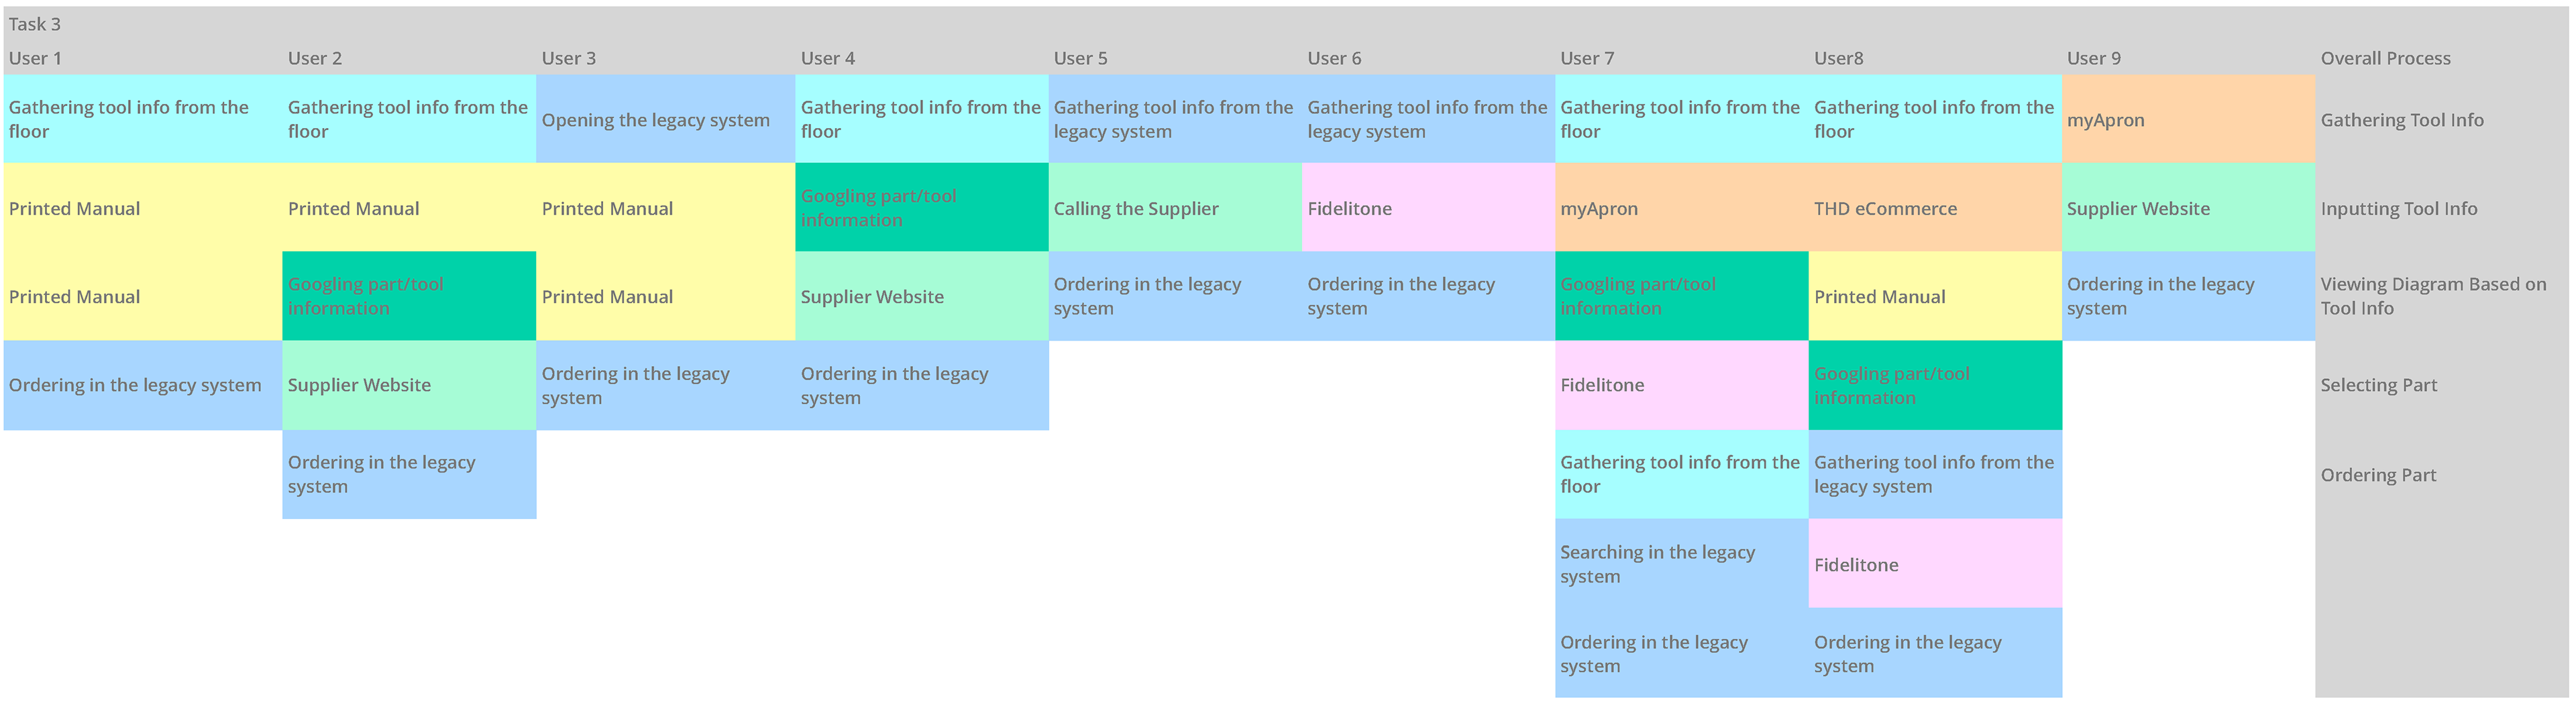
Fleet Scenario Step Analysis
After we completed our time analysis, we then went through the events of each test to find commonalities among their processes.
The following visuals represent the steps each user took per task. The grey bar on the right represents the overall intent of their steps.
We found that among every user in each task the overall intention is the same. This remained true when we tested the customer repair process.
Task 1
Task 2
Task 3
Customer Test Example
We then completed the same test on our 9 users, given the tools were brought in by customers.
Between each store we switched the order so that some technicians were completing the fleet test first and some were completing the customer test first. Within each test we additionally changed which task they were completing first.
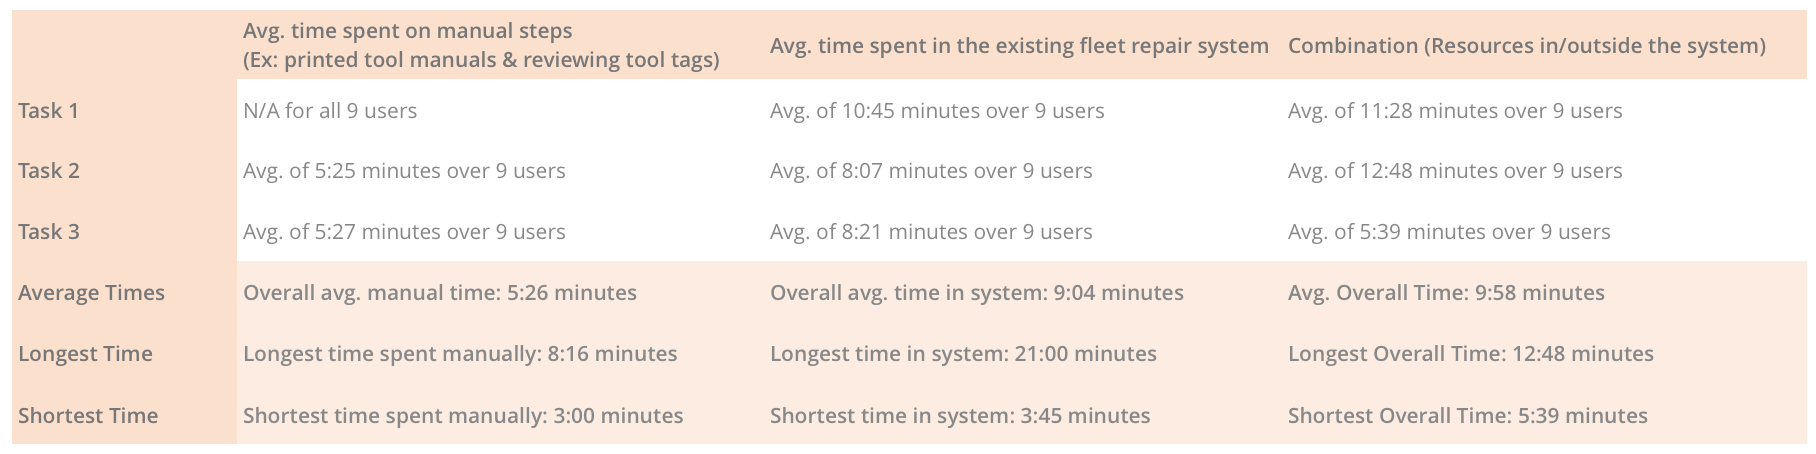
Customer Time Analysis
As with the fleet analysis, this is a summation of the average amount of time it took all 9 technicians to complete each task as well as the overall average and the longest and shortest times.
Customer Overall Impact
Below is a summation of the number of users who used manual and/or system steps to complete each task, the number of calls for help among the total number of steps in their process and the number of users who were able to complete each task.
Customer Scenario Step Analysis
As with our fleet analysis, the events of each test were reviewed to find commonalities among their processes.
The following visuals represent the steps each user took, with the grey bar on the right representing the overall intent of their steps. When comparing to the fleet analysis, the overall intention of the steps are the same for all tasks among the fleet and customer tests.
The main finding concluded it was significantly more efficient and easier to find and order a part for a customer repair.
Task 1

Task 2

Task 3

Journey Maps
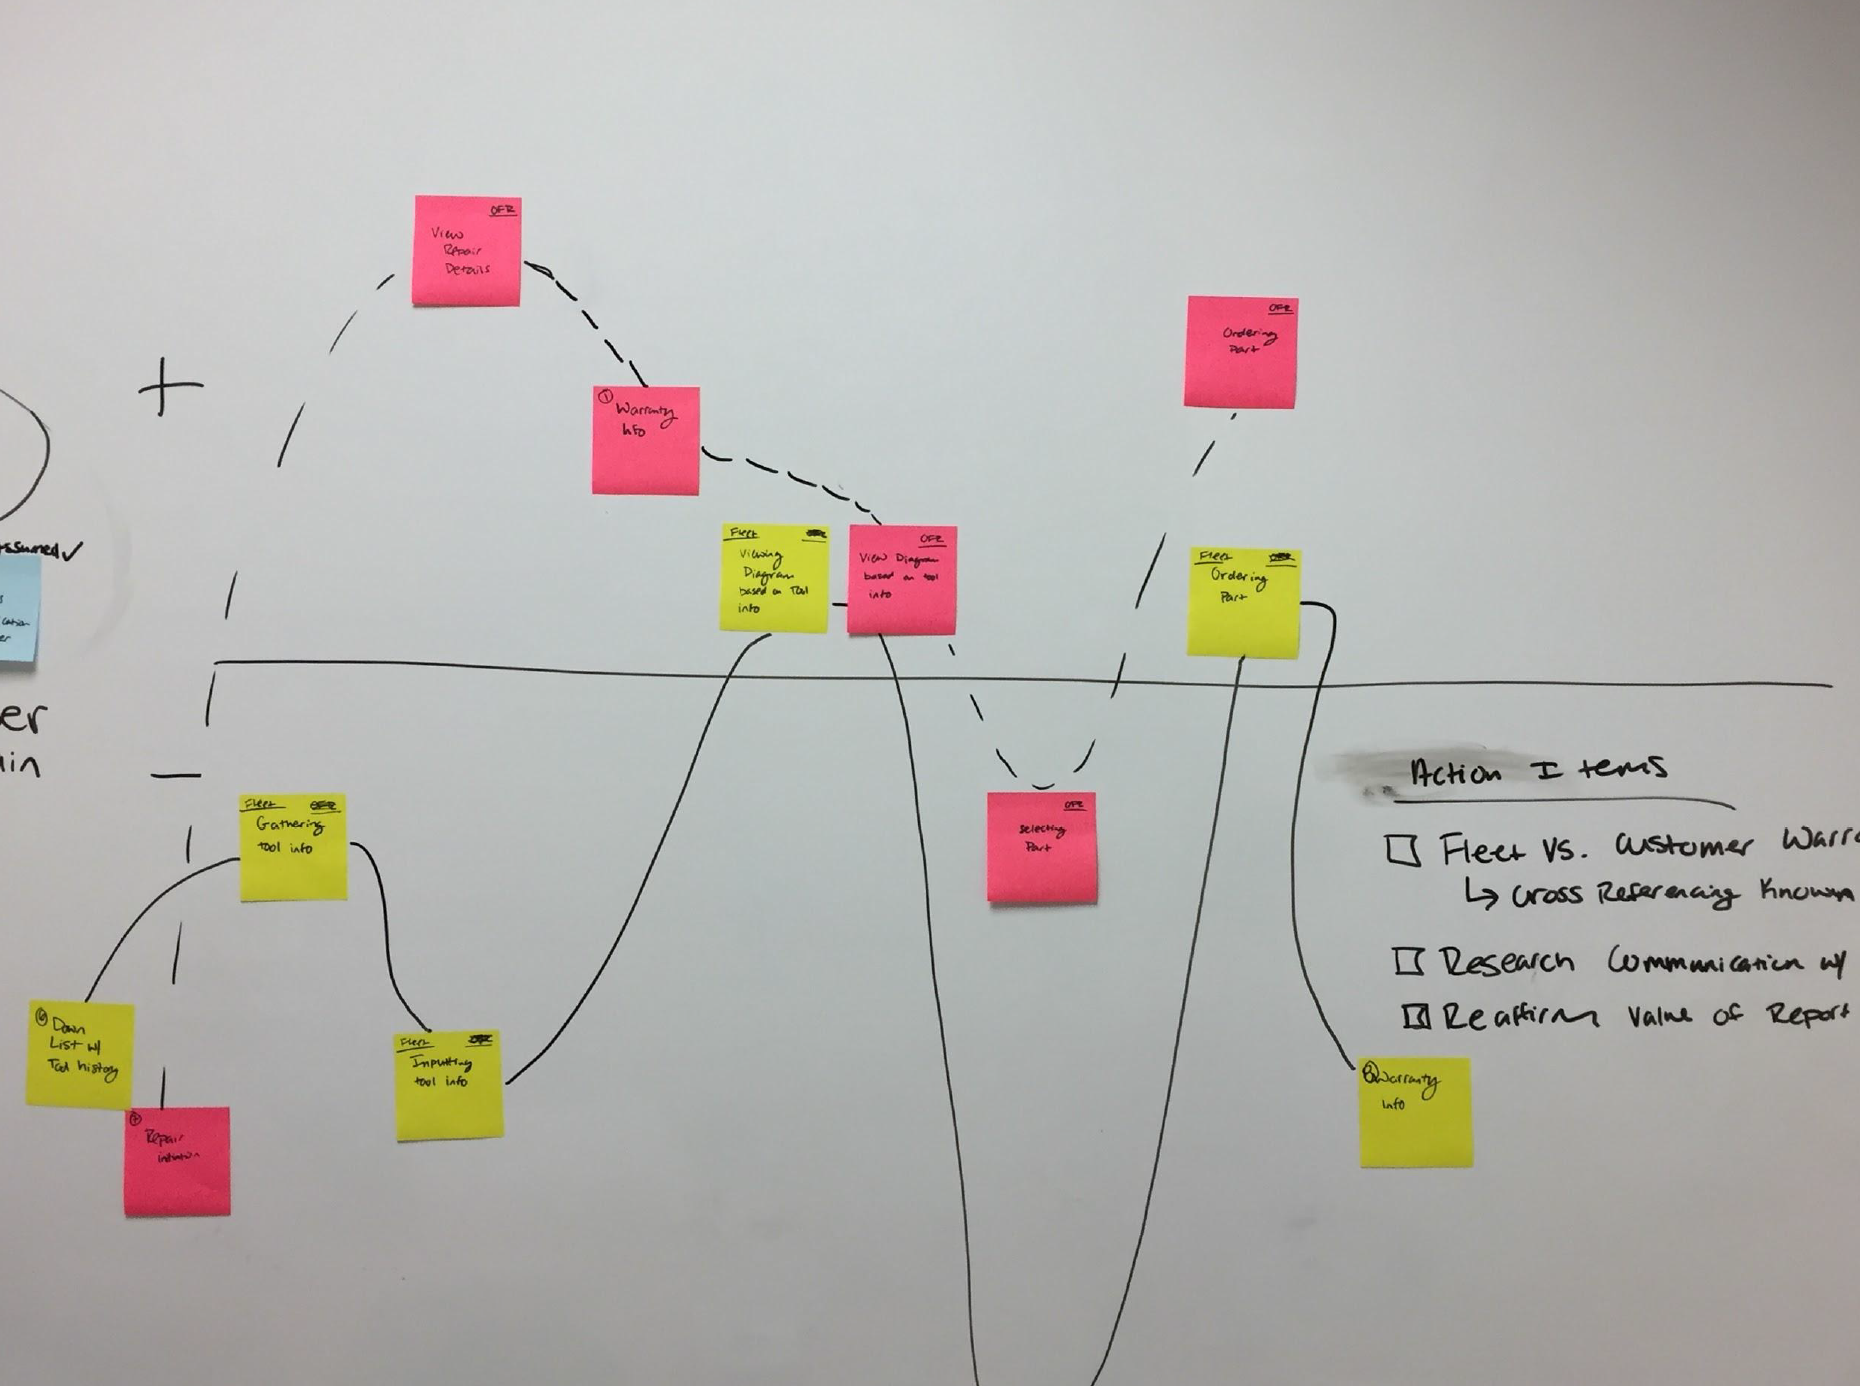
After completing our initial research and time analysis, we collaborated to map the experiences we observed.
This allowed us to discuss our individual perspectives and revisit our key insights.

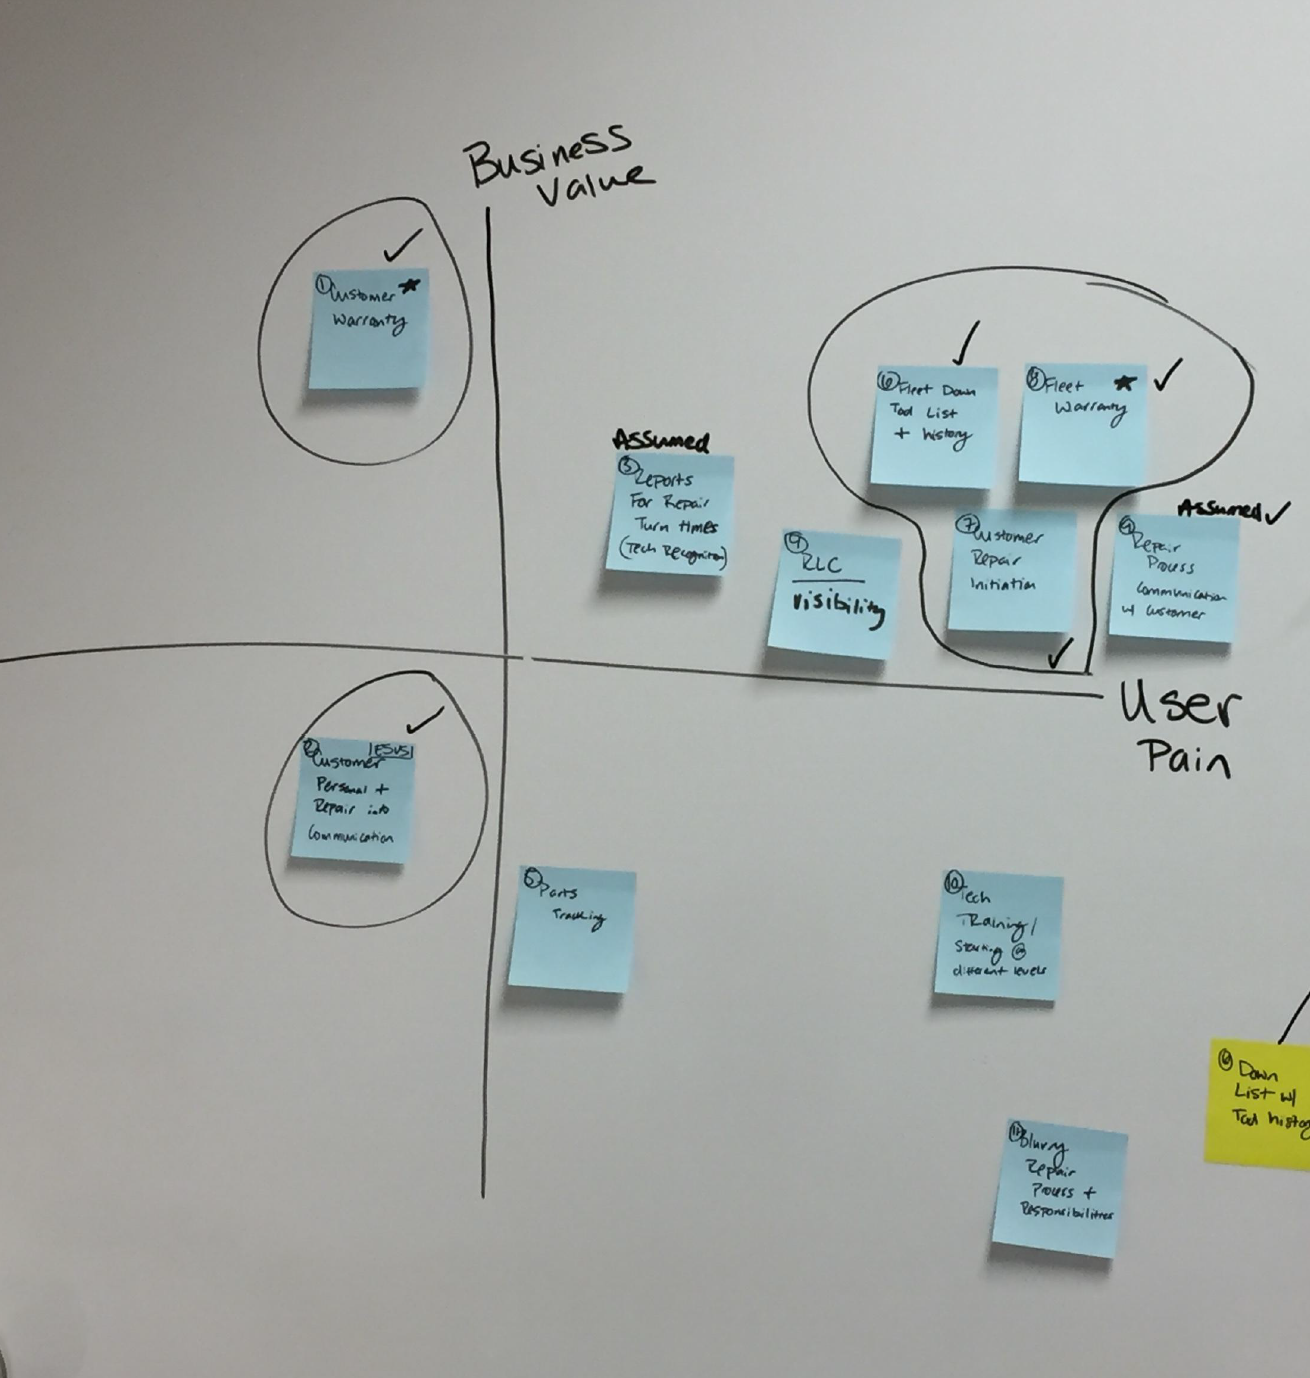
Prioritizing Problems
Once we mapped the experiences and discussed our research, we then individually generated a list of problems we could feasibly address.
Below is the outcome of our collaboration.
Notable Decisions
Based on research and collaboration sessions, we decided to merge the fleet and customer repair process. This provides users with streamlined access to diagrams for tools in their rental fleet and to tools customers can purchase from The Home Depot. This simplifies how tool technicians quickly asses a tool and order the correct part, thus enabling them to easily manage all of their decisions and give them the visibility they deserve by making their performance metrics more achievable.
Key Performance Indicators
We will know we have been successful when we see:
- a decrease in the overall time it takes to repair a fleet and customer item.
- a decrease in the time it takes to order and receive the correct fleet and customer part.
- an increase in the number of fleet warranty claims, putting more financial responsibility on suppliers.
Inception Prototype
Based on defined research and established KPIs, we then white-boarded what later became our inception prototype.
The following images describe the process a Repair Technician goes through to find and order the correct repair parts.
Prior to our inception meeting, we completed a rough time analysis of repair technicians clicking through the prototype. We found that for both fleet and customer tools, all technicians tested were able to find the correct parts in under a minute, giving us a potential time savings of up to 20 minutes. As we develop the product we will continue assessing the time saved.
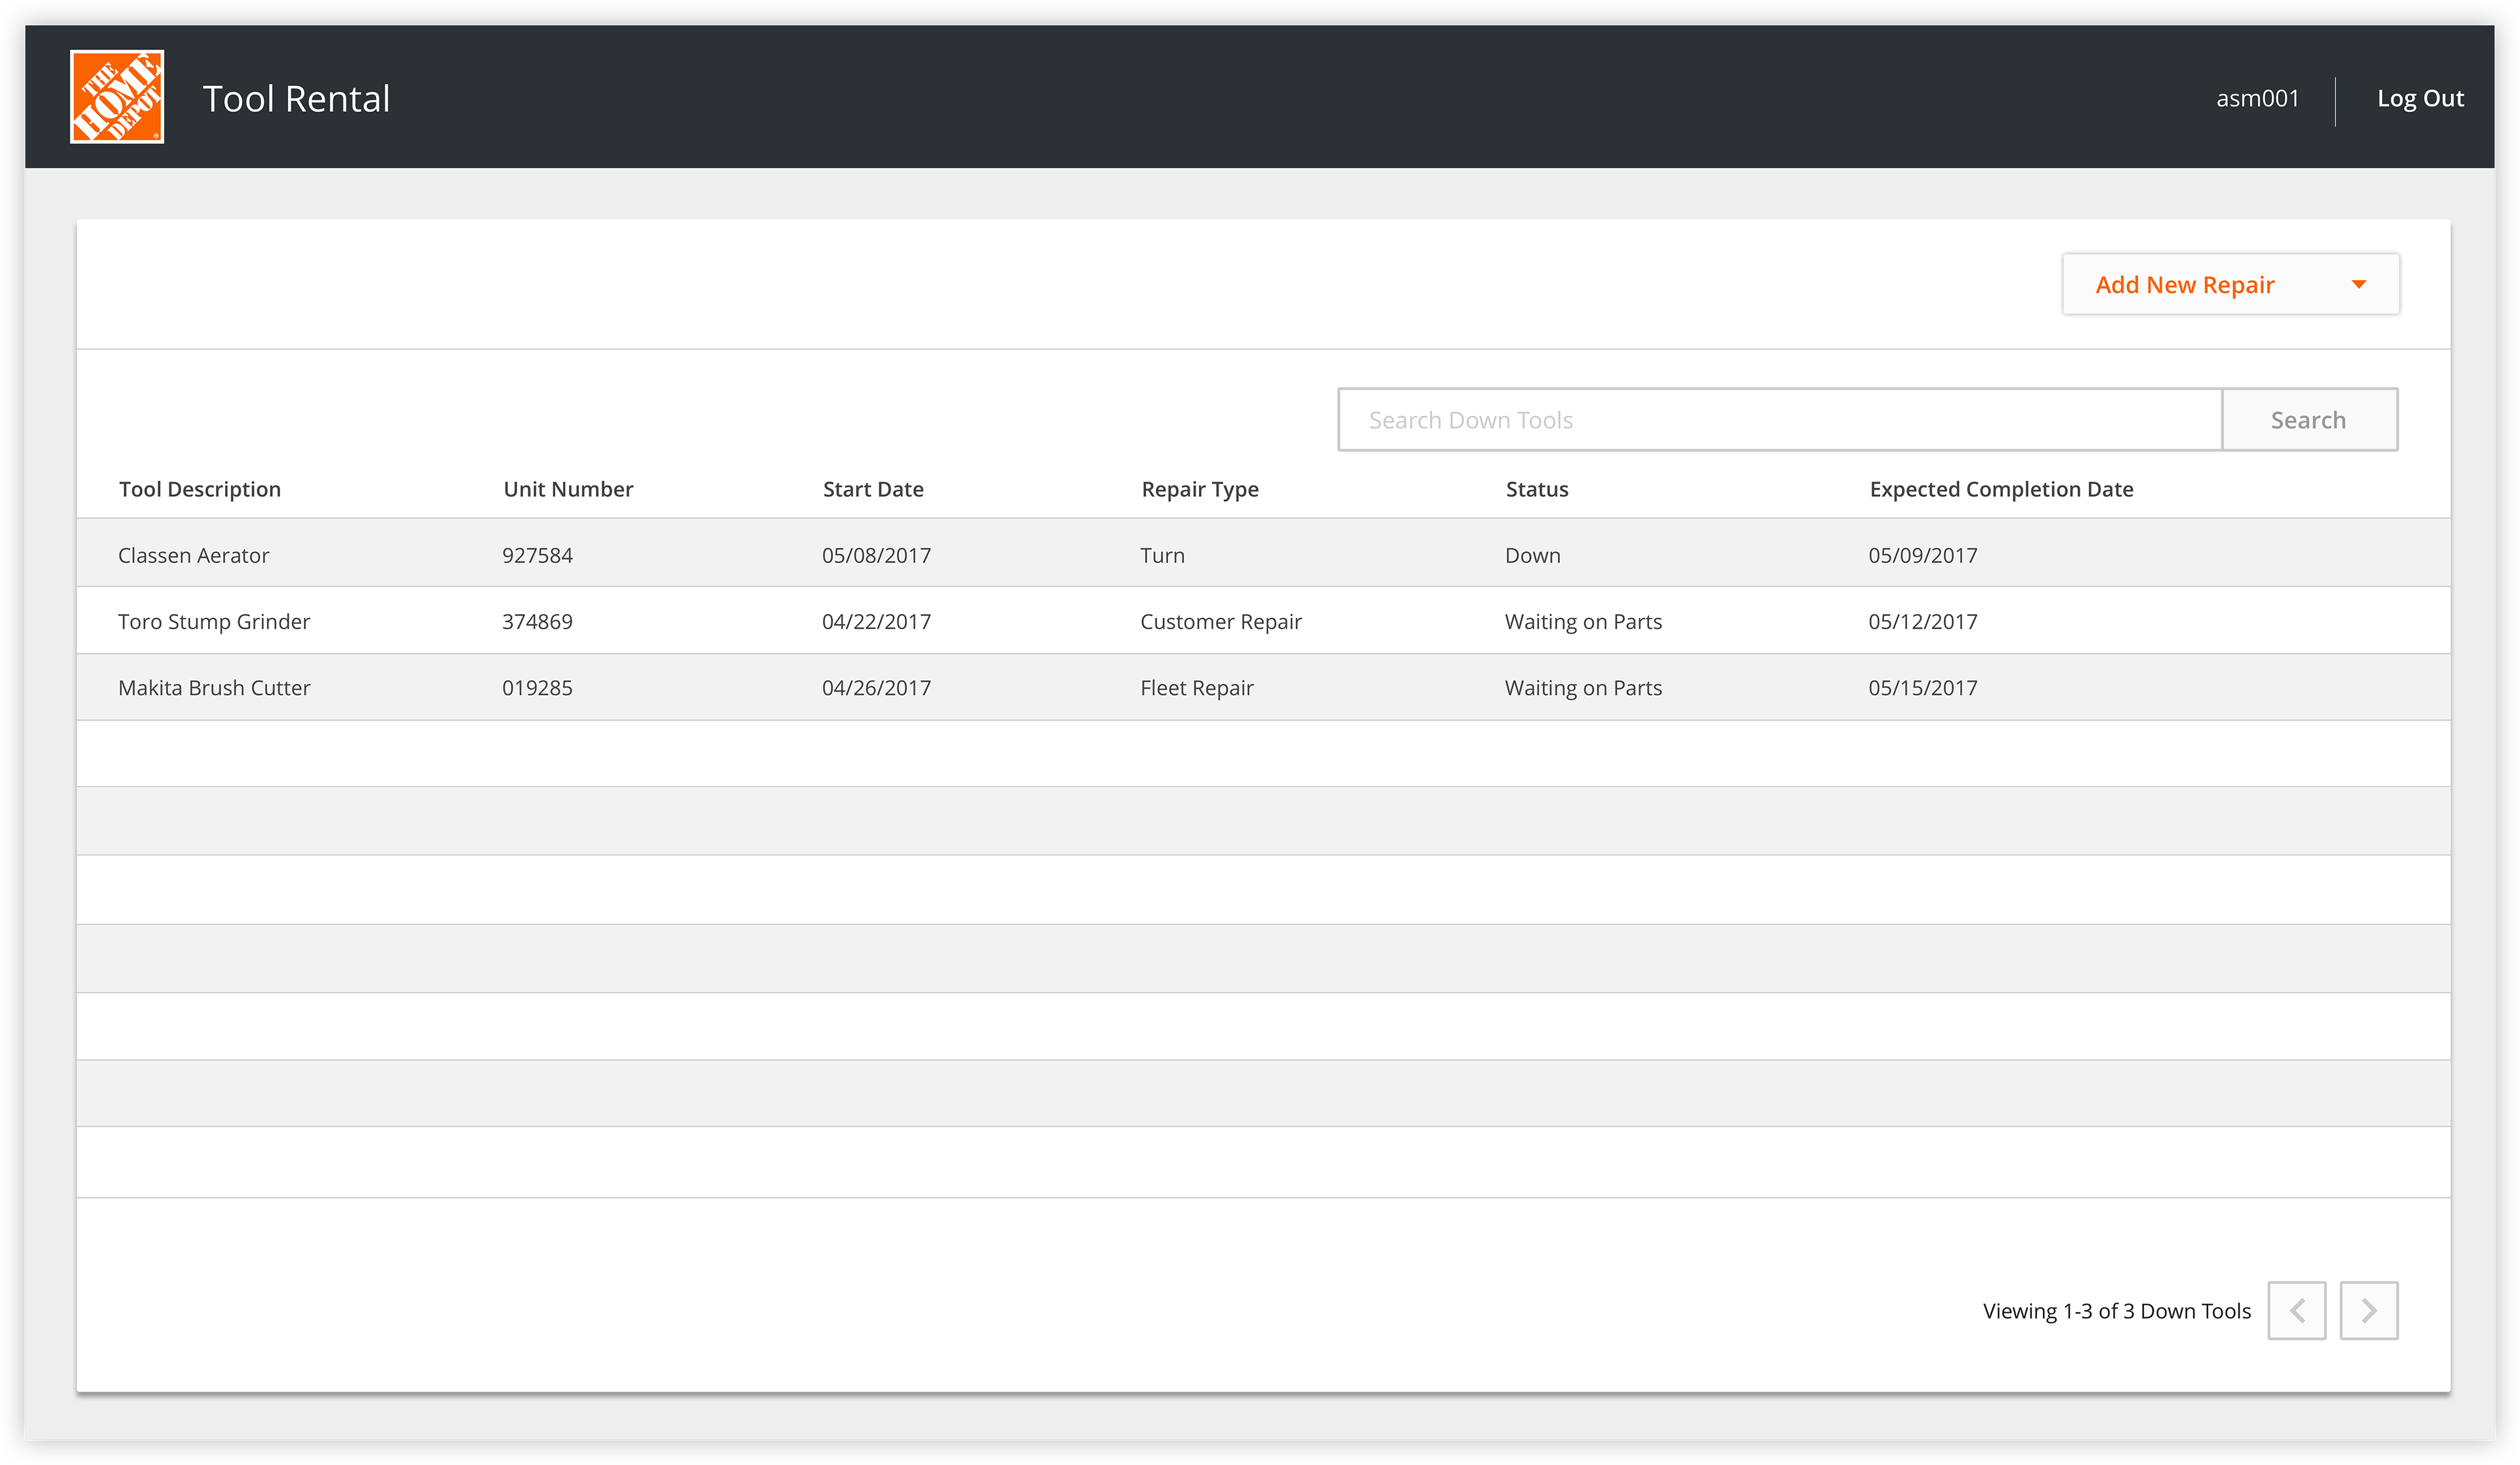
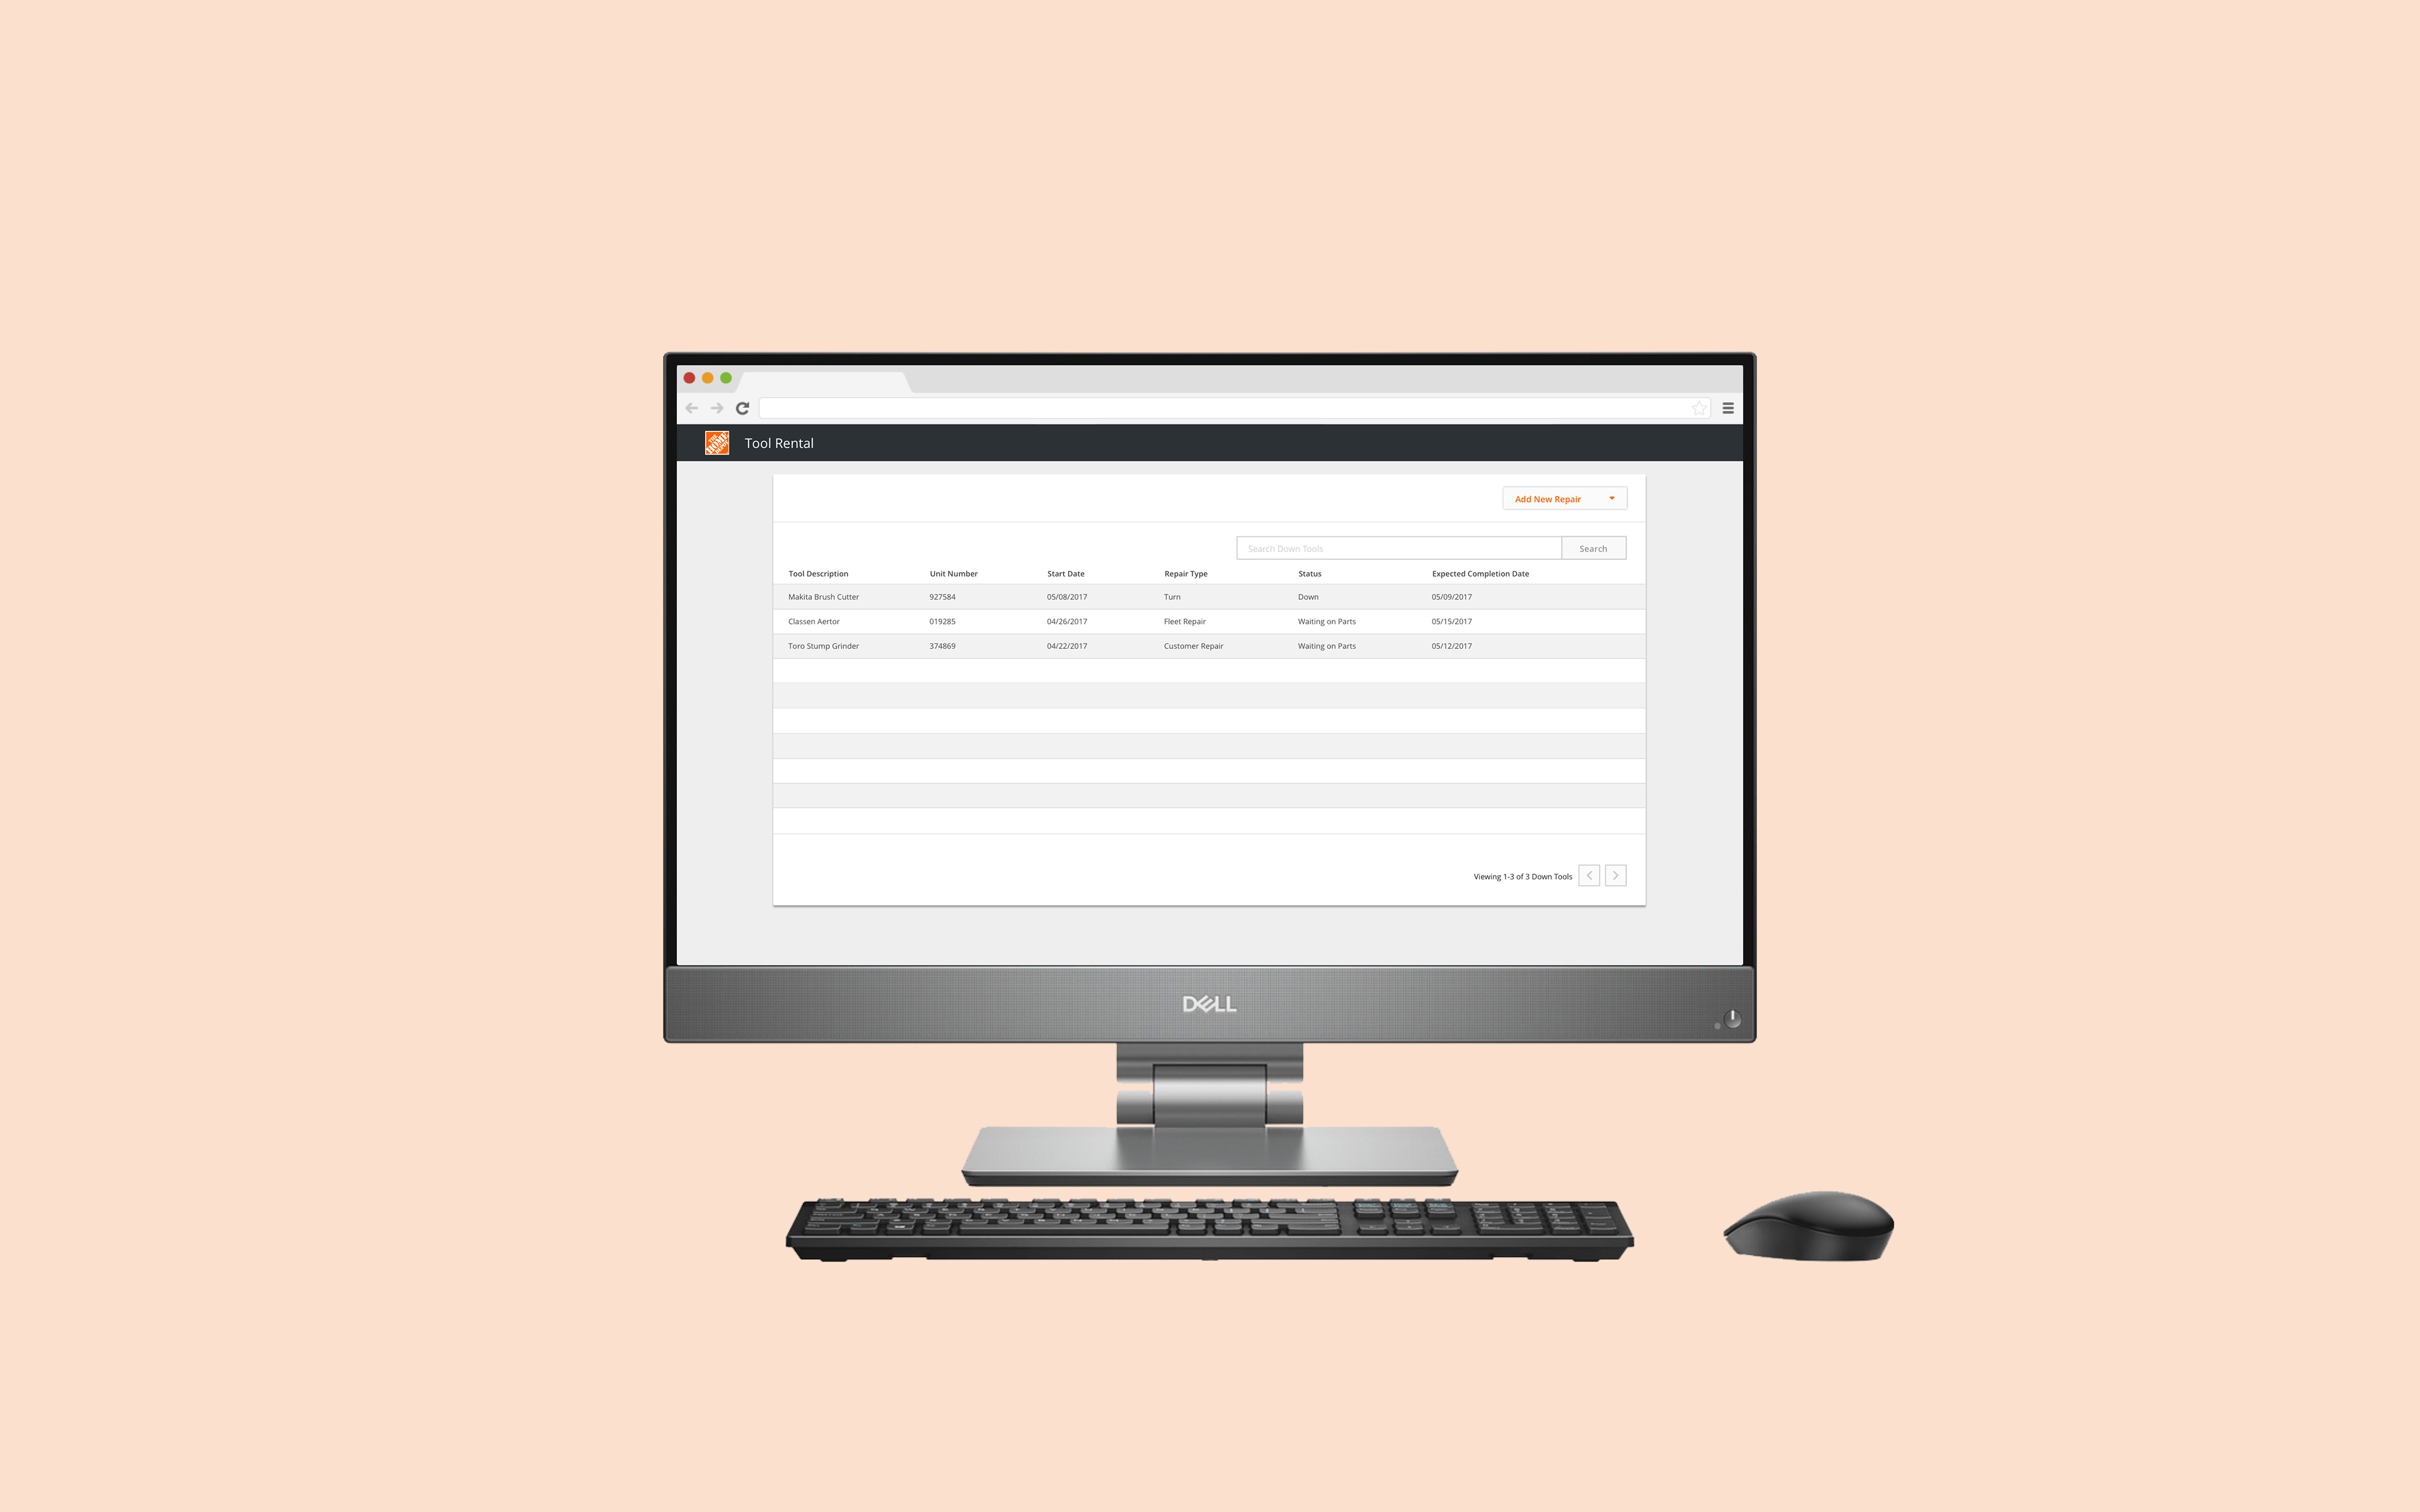
Tool Repair List
Currently, repair technicians print out a daily repair list that tells them which tools need repairs and what the status of the repair is. Providing technicians with a digital list gives them access to real-time information so they can more easily manage repairs. During our initial interviews we found that technicians are stressed because they are being evaluated on metrics that are difficult to achieve. By giving them a real-time view into their repair list they can leave this home page idle on their computer to see when new tools come in, and when the parts they have ordered have been scanned in receiving. Doing this allows more seamlessly jump between repairing tools and assisting customers.
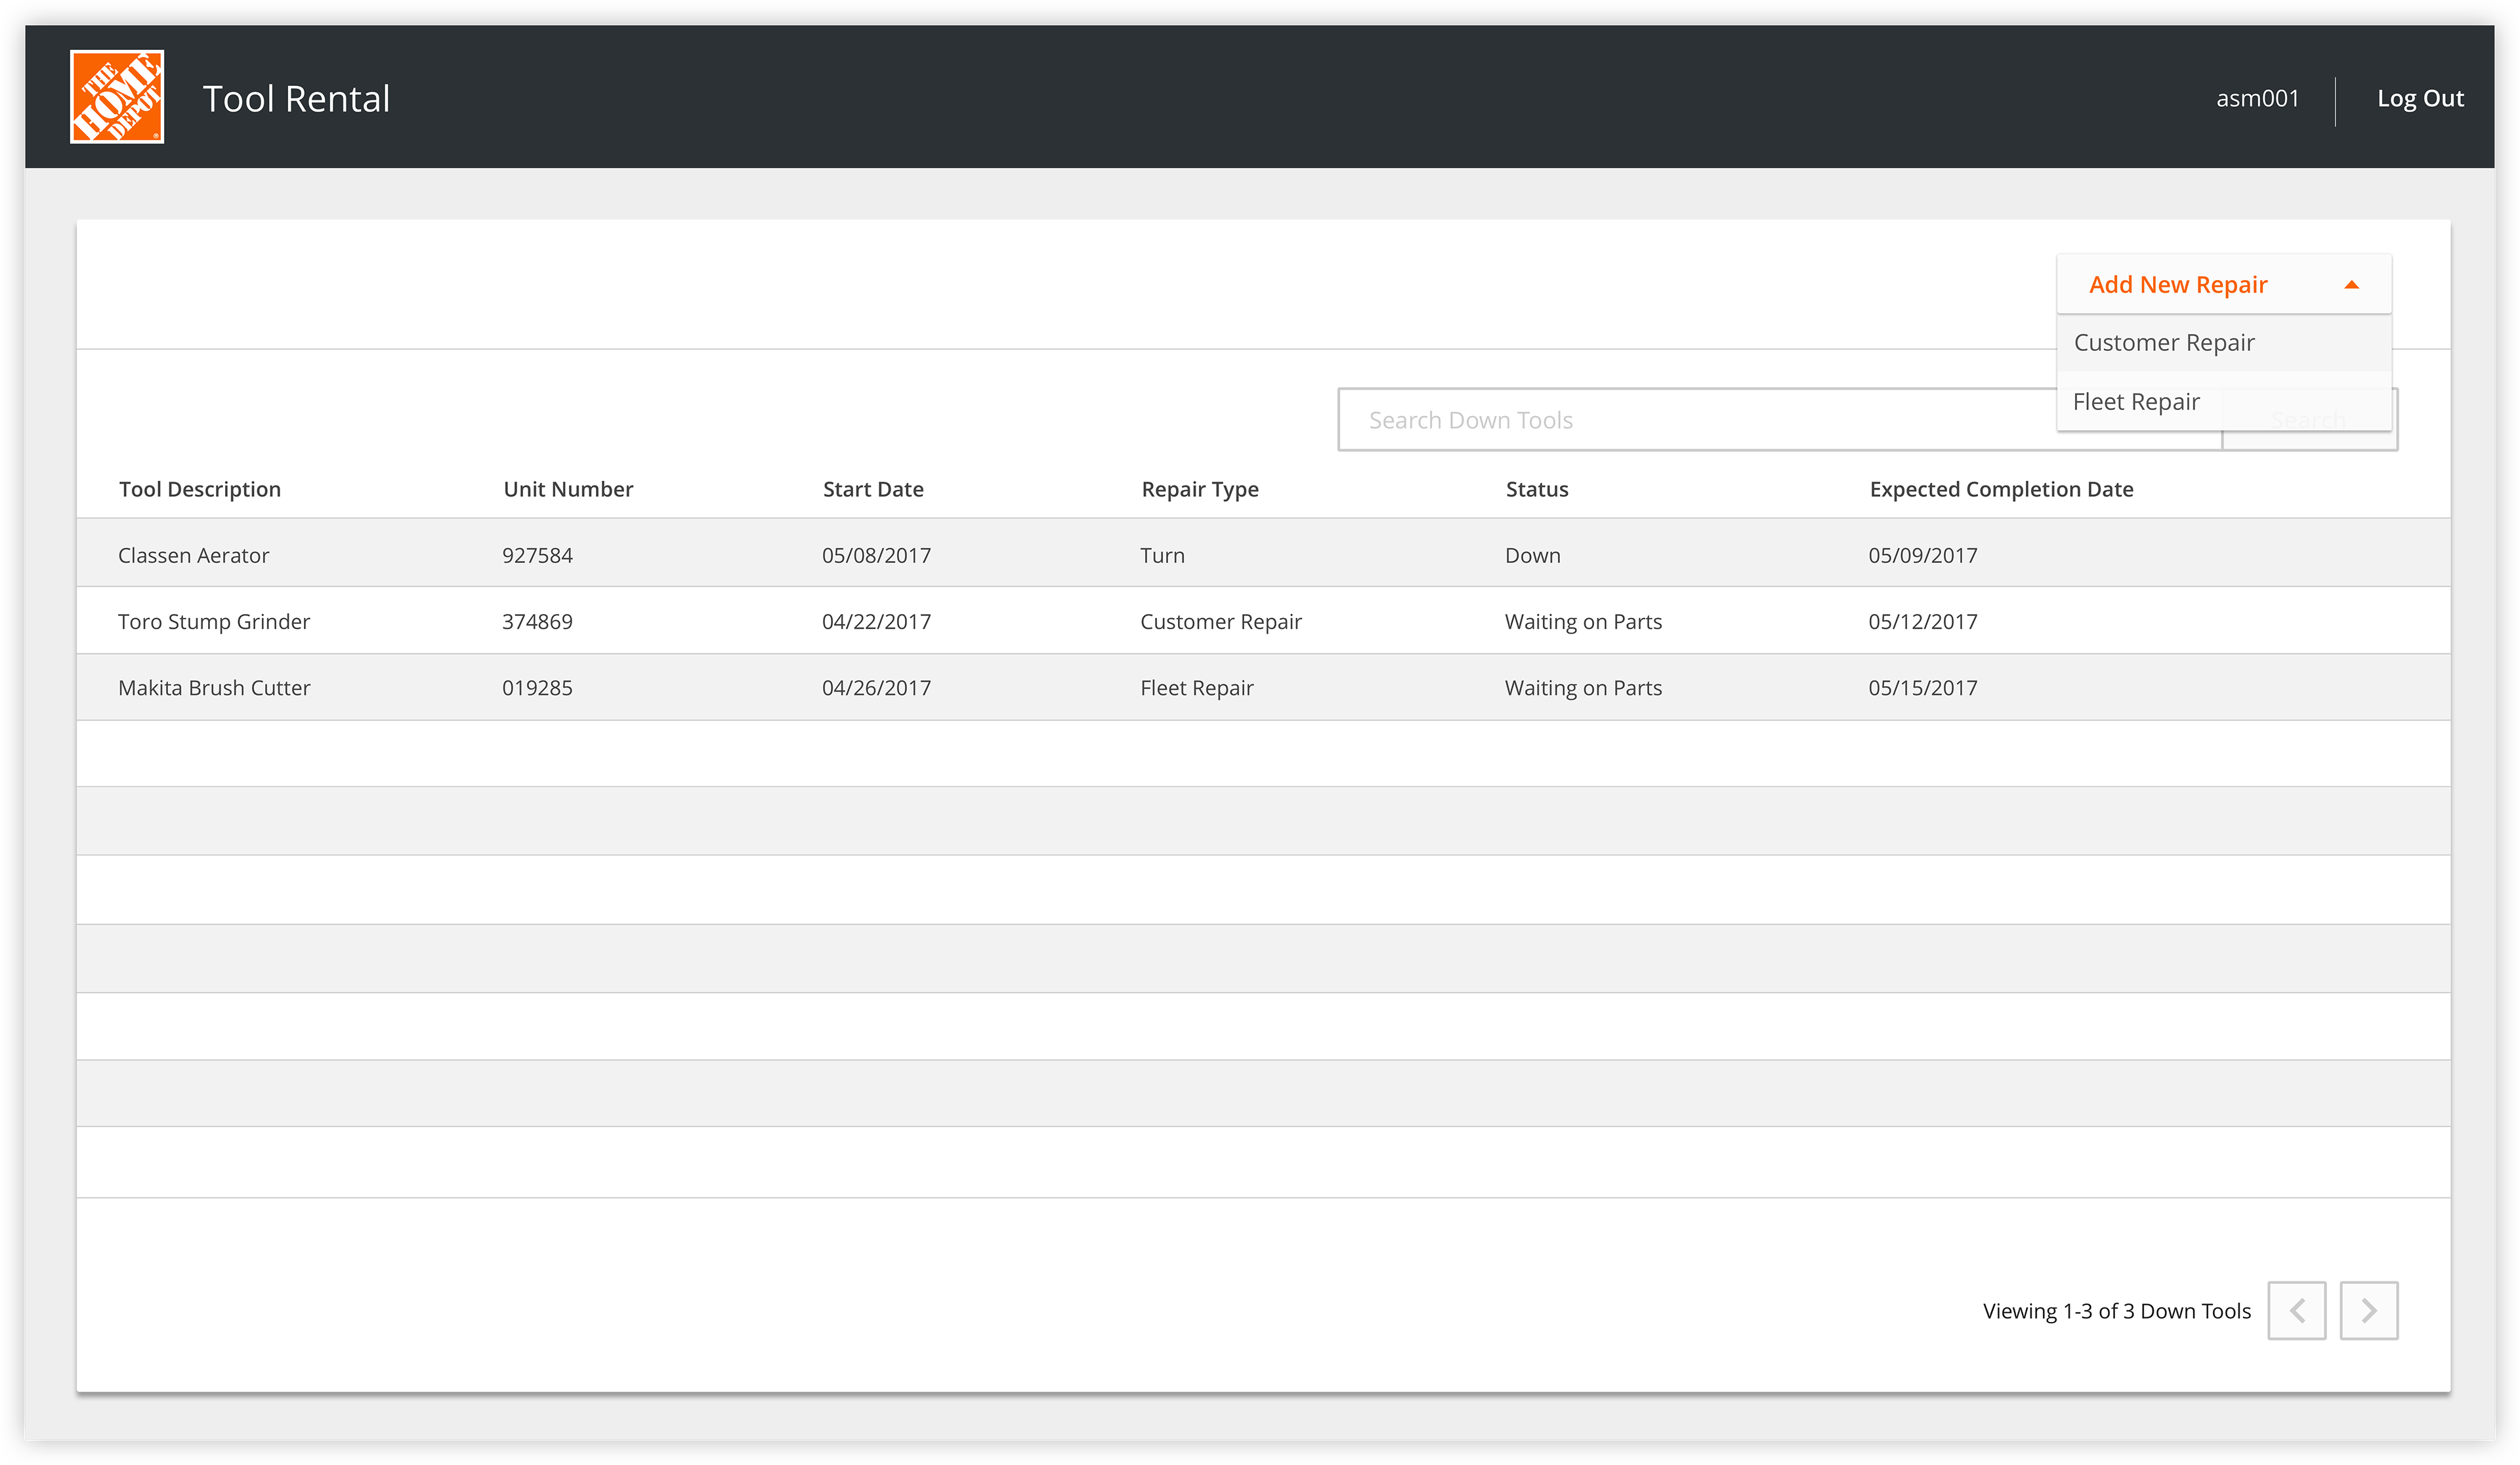
Customer or Fleet Repair
As our analysis displays, we found that the processes for ordering parts for a customer tool are much more streamlined than for ordering for a fleet tool. Our main goal is to make the process as similar for both as we possibly could. For both processes, selecting and ordering parts is the same; the main difference is intaking customer's information.
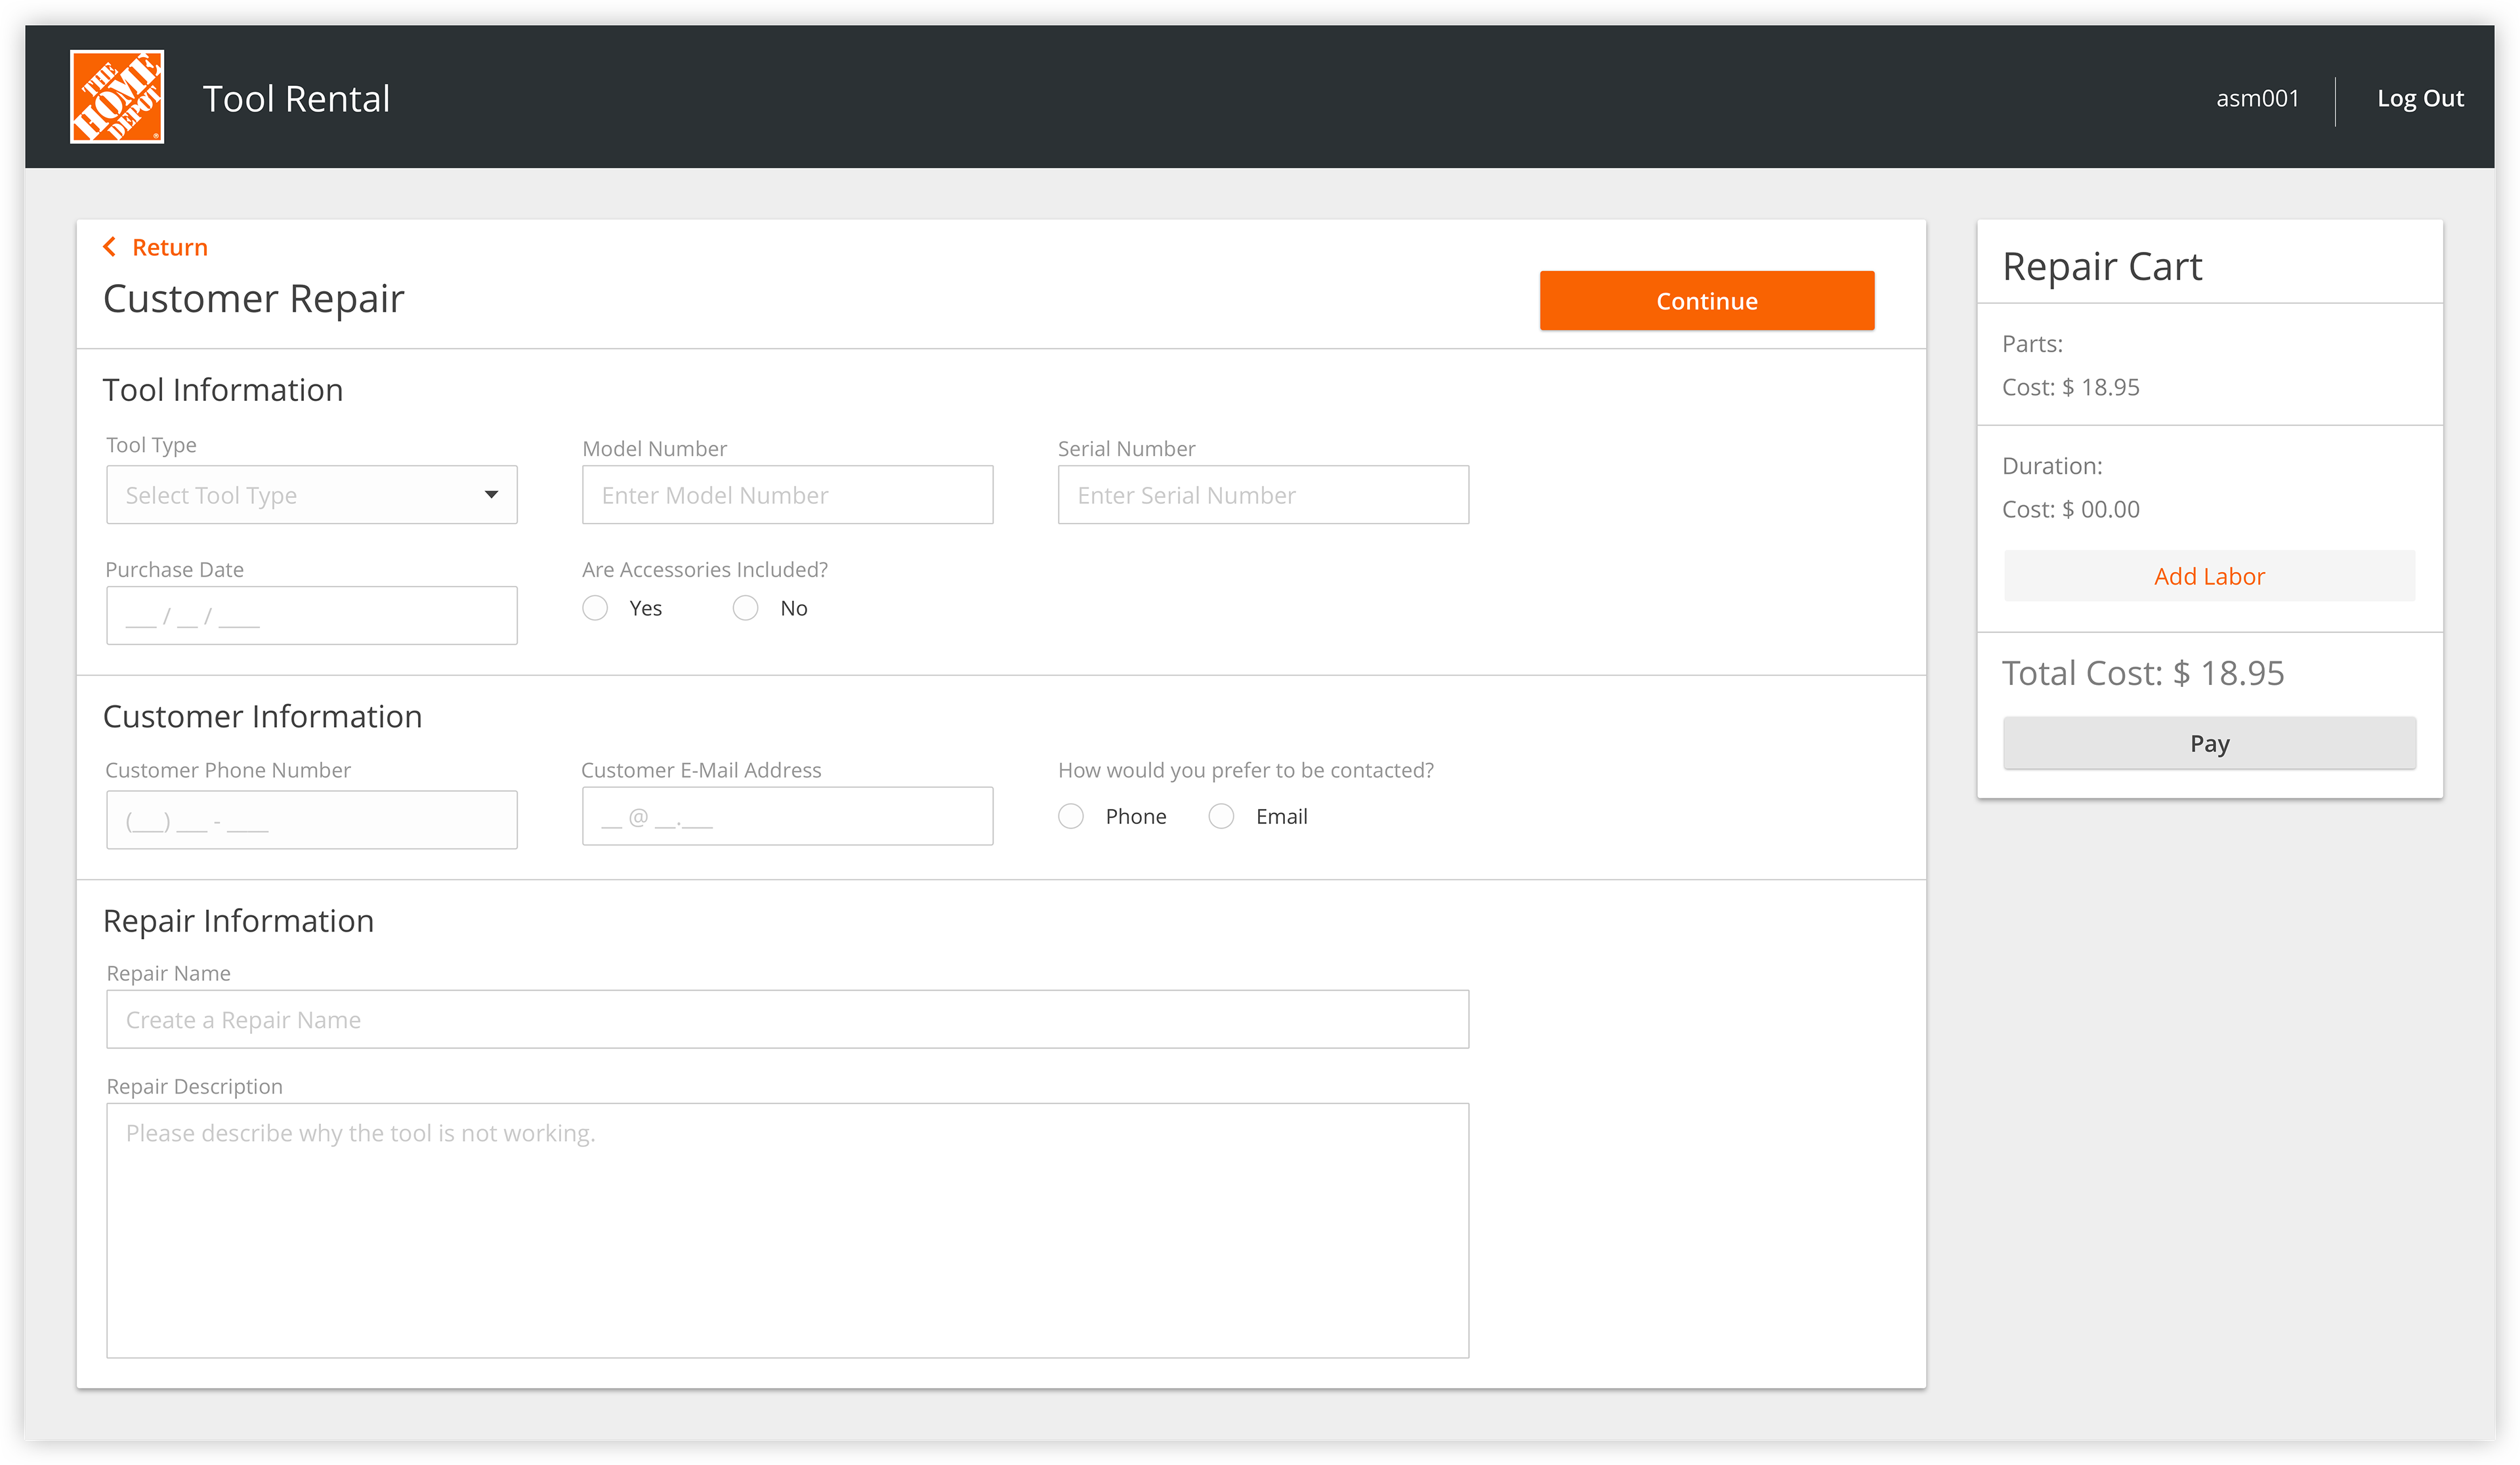
Tool & Customer Information
Currently, when a technician intakes a customer repair, they are putting tool, customer and repair information into three different applications. This makes it difficult to track the progress of the repair and contact the customer to communicate the status of their repair. By intaking all this information on one page, it is quicker for the repair tech to diagnose the tool while communicating with the customer. When the technician revisits a customer repair he will be able to see all the necessary information.
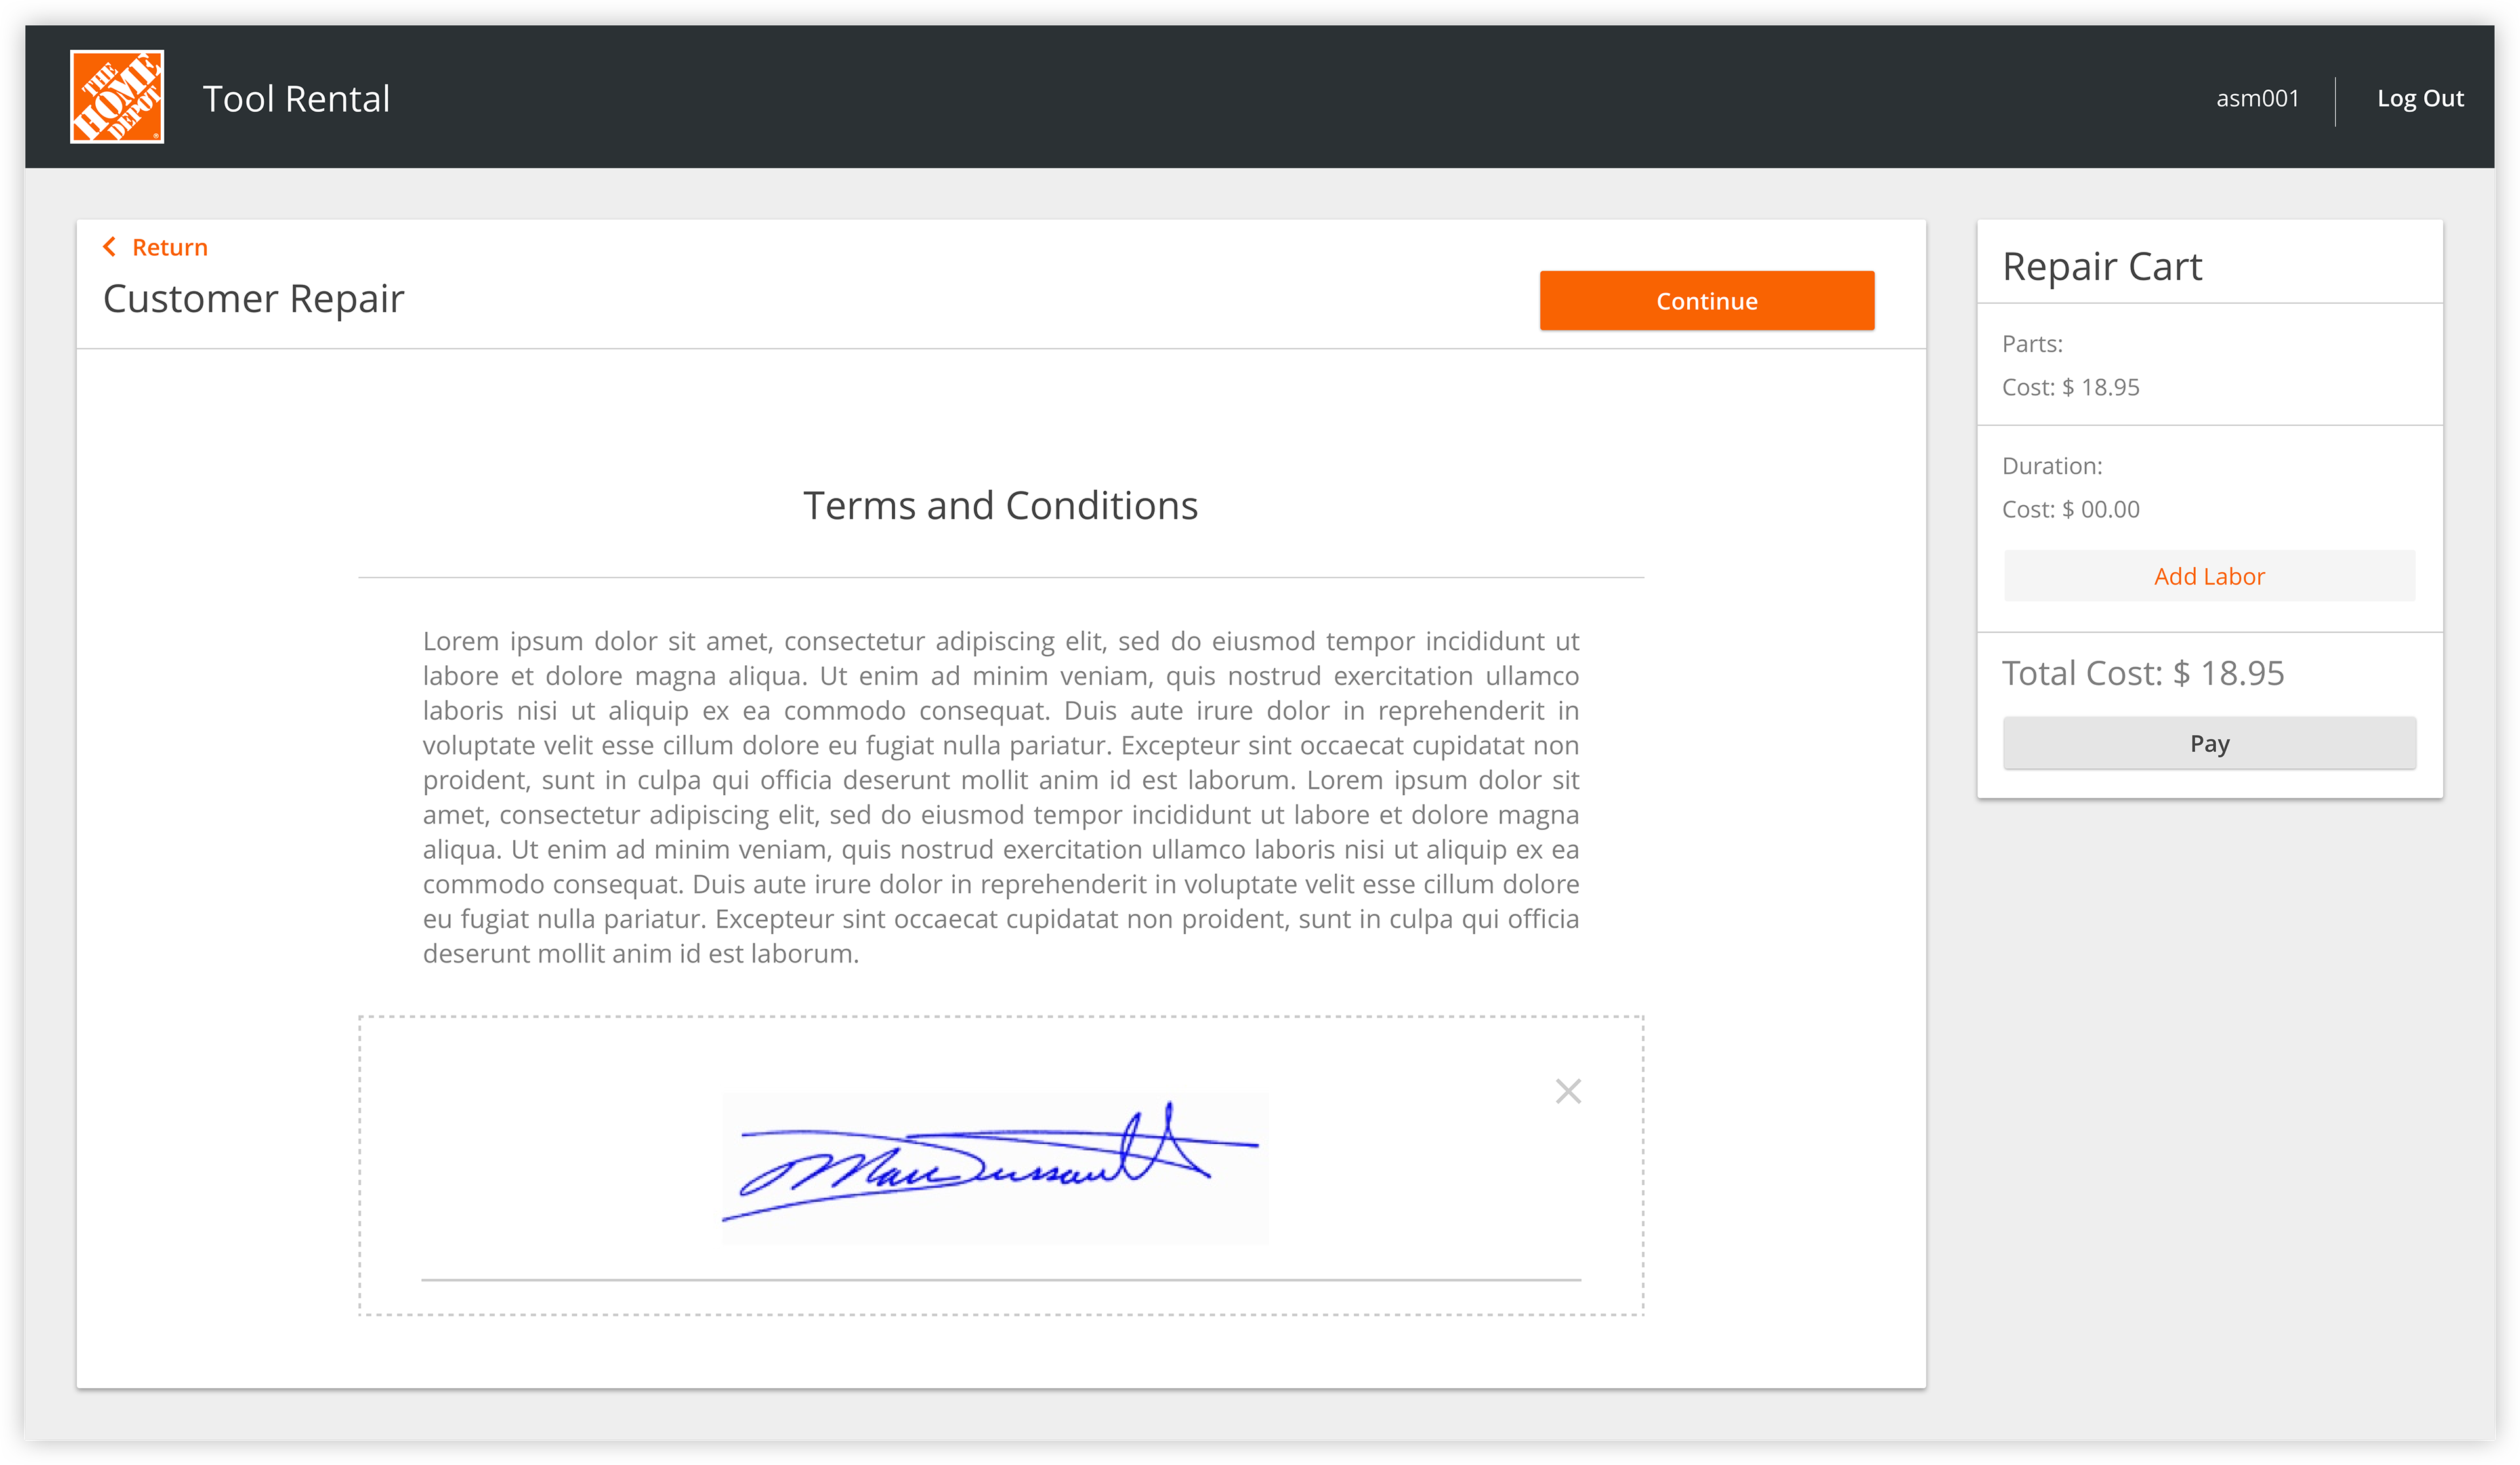
Customer Authorization
Once the customer's information has been input, the associate is then brought to this screen so the customer can authorize the terms of his repair. This is a mirrored view of the keypad; once the customer signs his name, the technician is prompted to continue forward with the customer's initial payment.
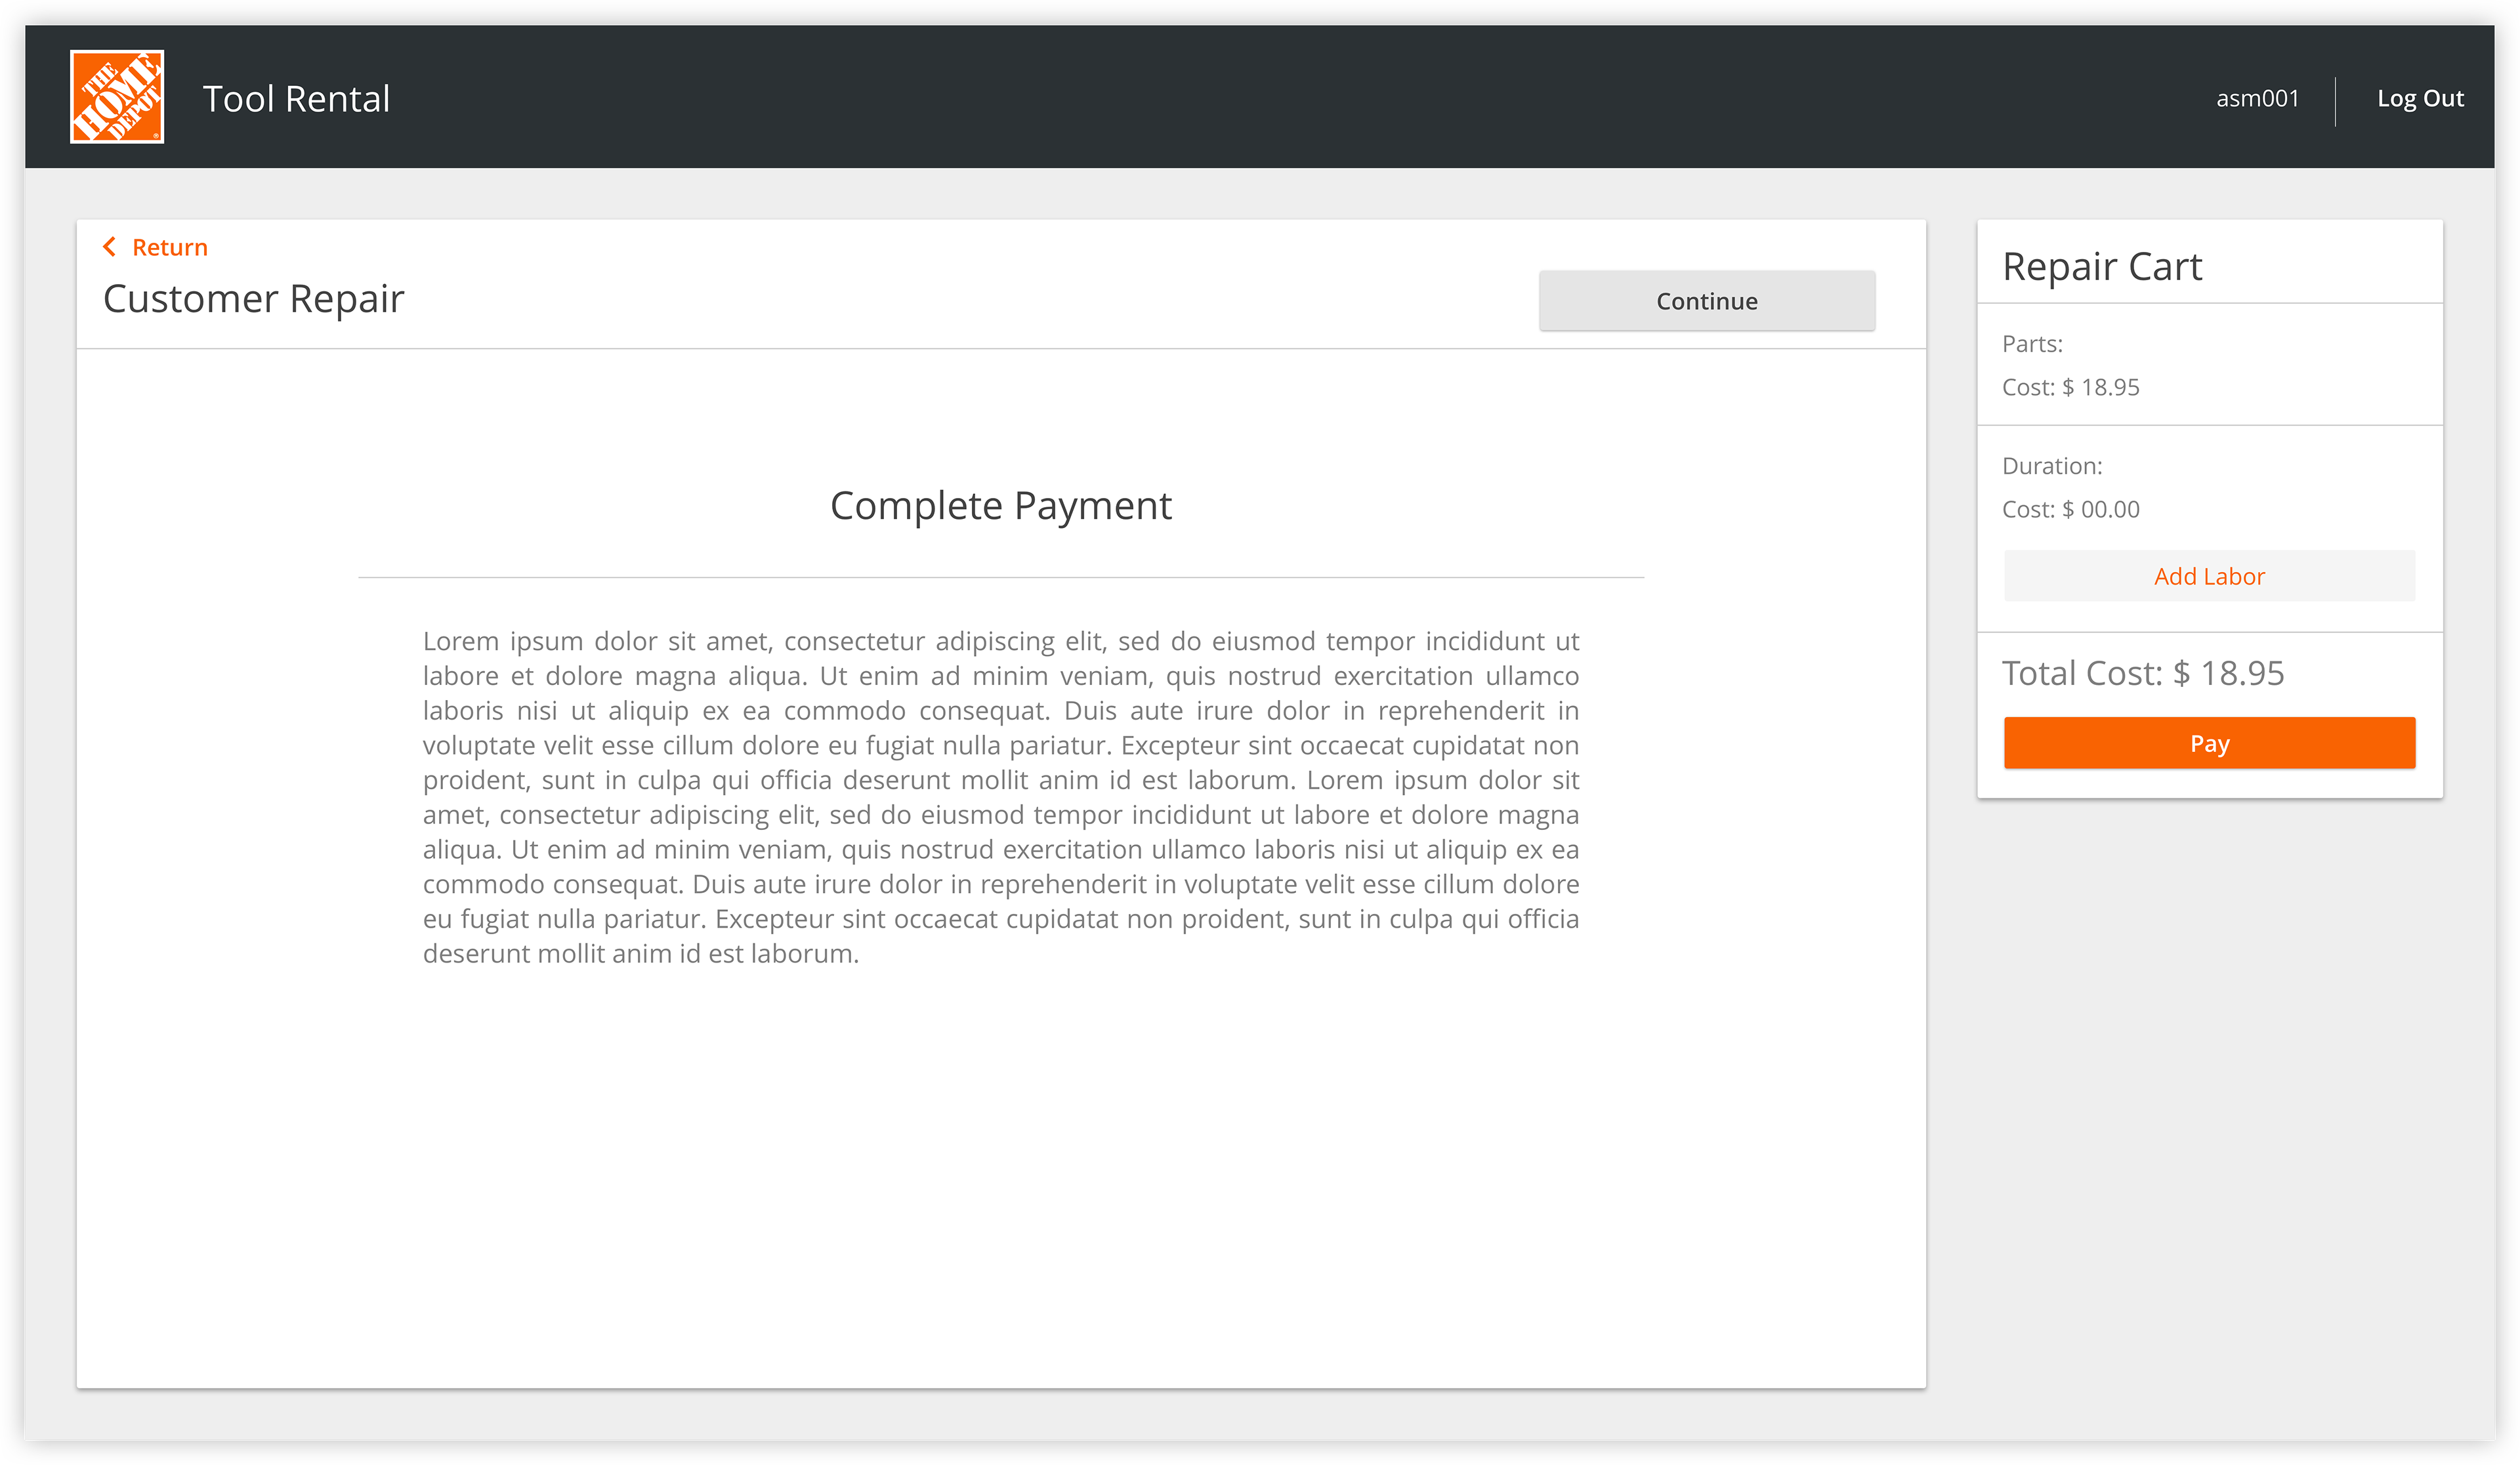
Continuing with Payment
Once the customer has authorized his repair, he is then prompted, by the keypad, to continue forward. This screen shown above is the technicians view showing the progress of the customer. If the customer has difficulty with the keypad, the technician can then continue forward by selecting the "pay" option and manually entering the customer's payment information.
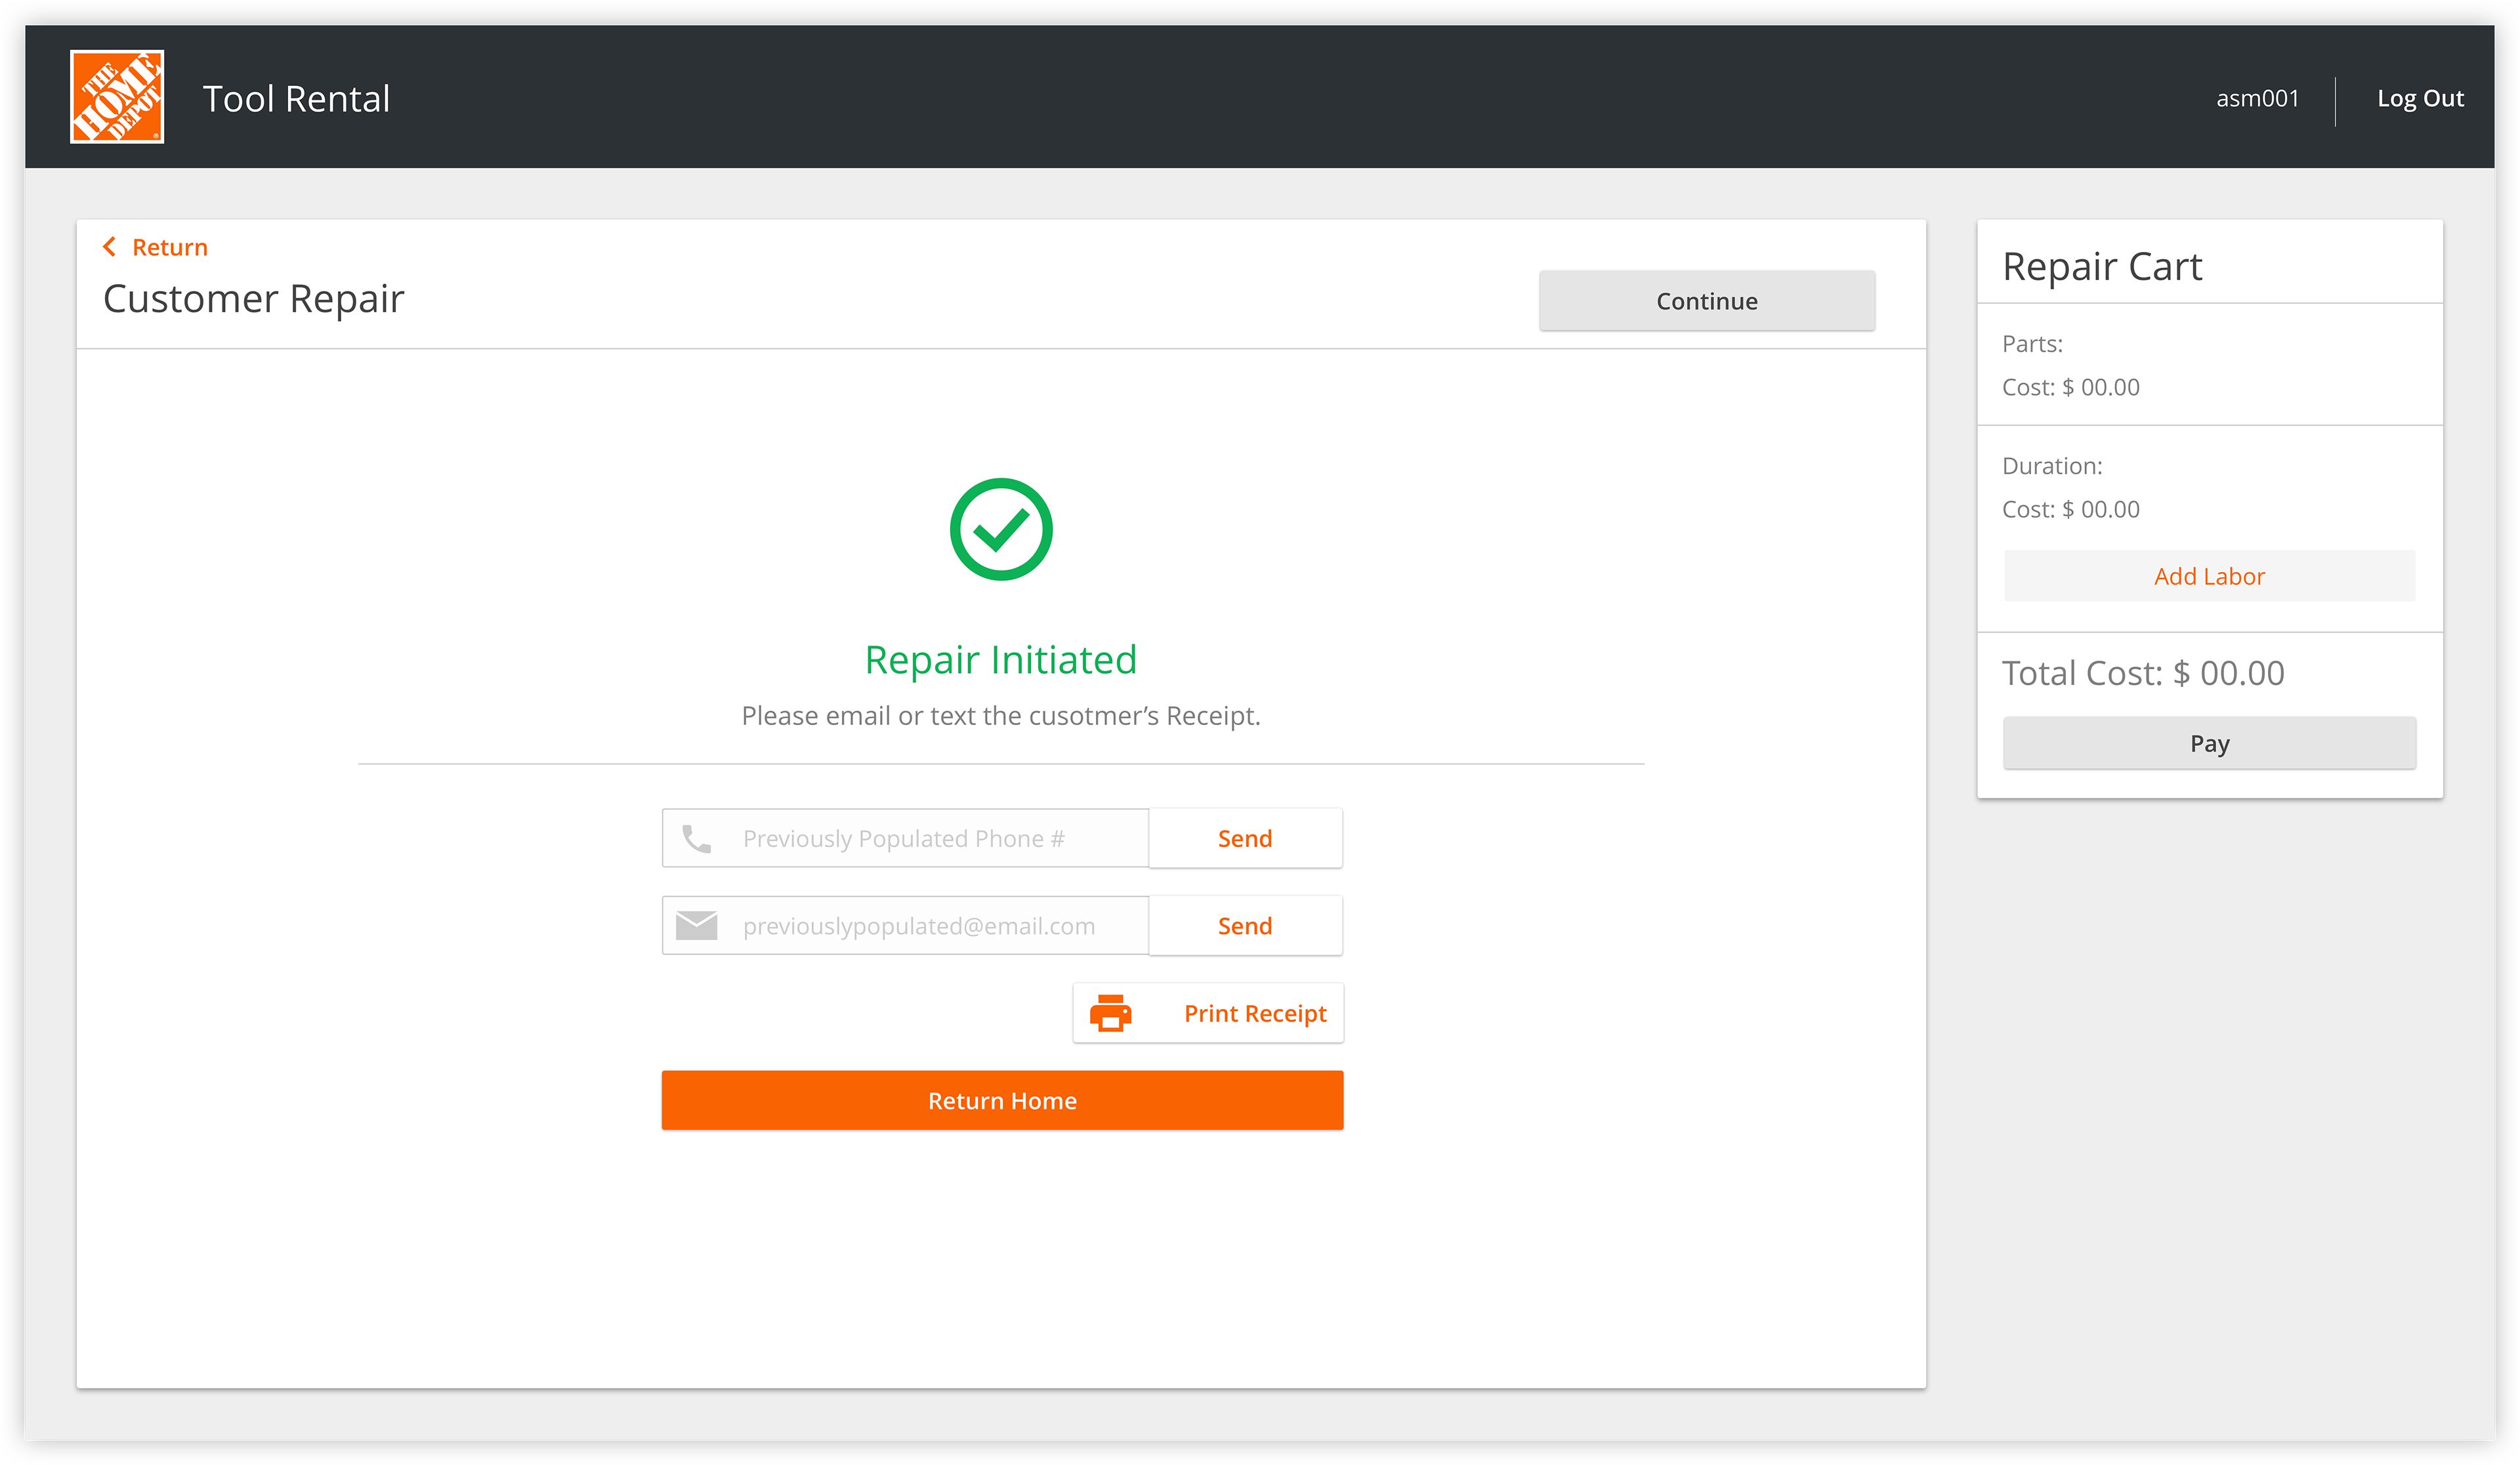
Confirmation
Once the payment has processed, the customer then has the option to receive his receipt via text, email or paper.
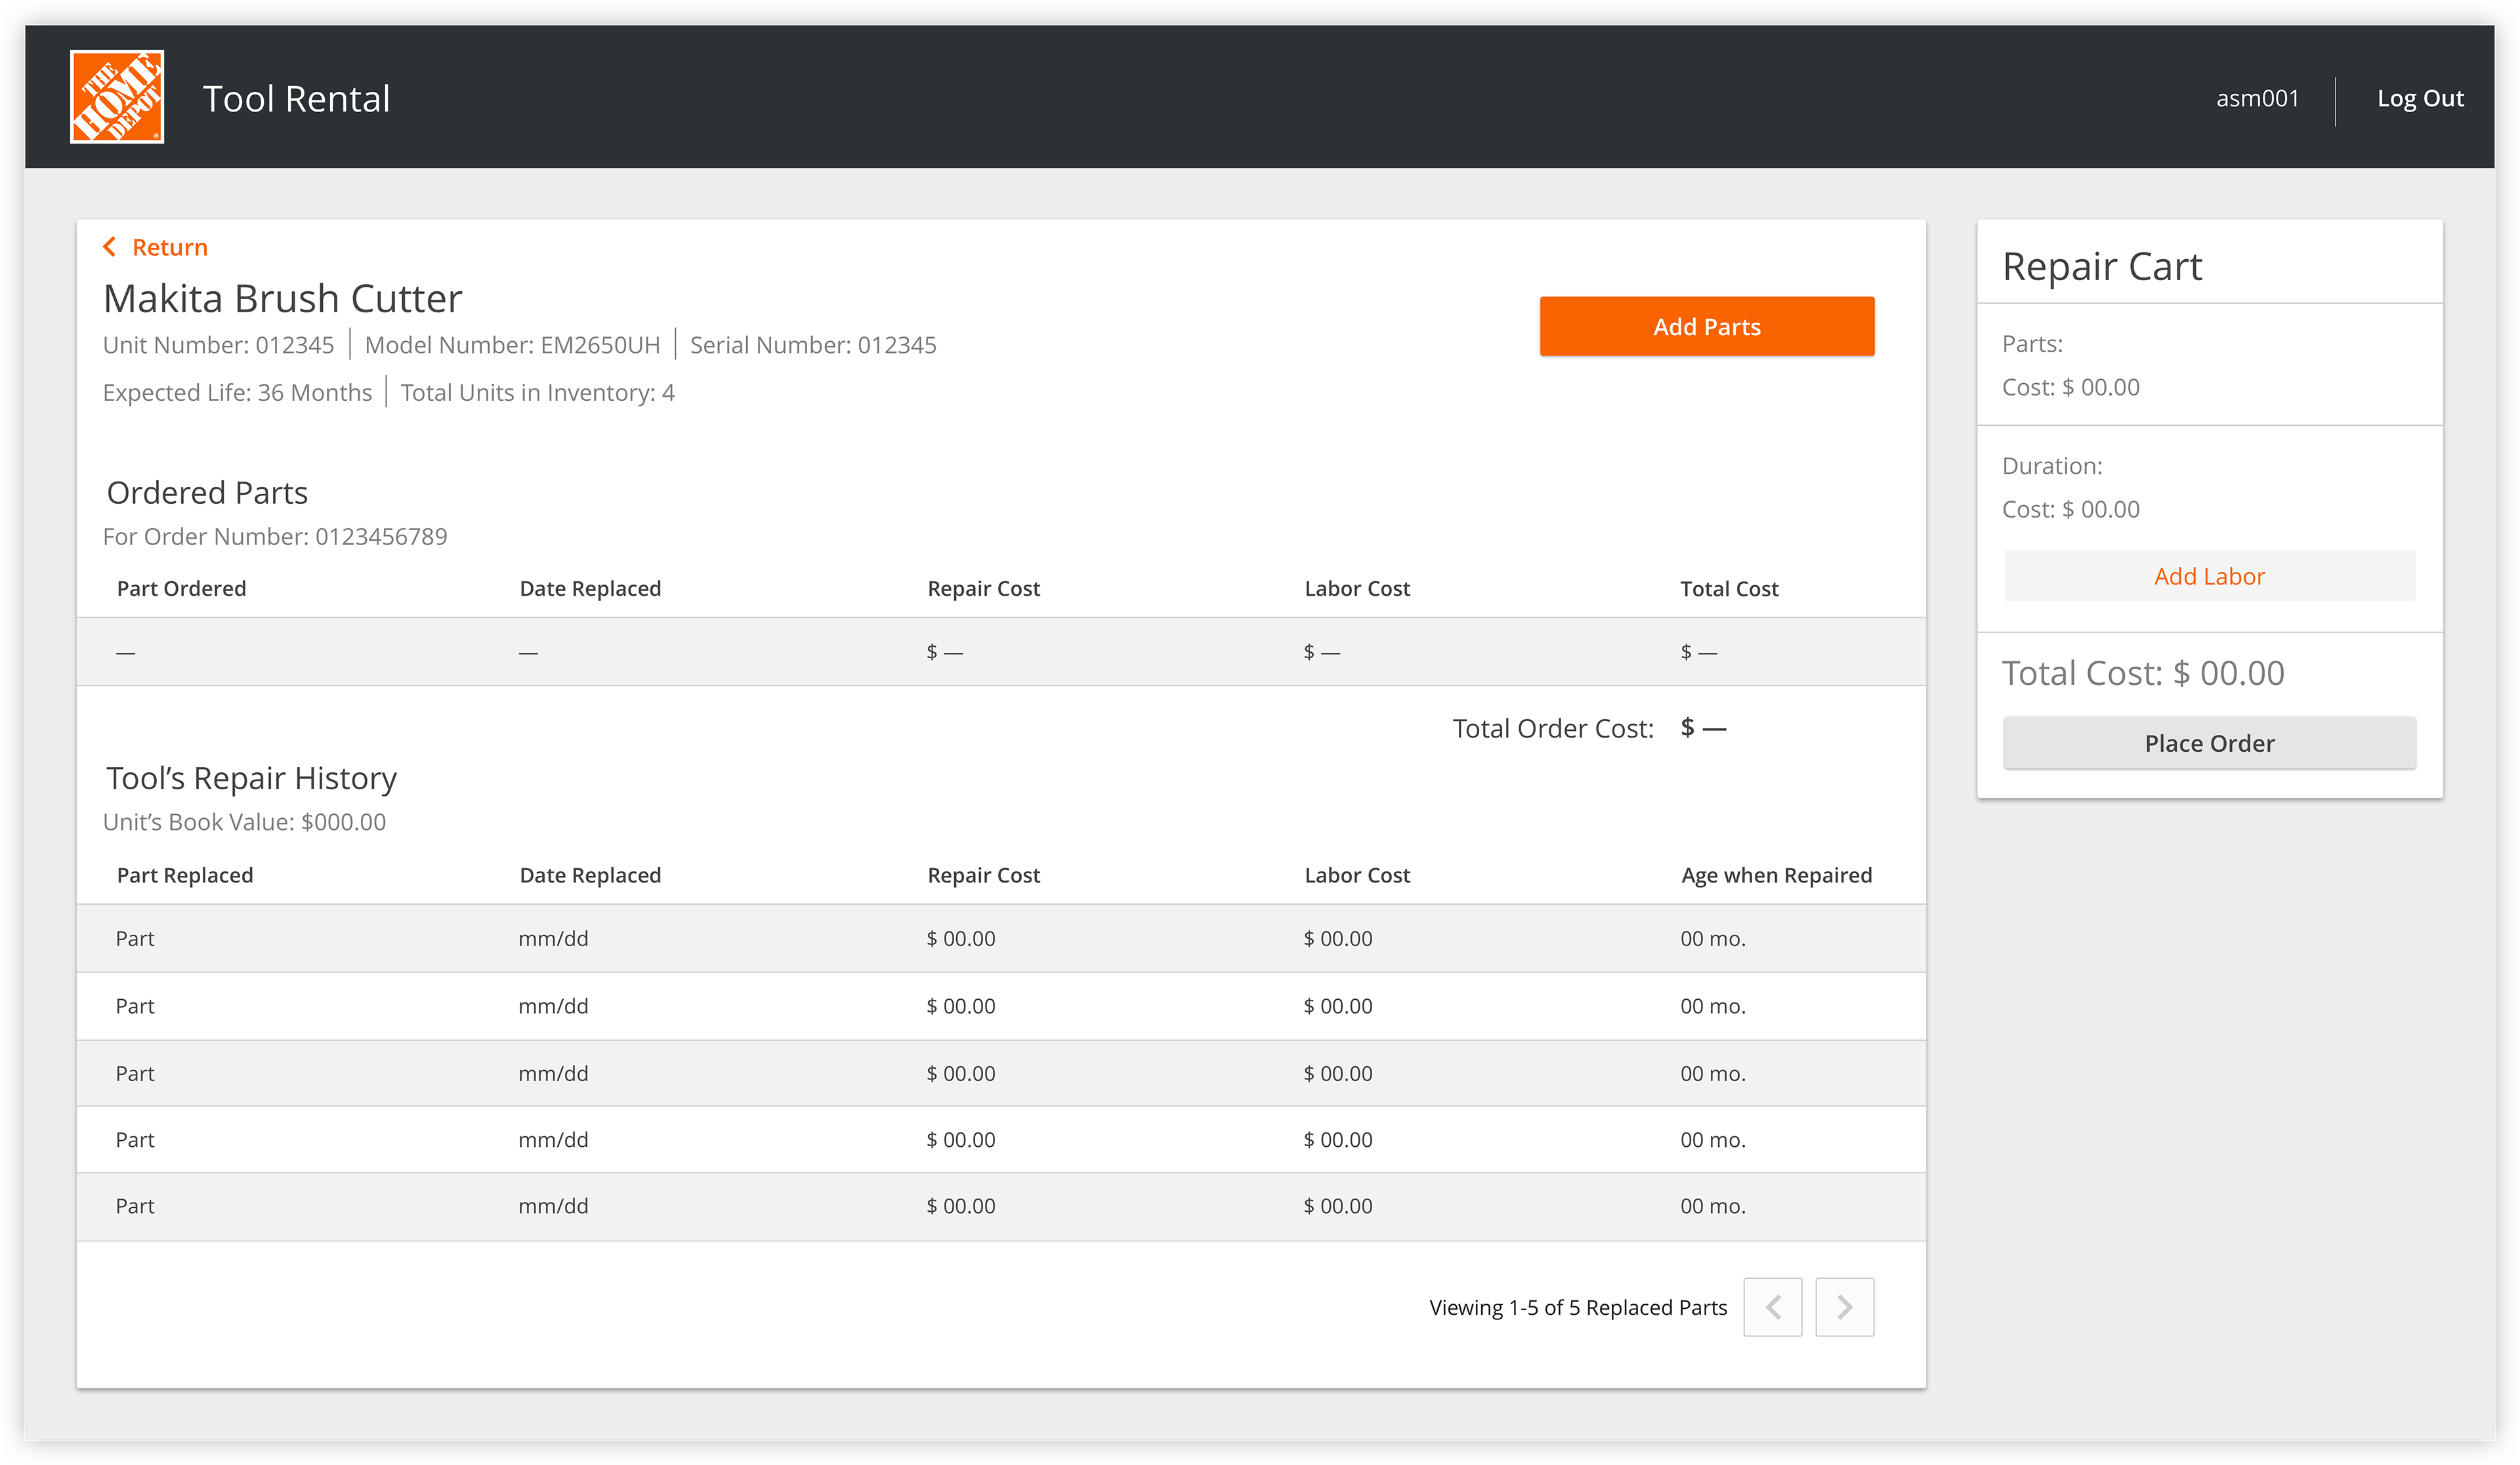
Repair Information Page
When the repair technician is ready to initiate a repair, he can select which tool he is ready to work on and click into the repair information page to see the entire history of repairs on a tool. Seeing this allows him to understand why something may need to be repaired, and ultimately if it is a better investment to repair a tool or purchase a new one. In the case that a new tool needs to be purchased, the repair technician can contact his merchandising team and the team can order a new one in Trio.
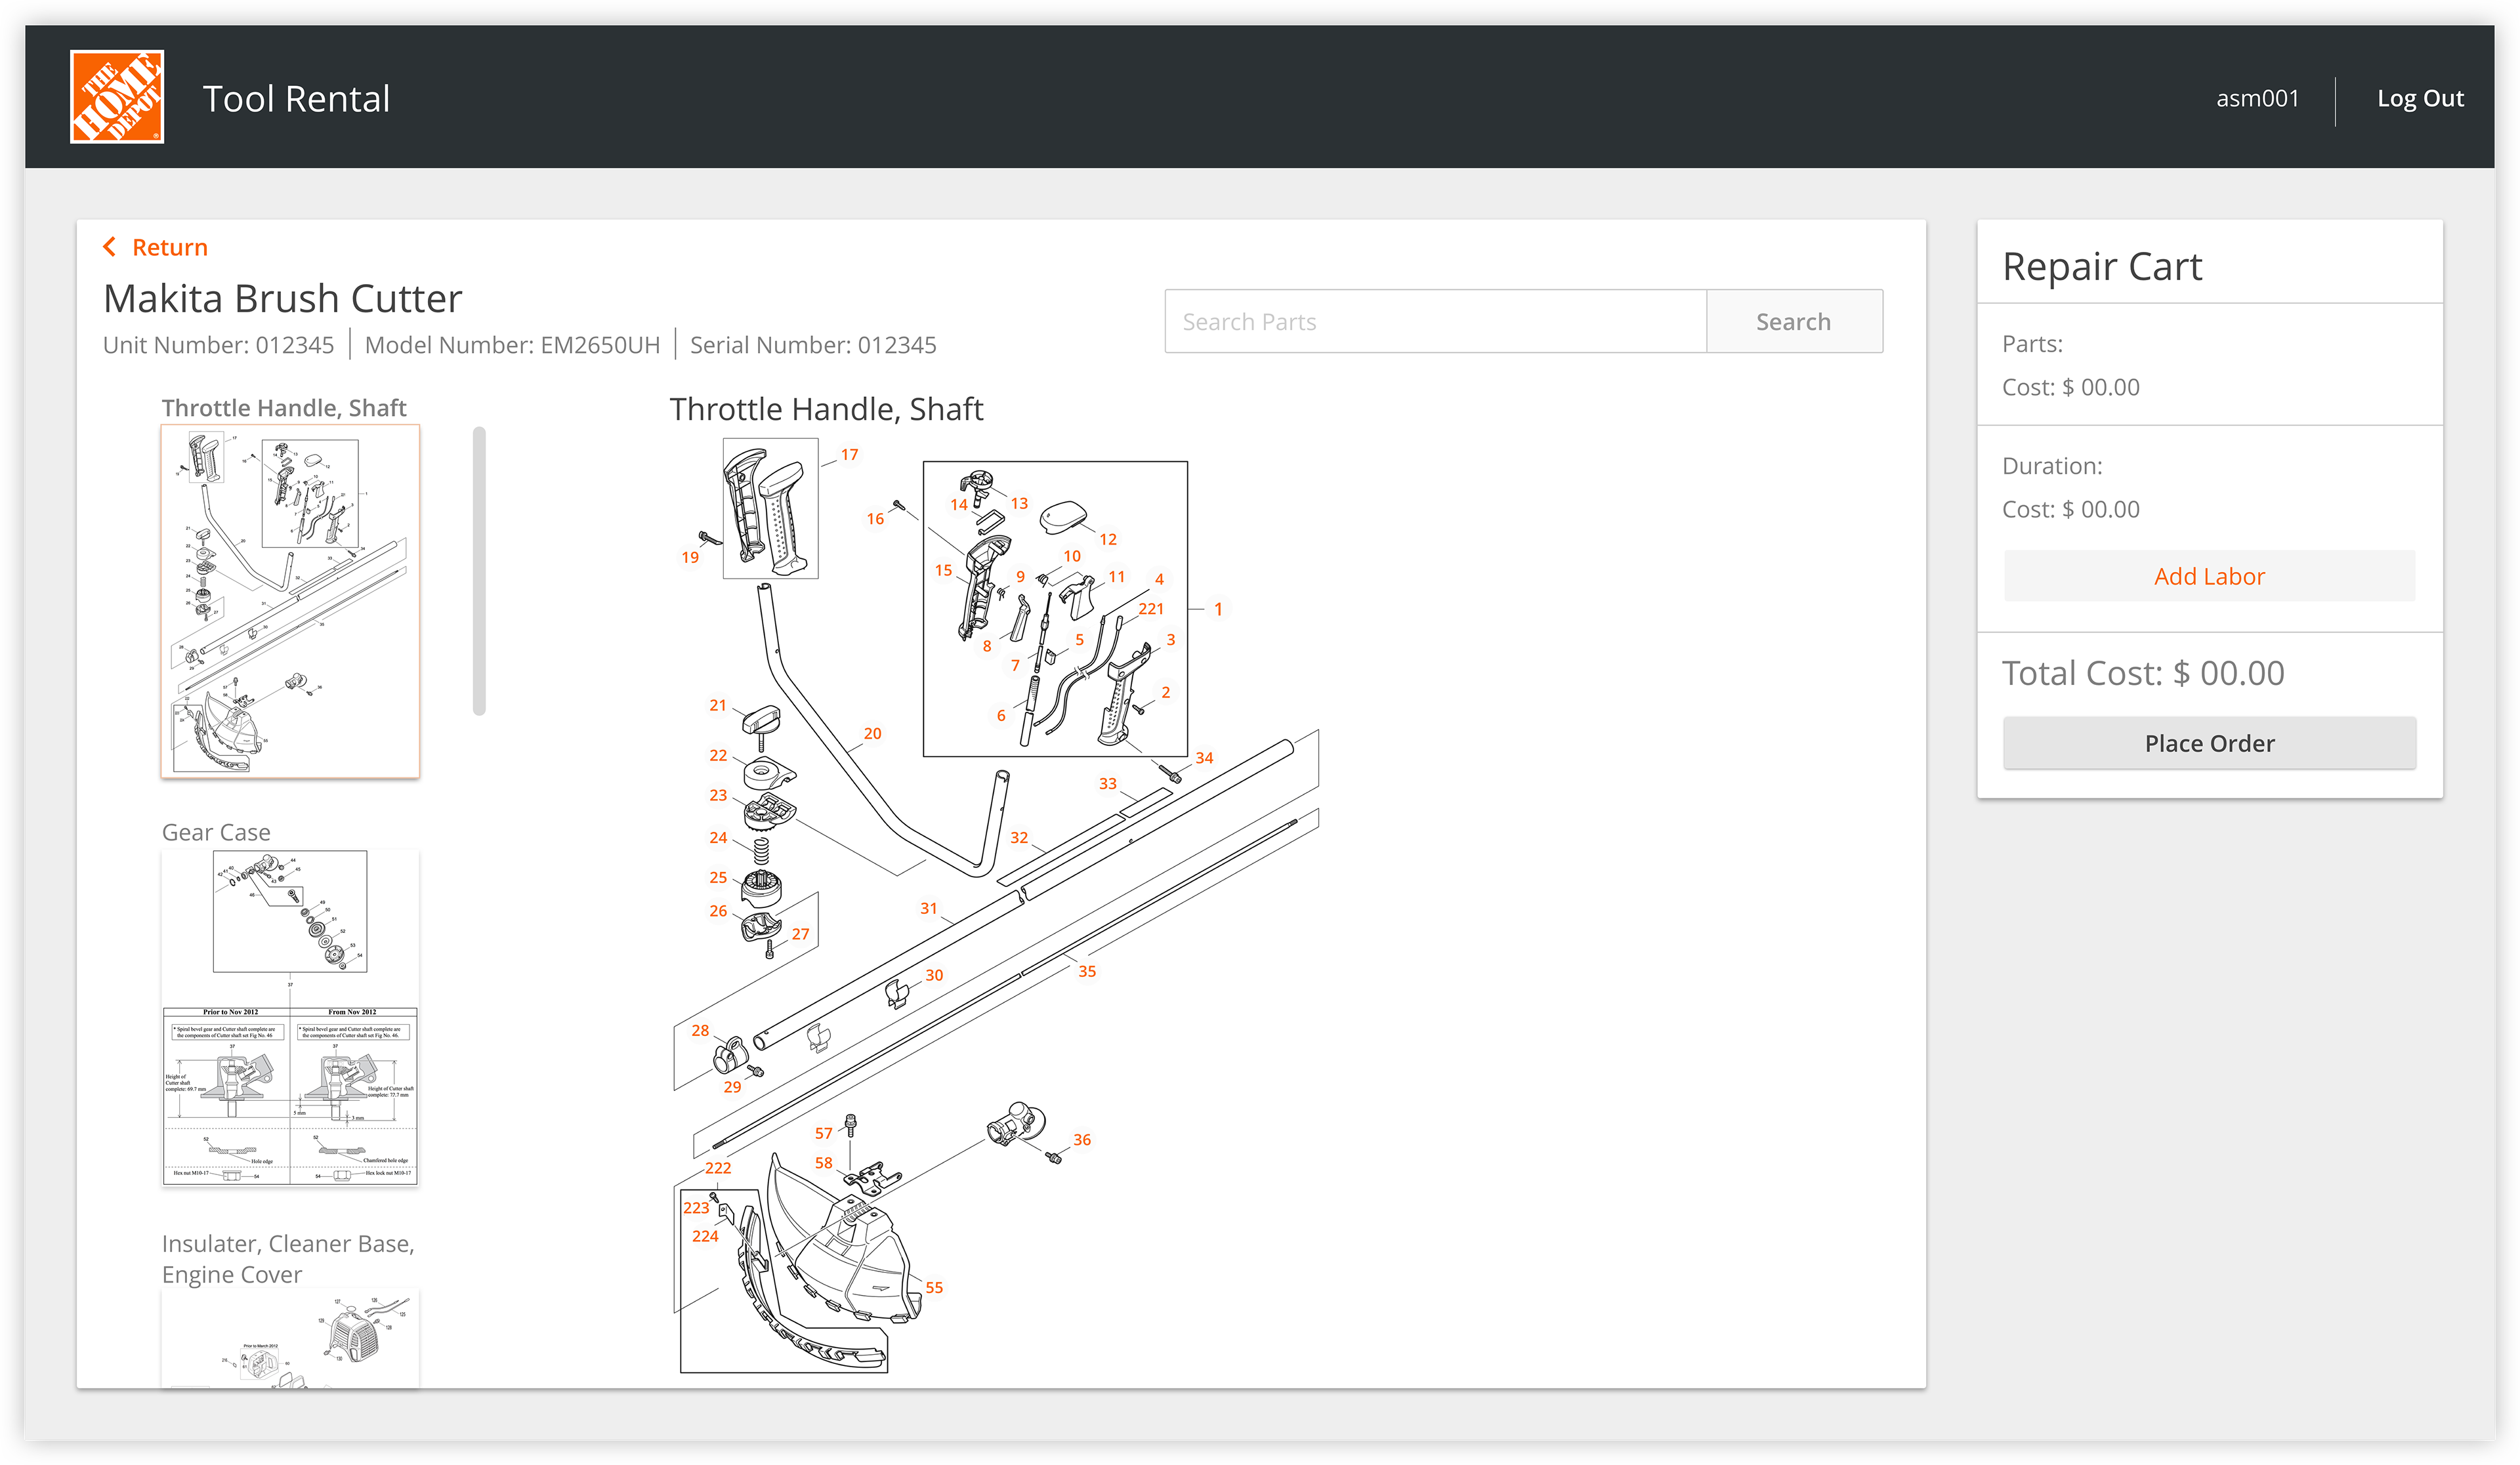
Viewing Diagrams
One of the biggest findings of our time analysis was that repair technicians have an incredibly difficult time finding the right diagram to select the correct part. In the current process, technicians spend the majority of their time looking at any resource possible for the right diagram. In the new repair system, technicians can view multiple diagrams that are tailored to the tools in their fleet, and the tools that customers can purchase from their Home Depot. Tailoring the correct diagrams allows technicians to find the correct part and reduces time spent on the down list, a common hindrance in technician's performance.
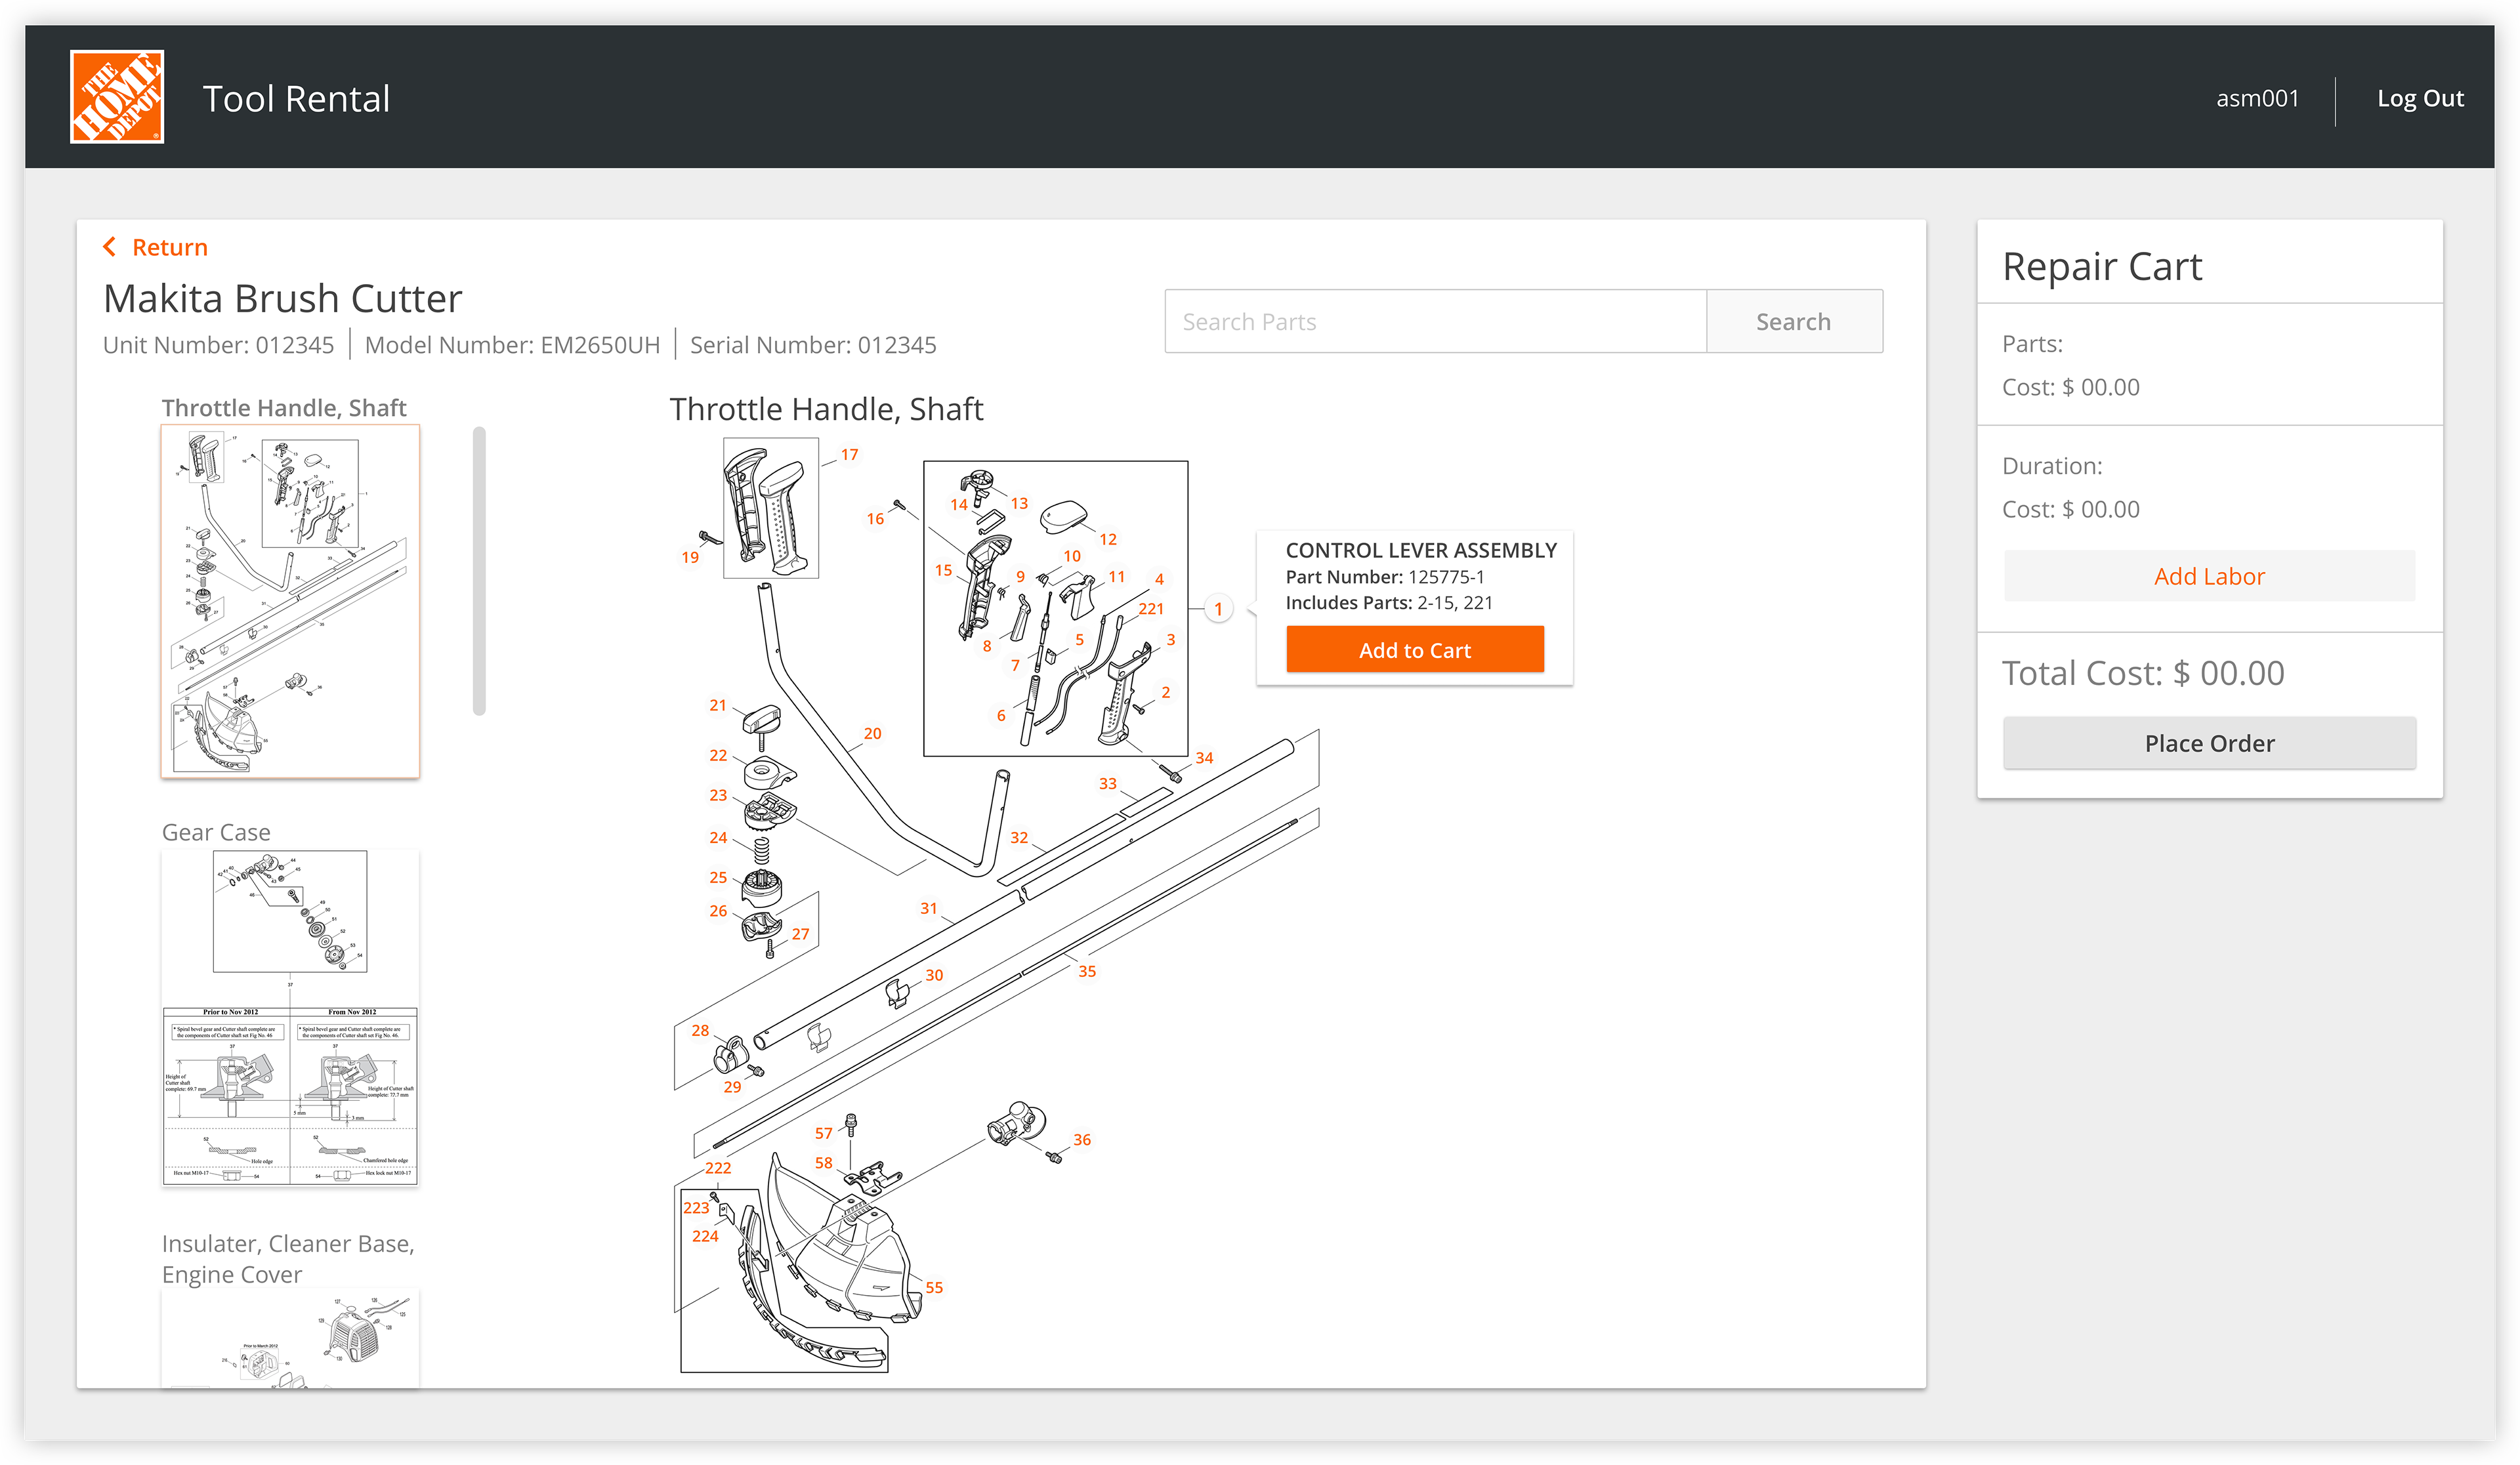
Selecting the Part
When looking at the diagram, technicians can hover over the part they believe they need to see the part's name and number. At this point, technicians can add the part and continue with the order.
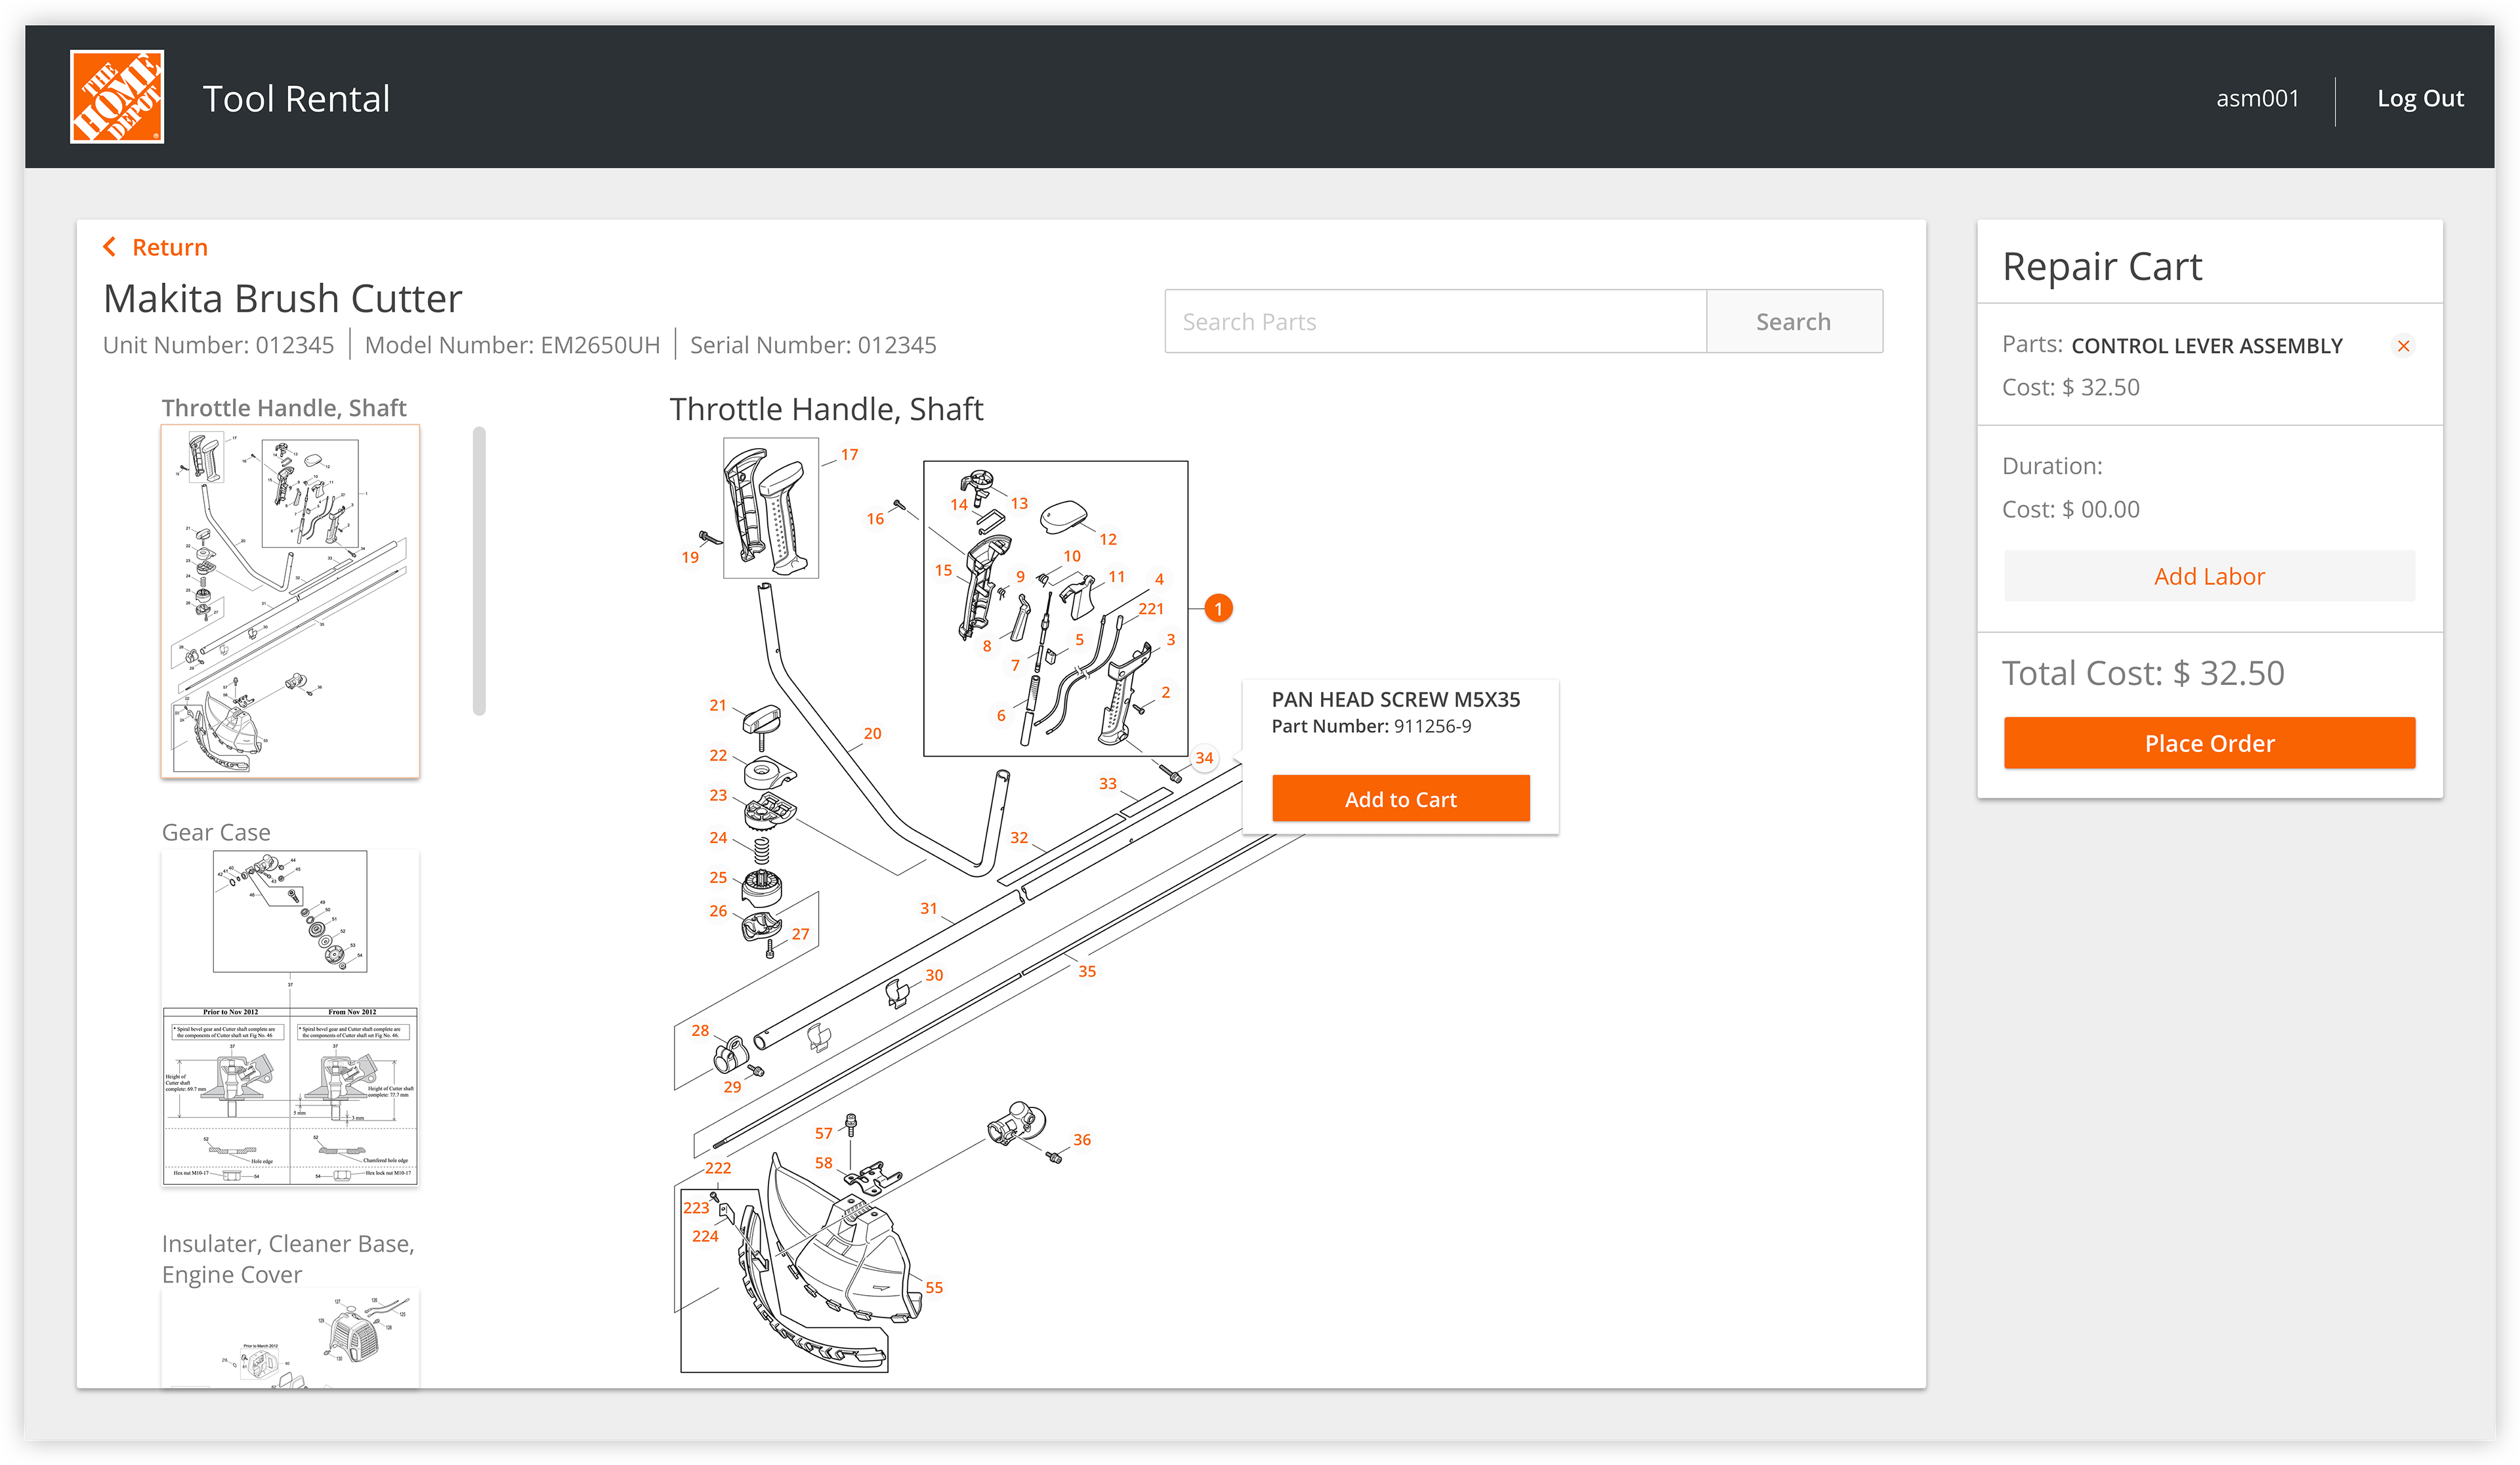
Selecting Parts
After the technician has added the part to the cart, they can continue looking for additional parts, while maintaining visibility into what has been selected in the diagram and in the repair cart. The technician also has the ability to remove any items previously added to the repair cart. This helps technicians see the total cost of a repair versus purchasing a new tool.
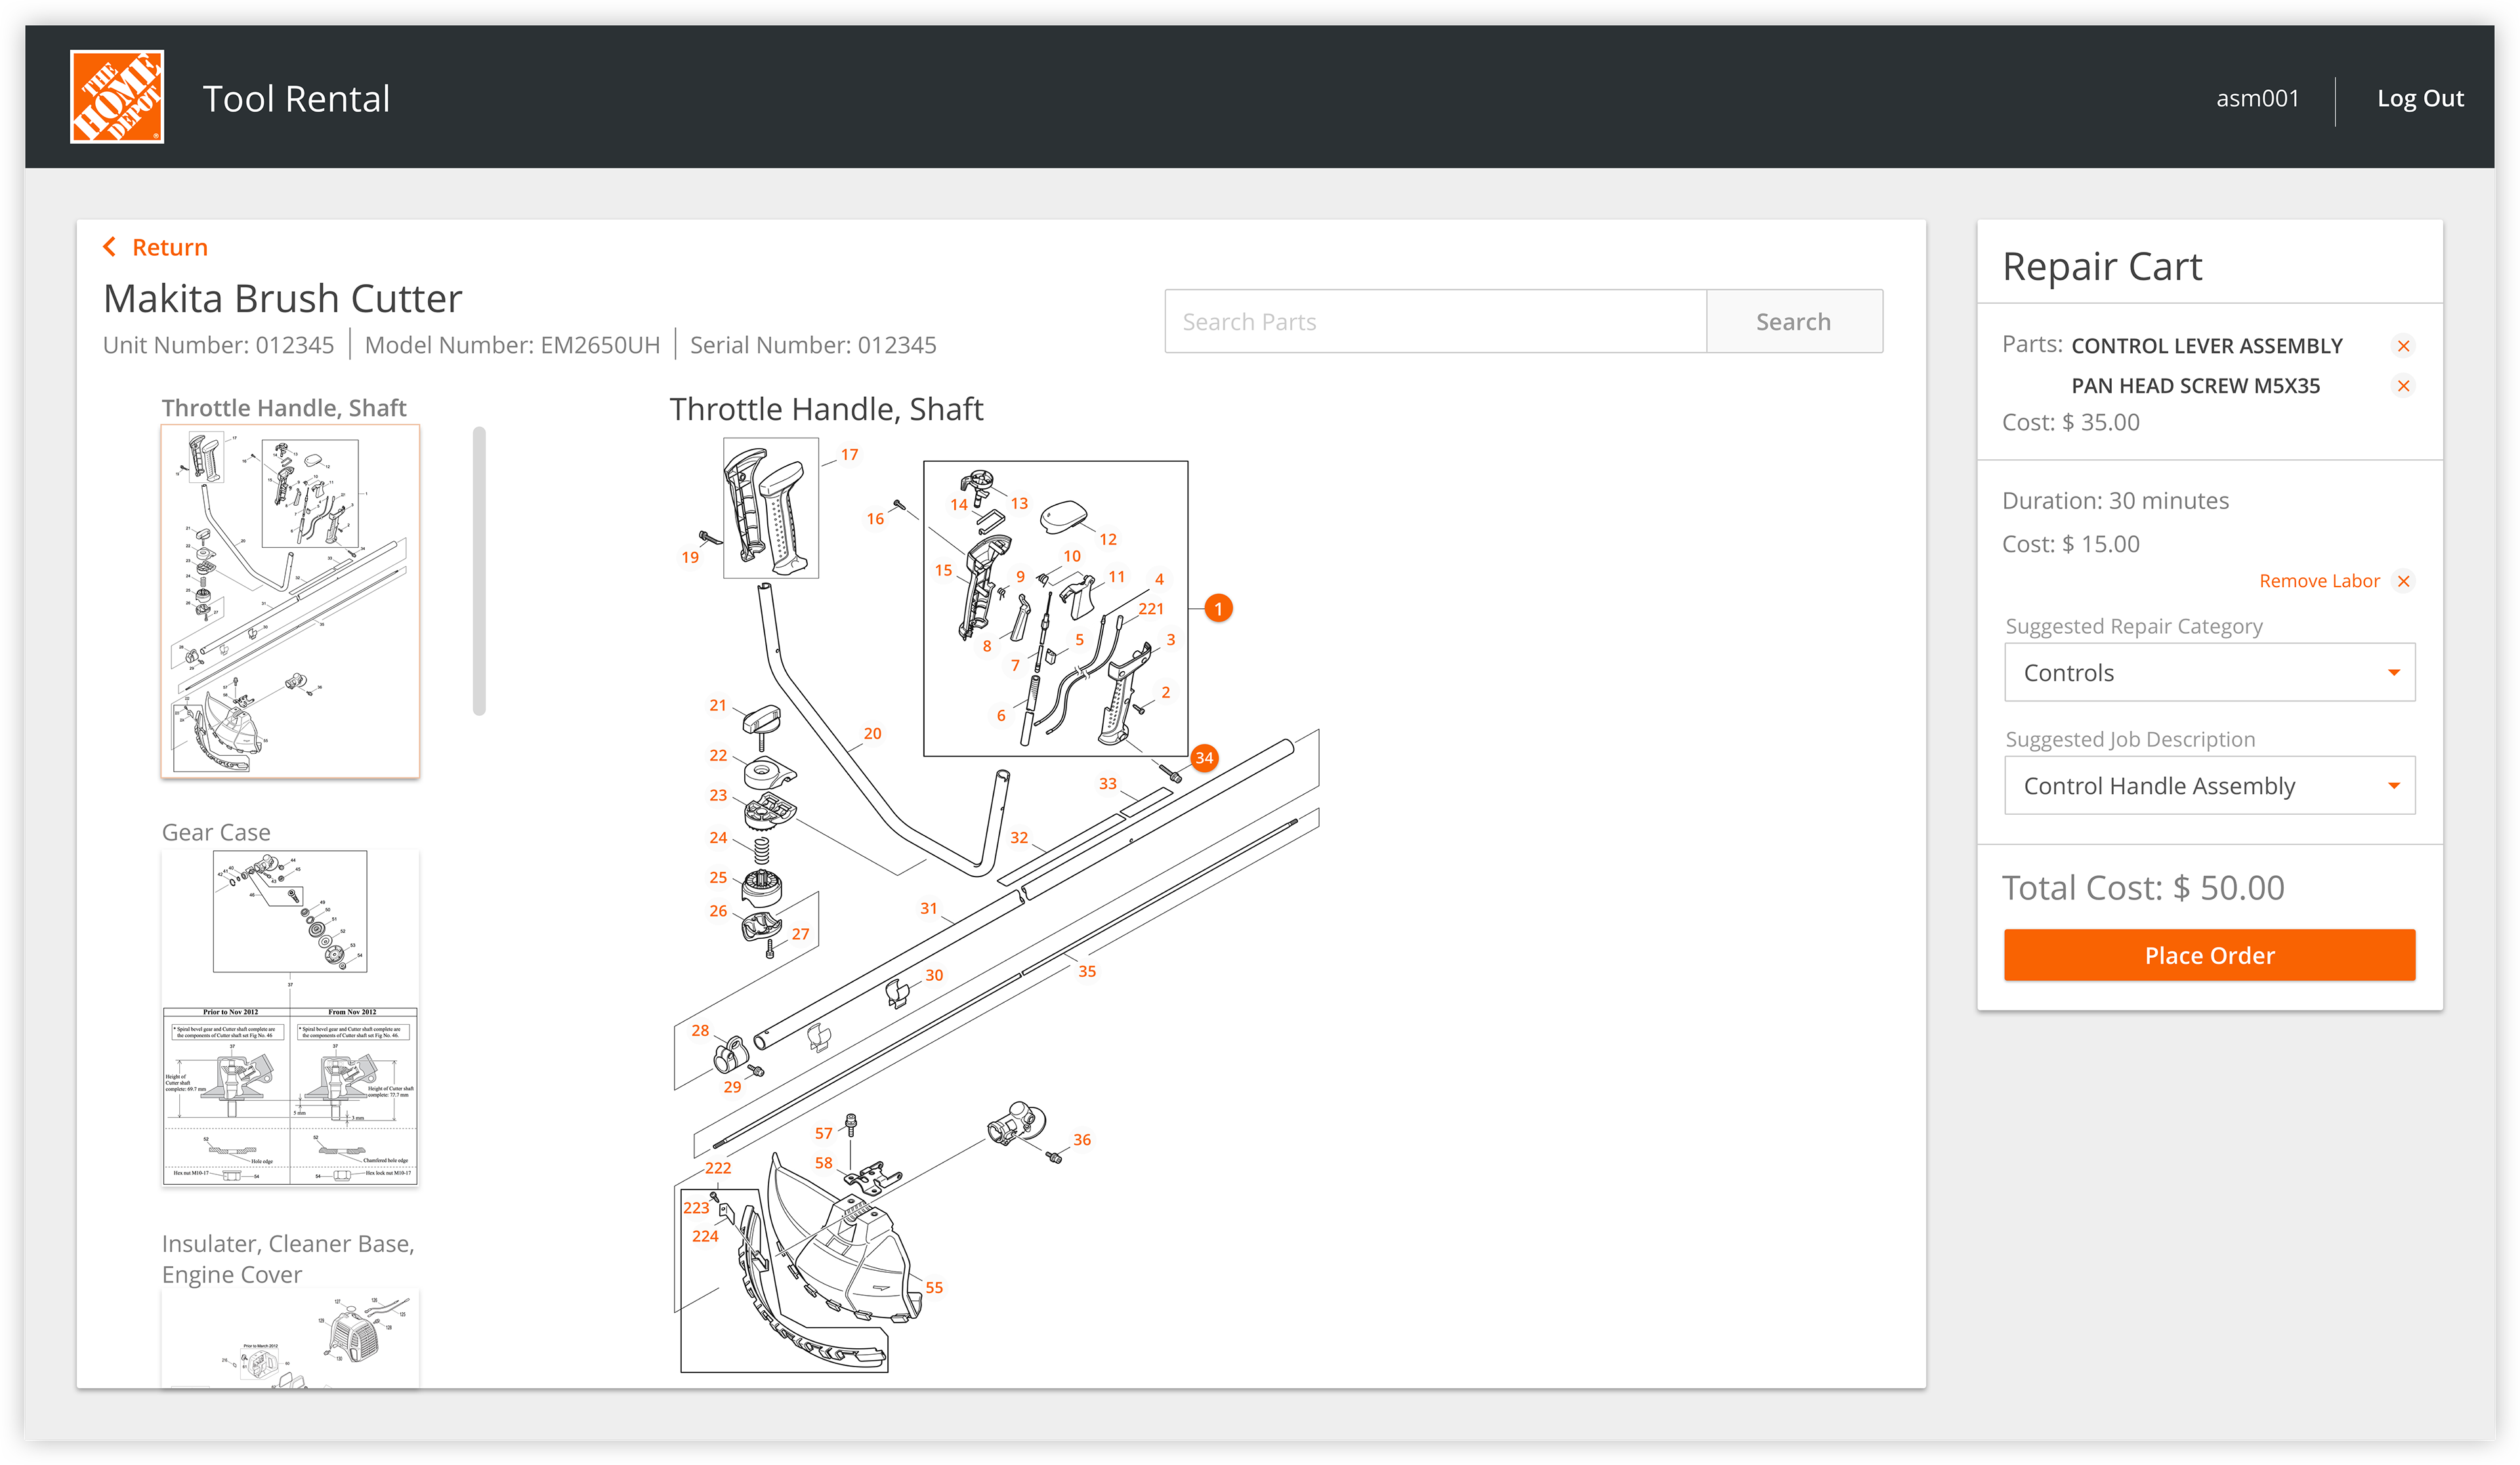
Adding Labor
The technician then needs to add the amount of time it will take to complete the repair by selecting the repair category and job description. This will add an estimated duration and the cost associated with that duration.
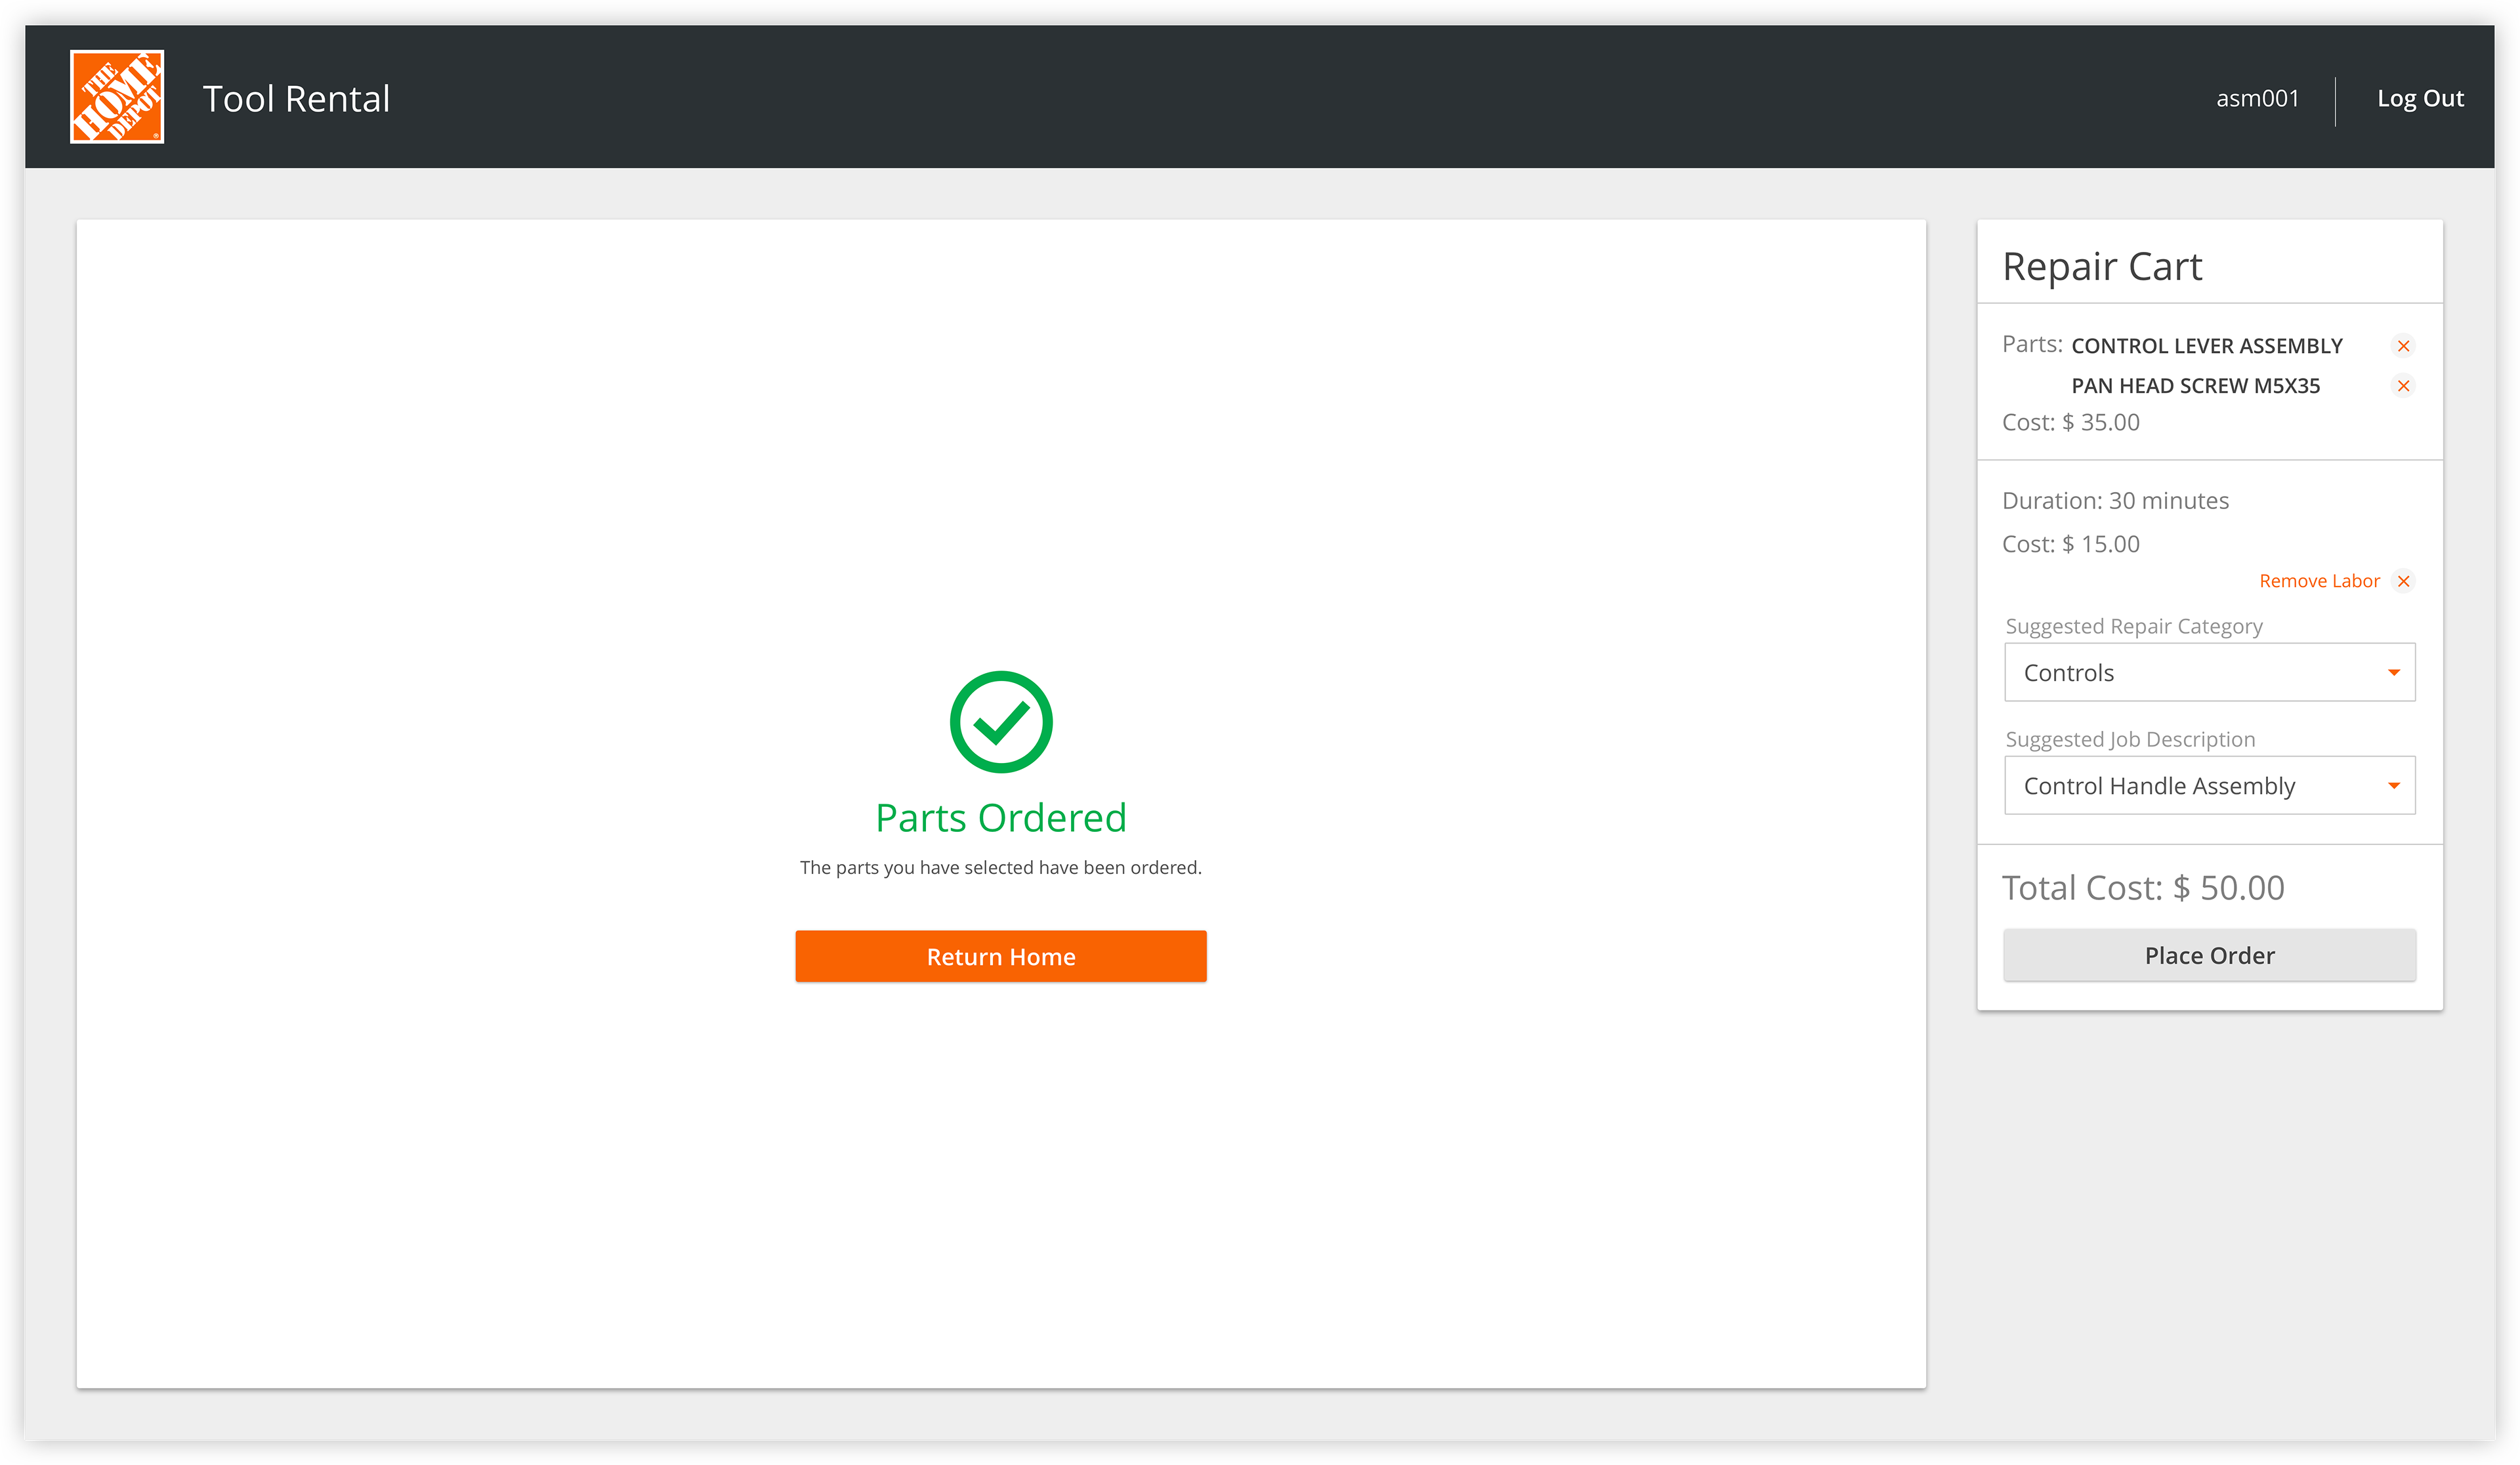
Confirmation
Once the parts have been ordered and the labor has been added, the technician can return to his other responsibilities.
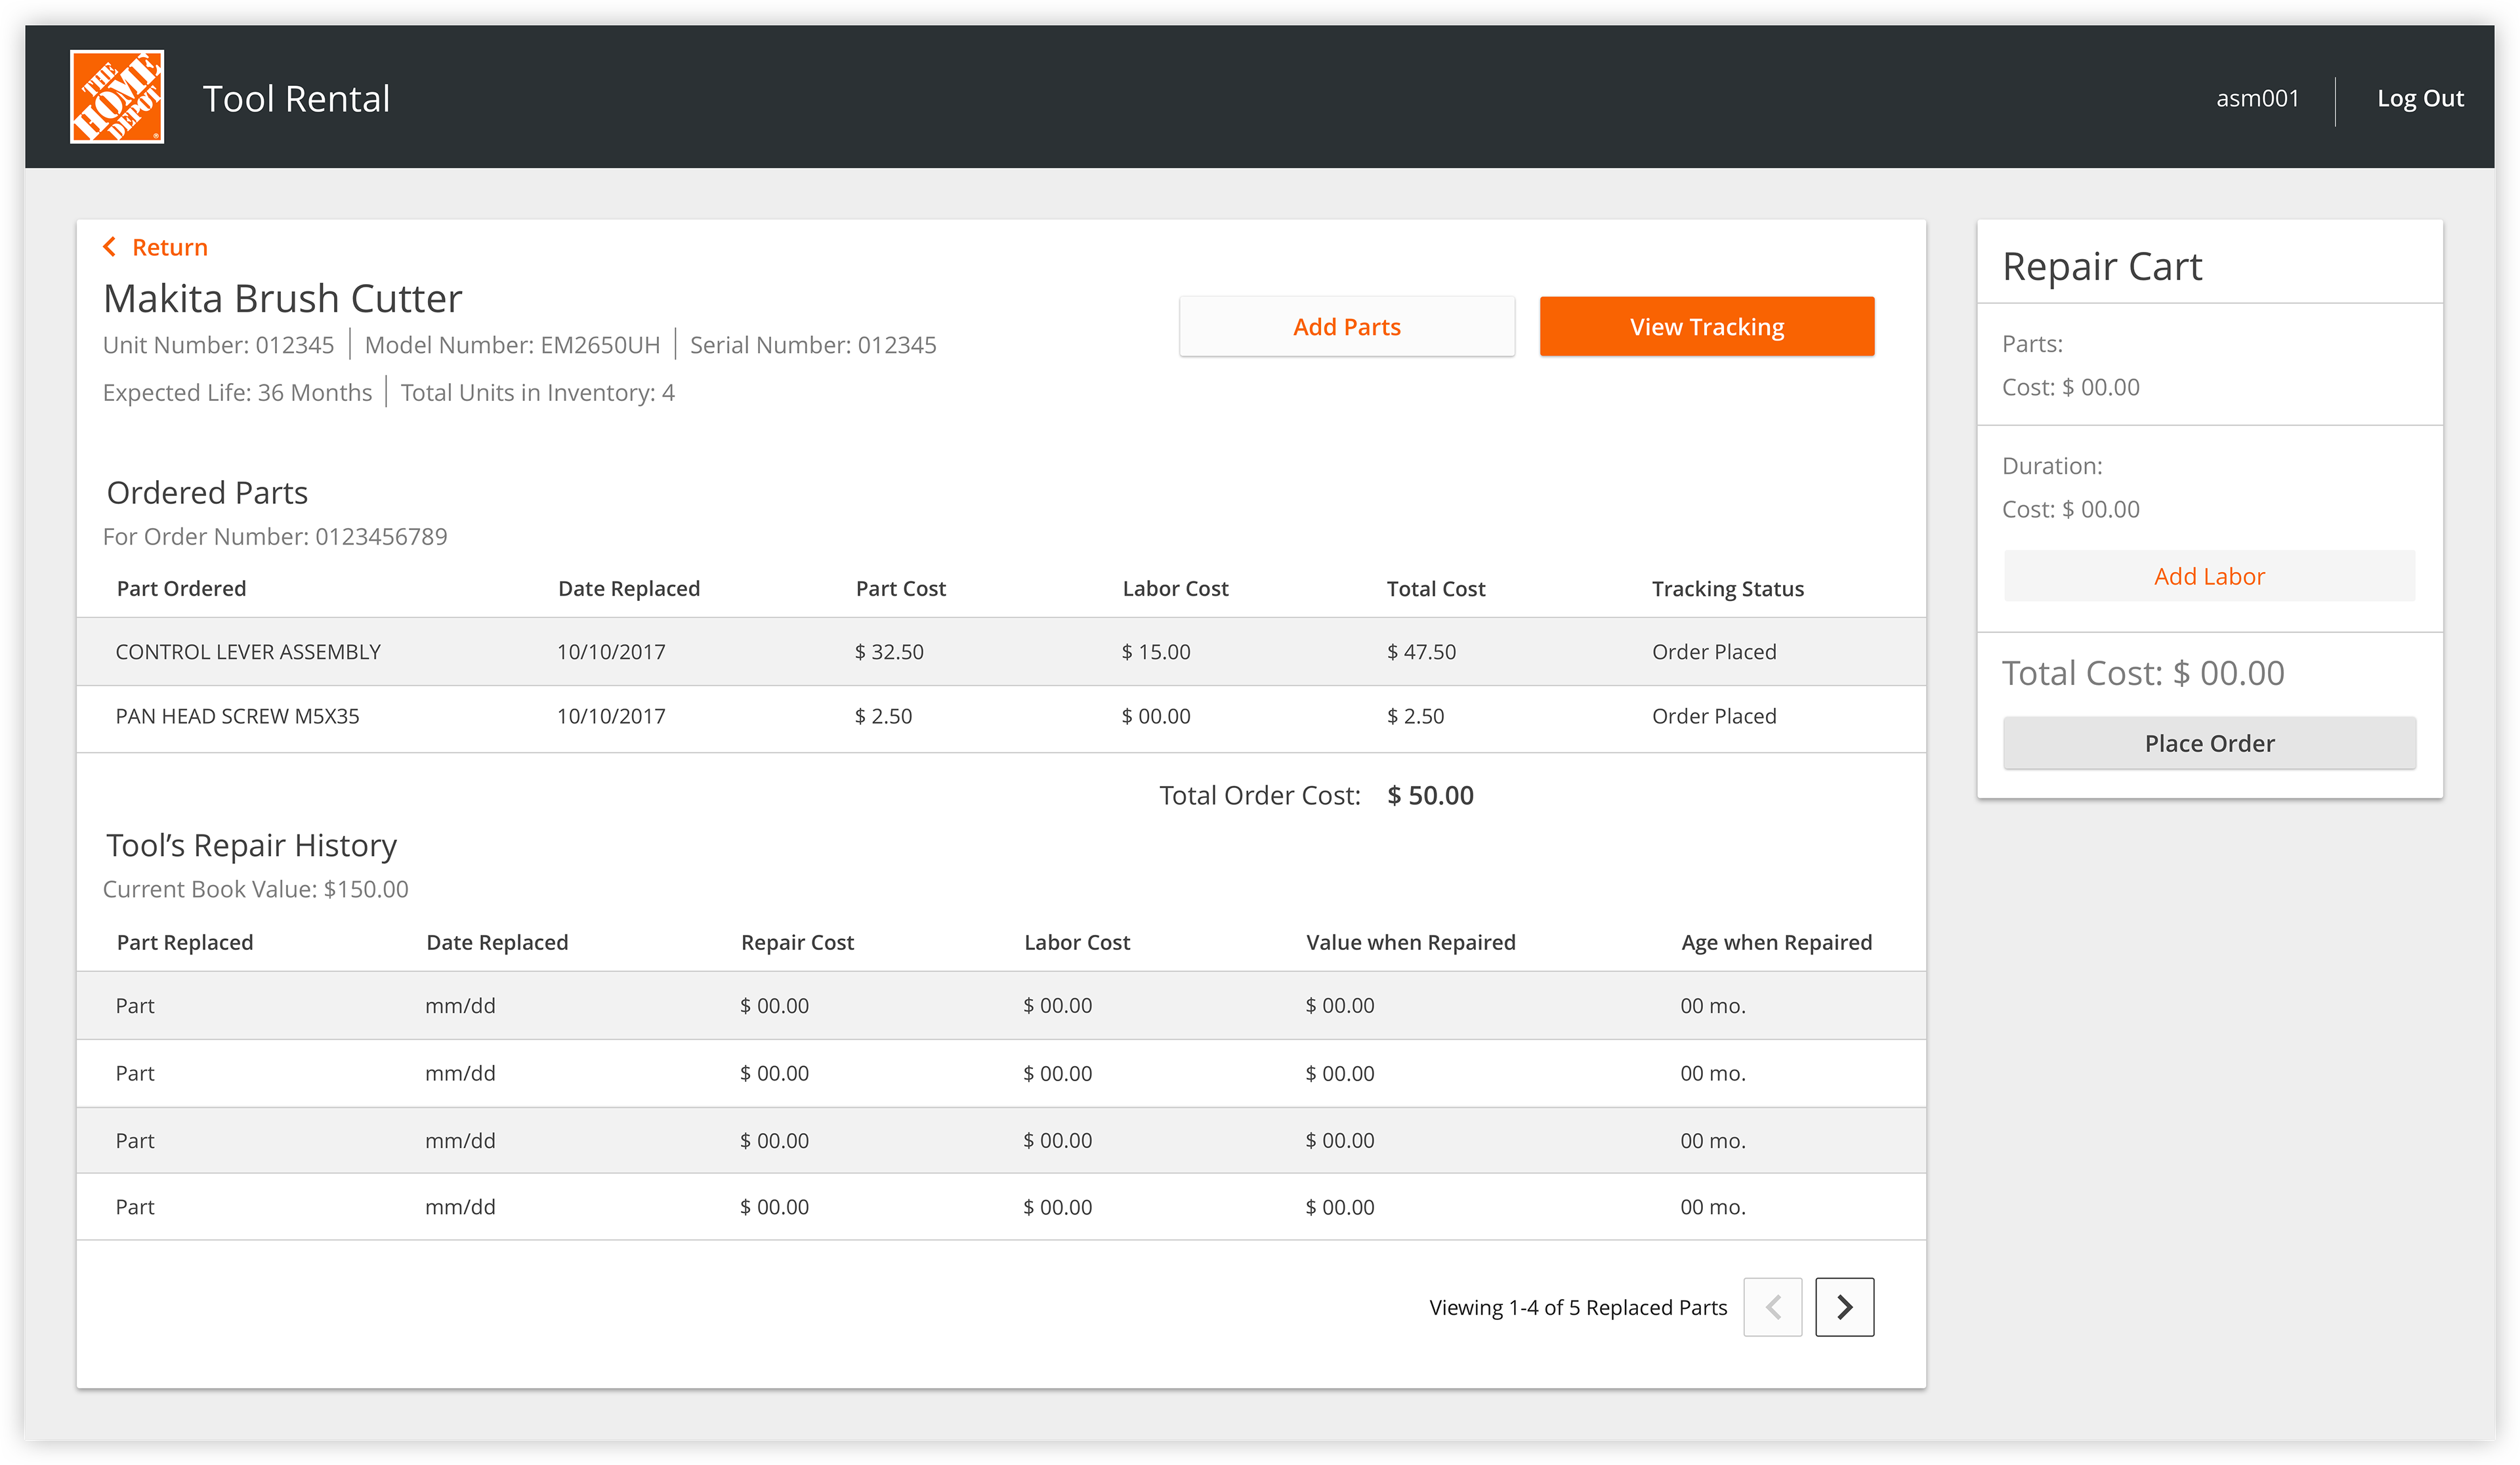
Waiting on Parts
While the technician is waiting for the parts to arrive, he can visit the repair information page to review the parts he ordered, order additional parts and view the tracking of his order.
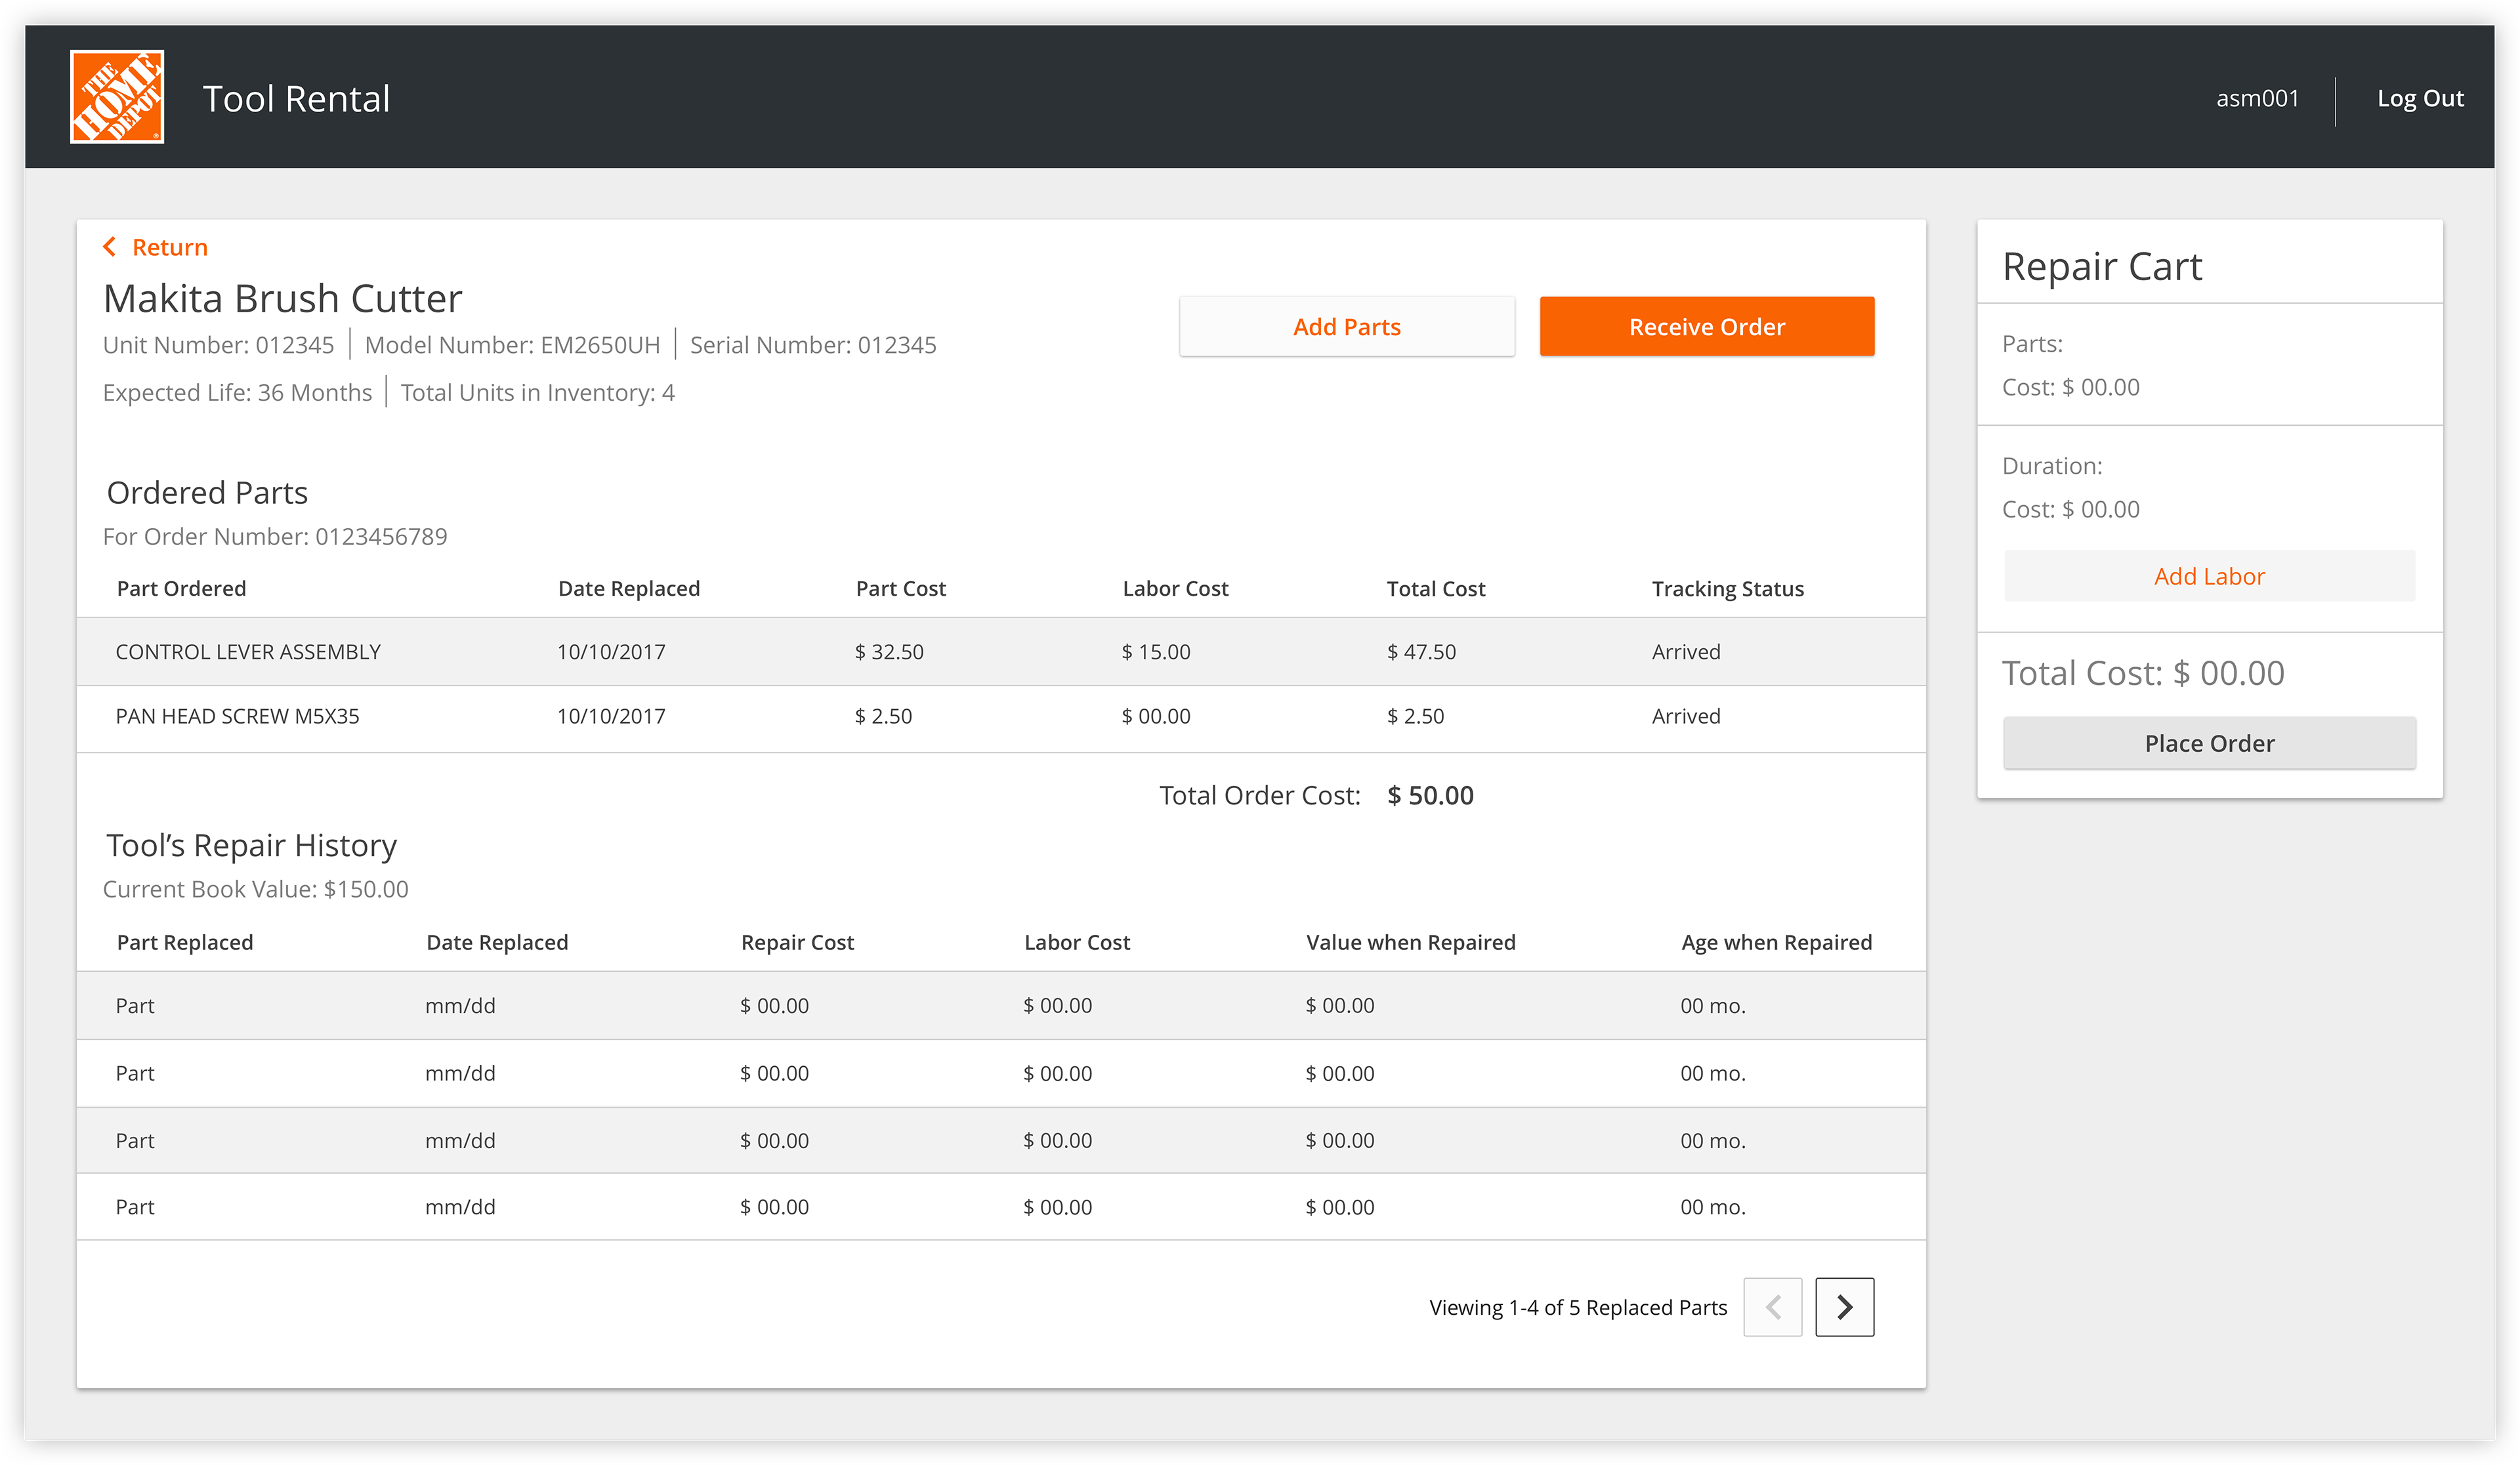
Receiving Parts
Once a part arrives at the technician's Home Depot, he can then see if the part will work for the repair. If it does, the technician can select the "receive order" option. If it does not work, the technician can "add parts". Our goal is to display the right diagrams so technicians are unlikely to order the wrong part.
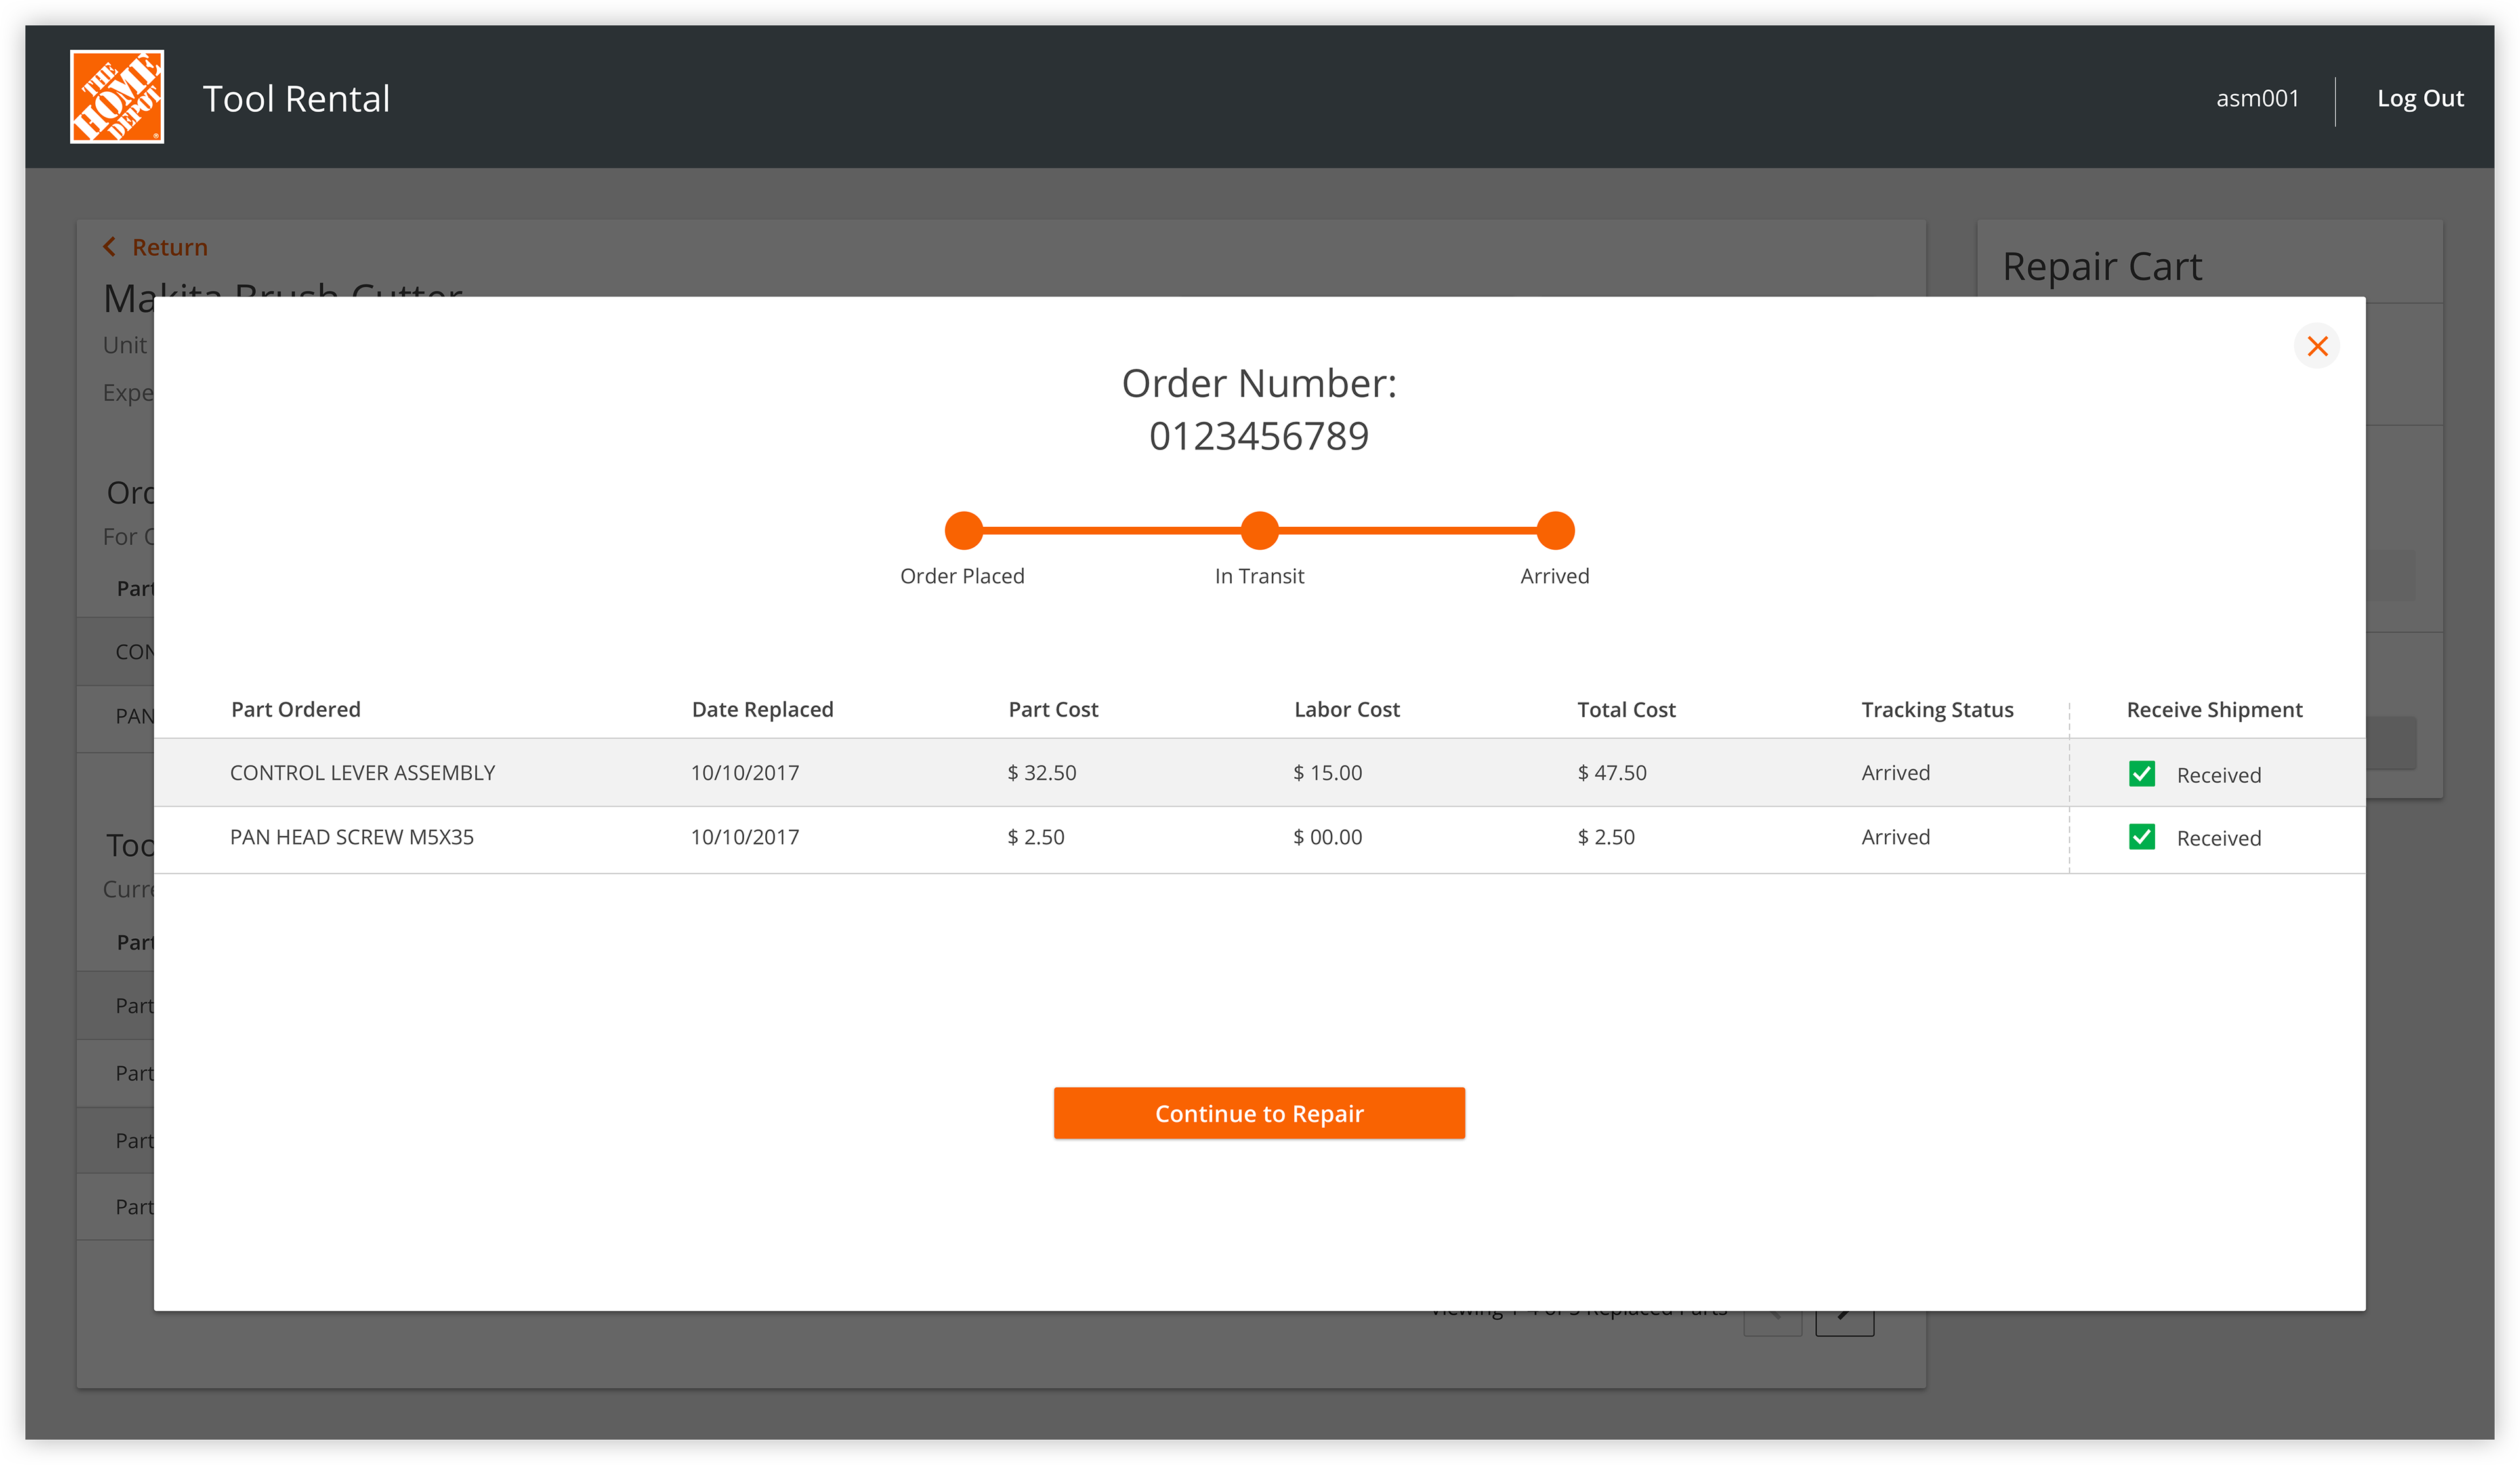
Receiving Parts
If the technician has ordered the correct parts, he will come to this screen to select which parts in the order he would like to receive. Then he can continue repairing the tool.
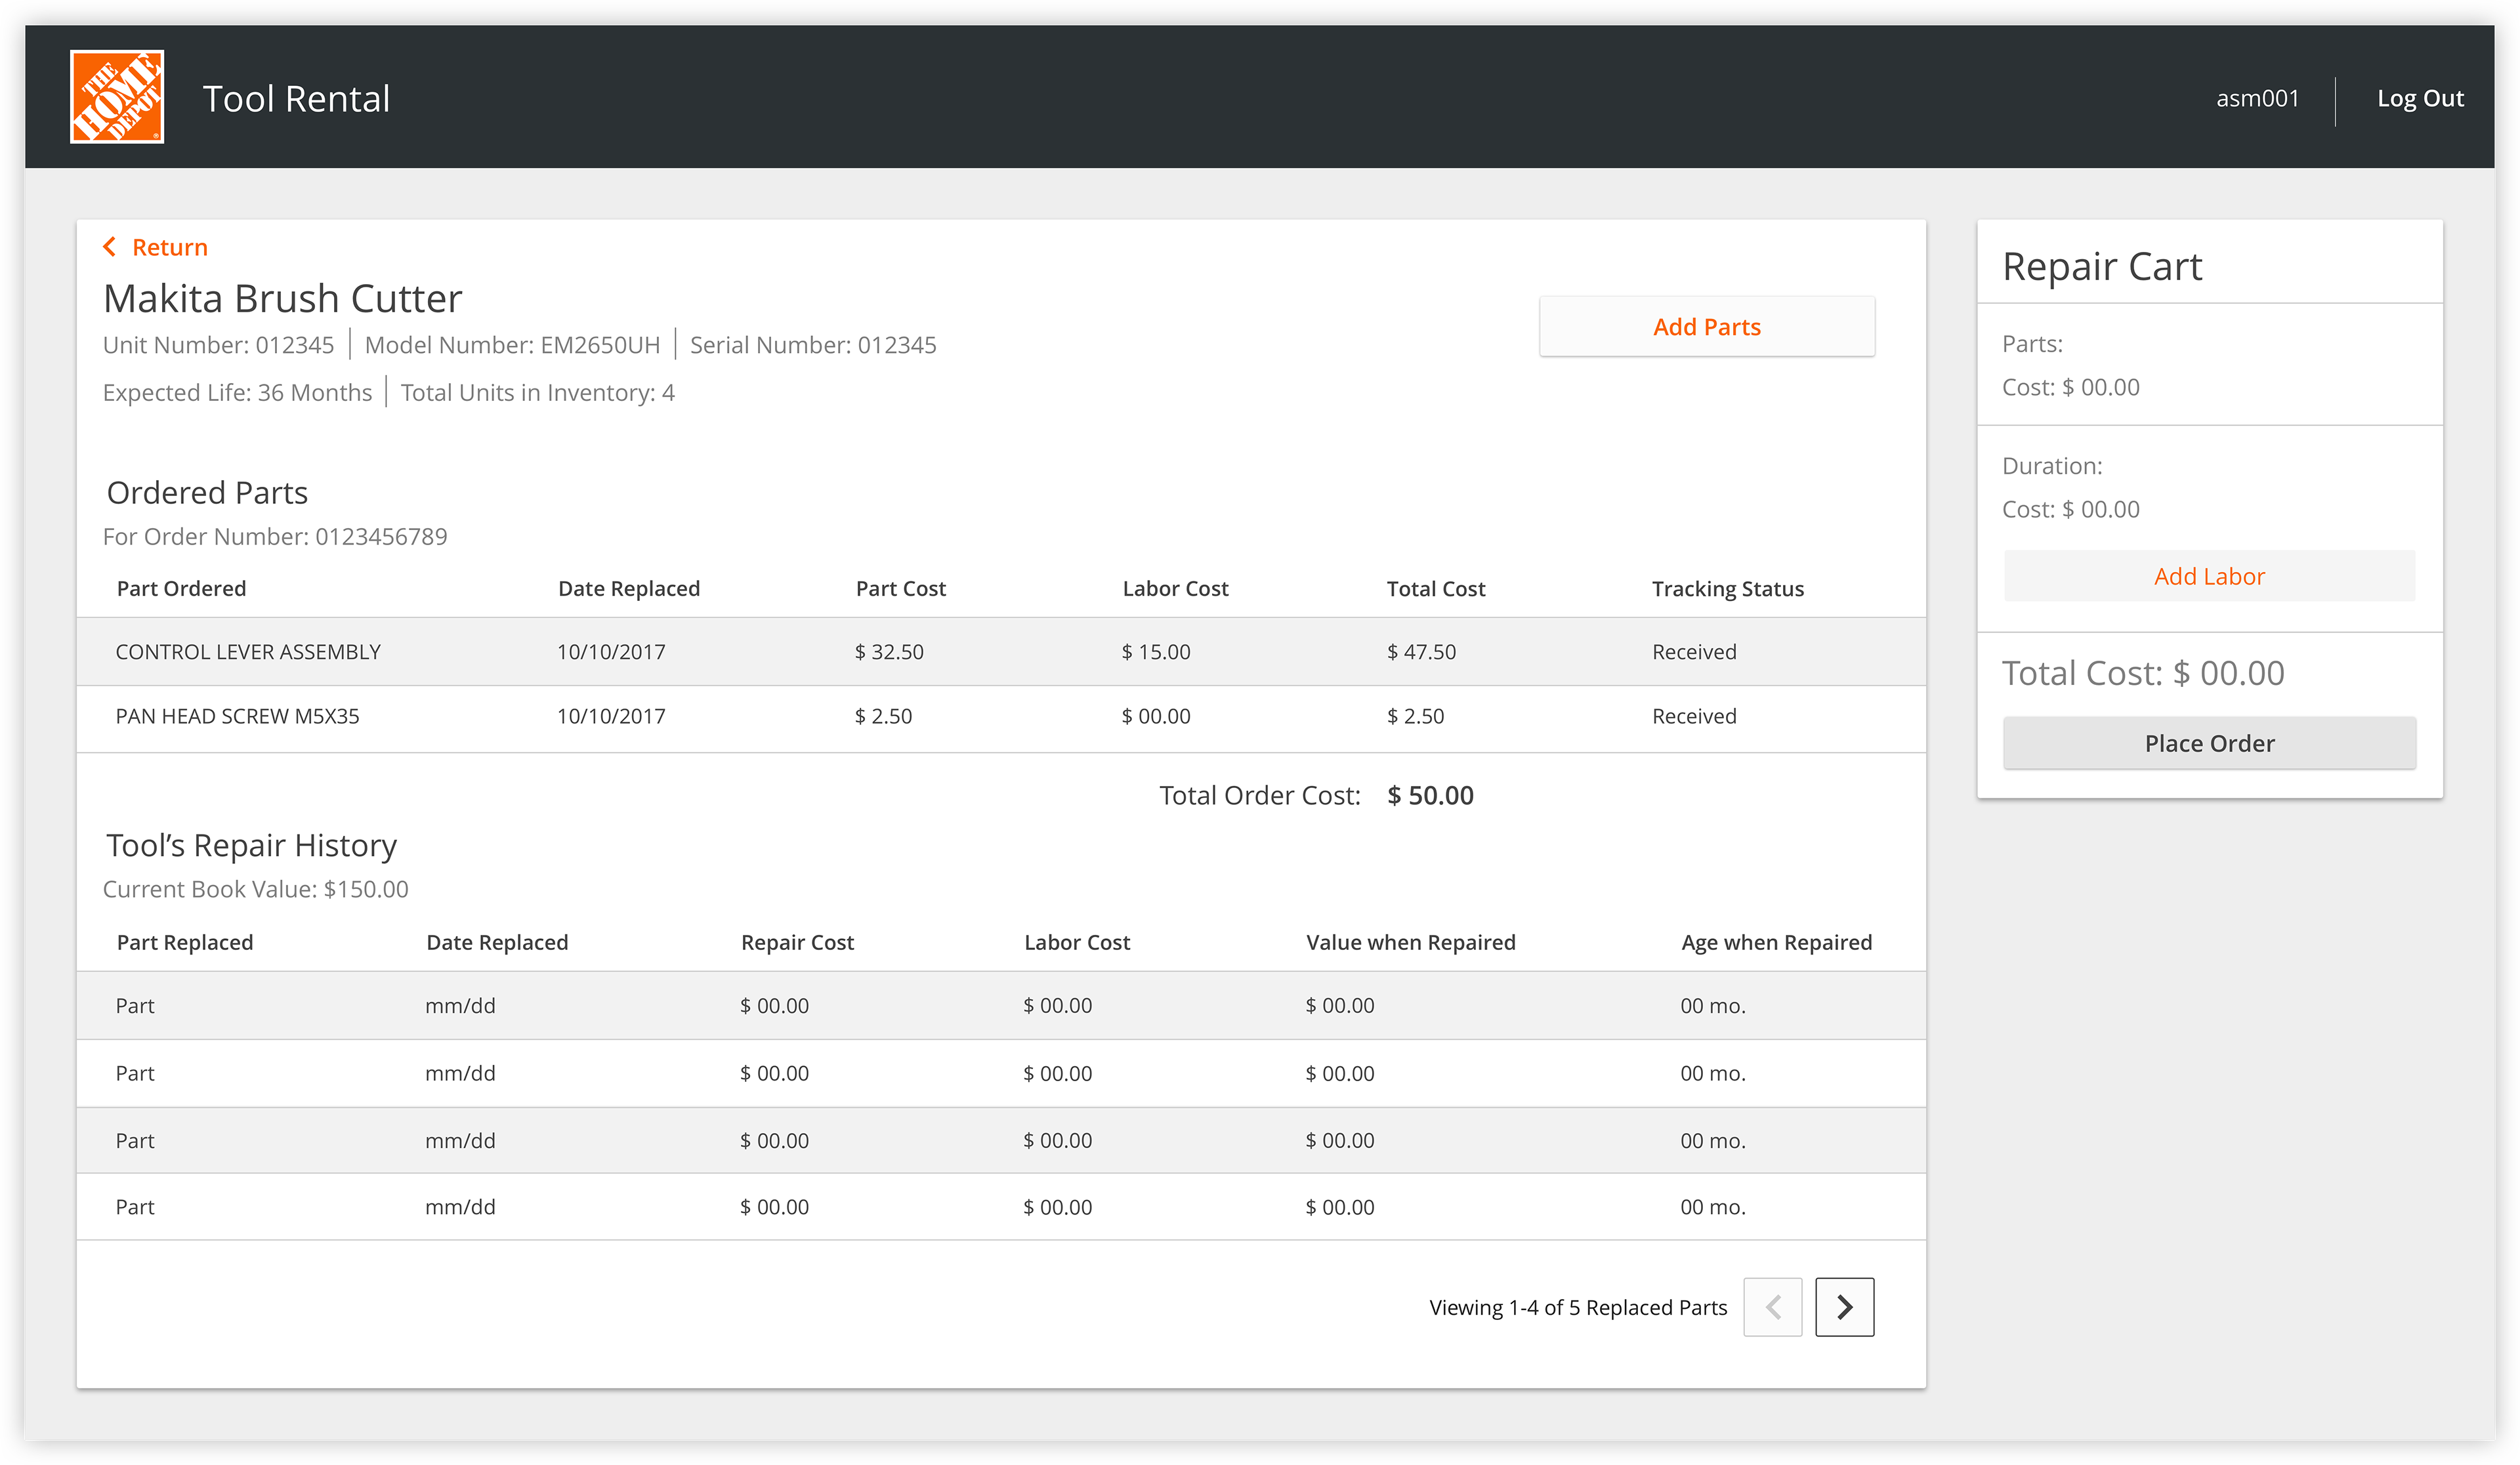
Additional Parts
While working on the repair the technician may find that he needs additional parts to complete the repair. If he does he can select the add parts option and go through the same process as when he added the initial parts to the repair.
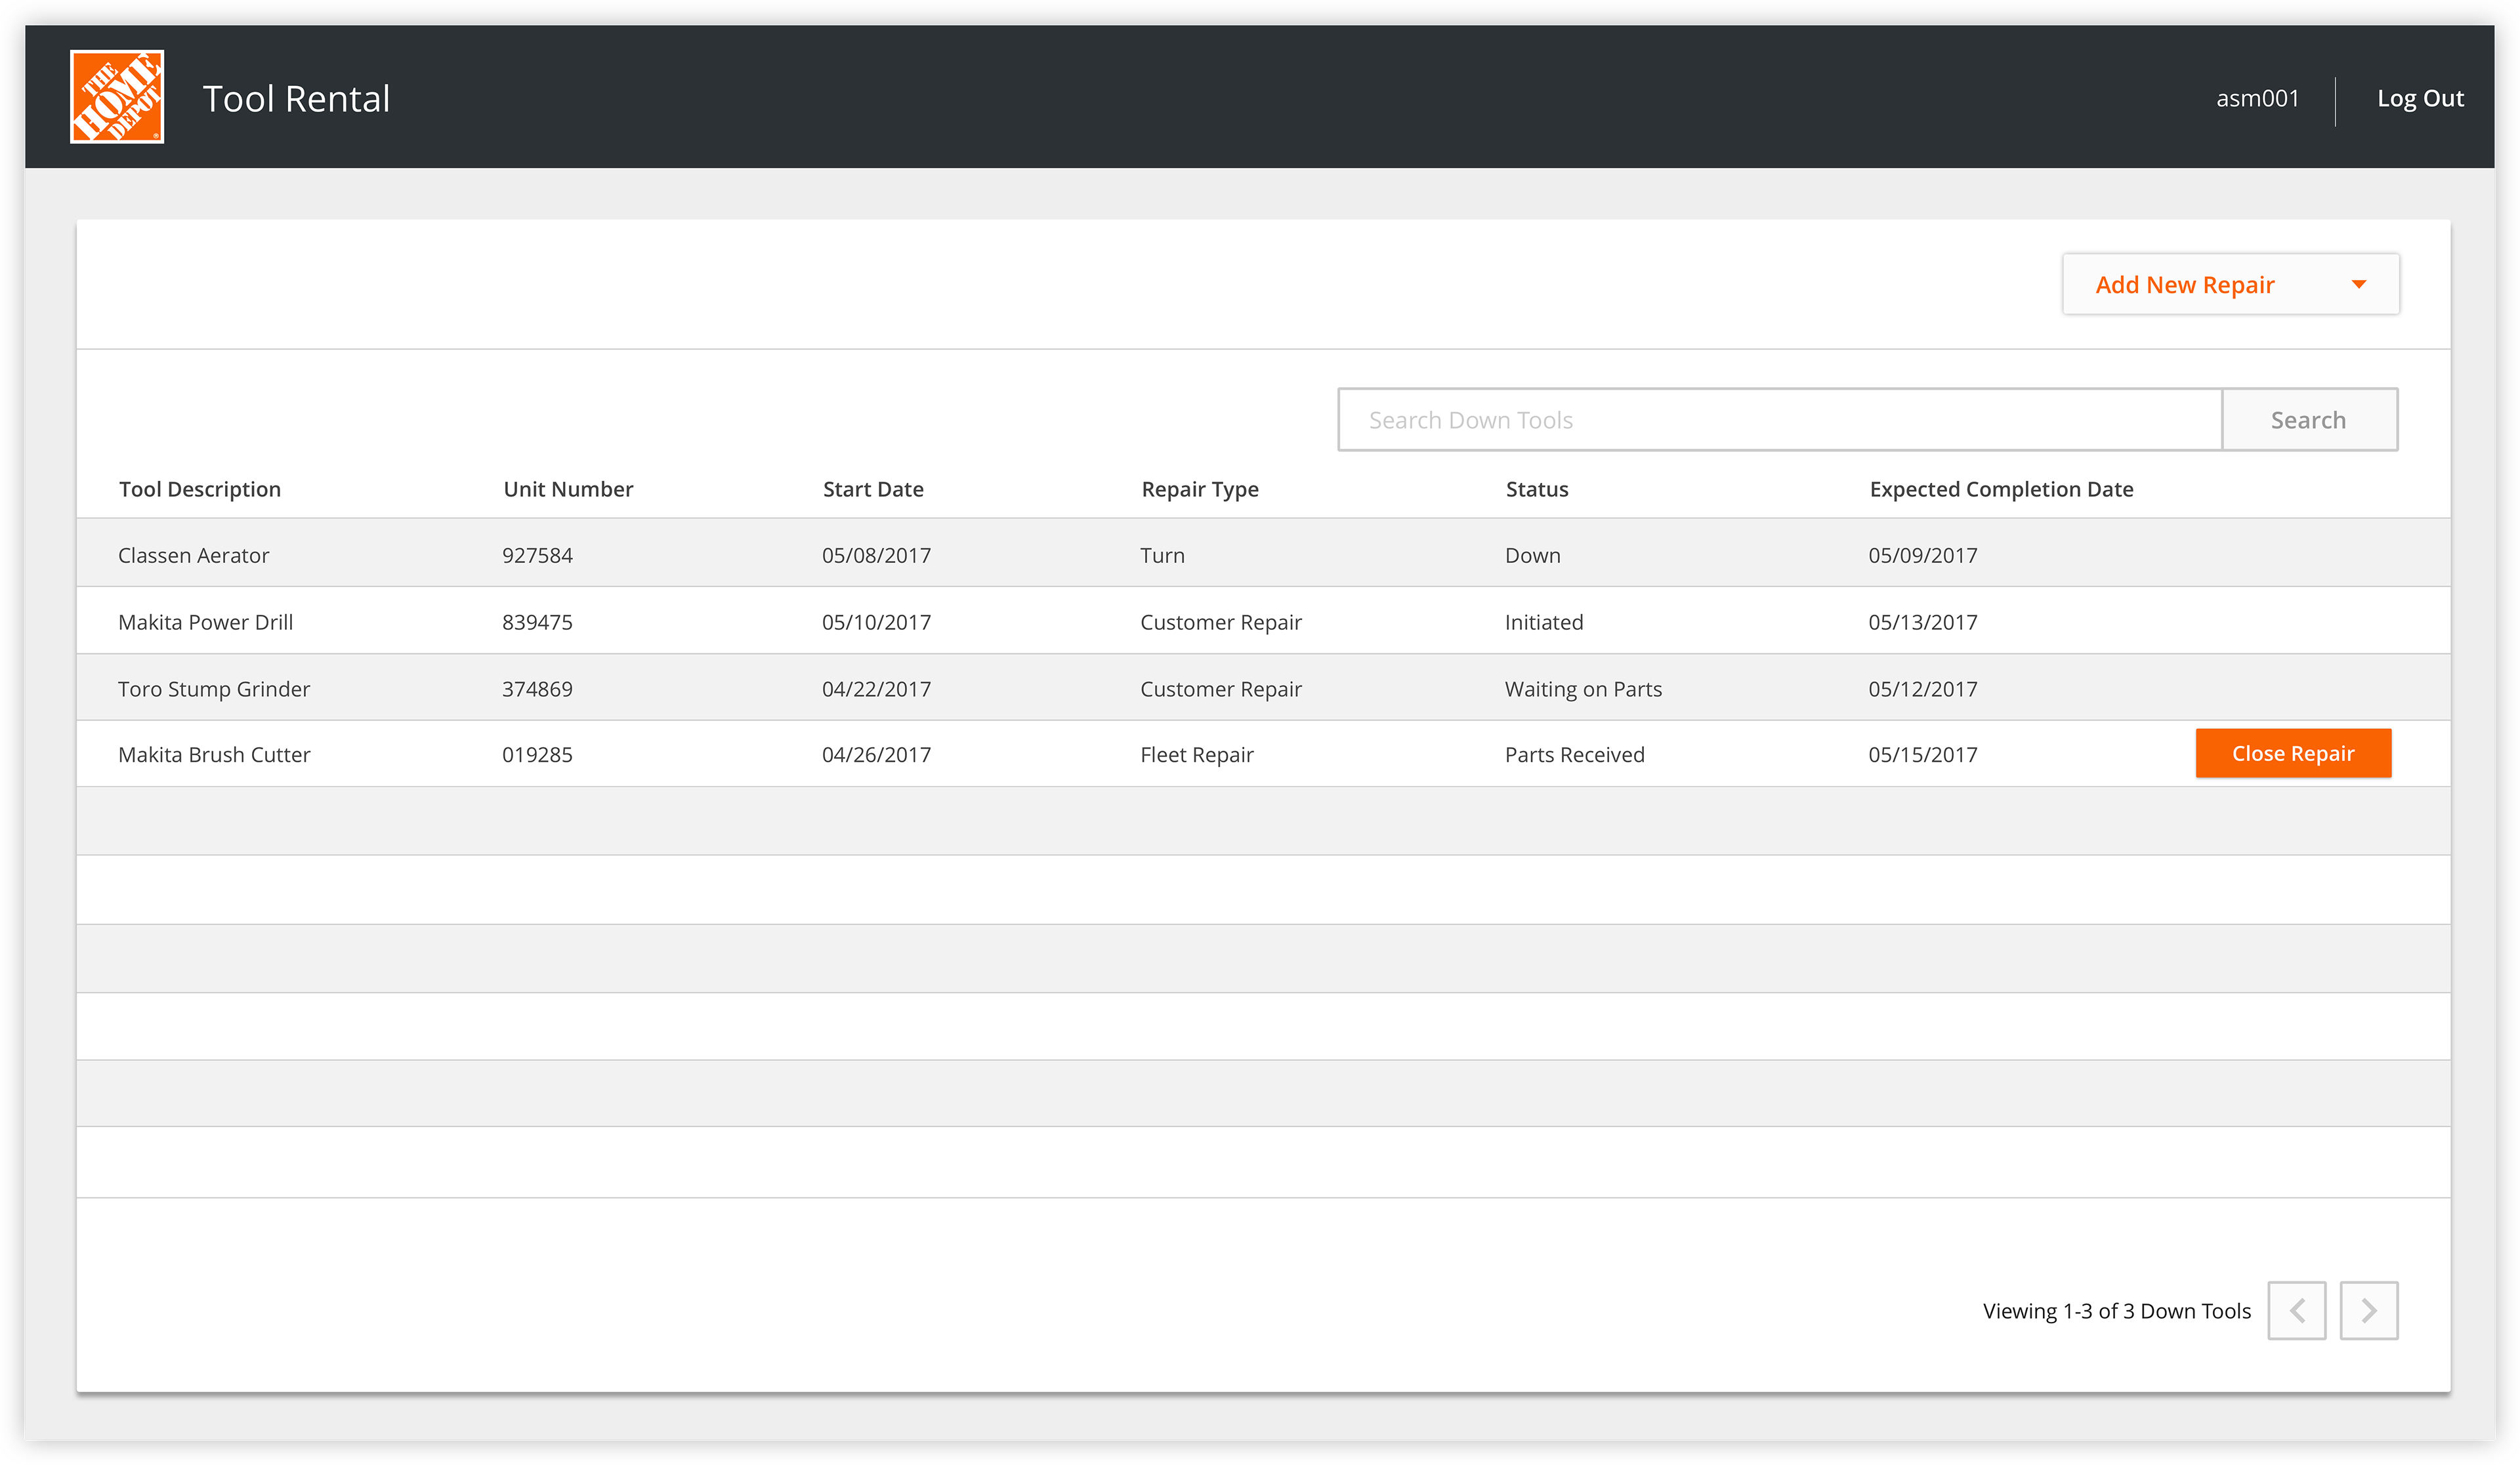
Closing the Repair
Once the technician has completed a repair, he can close the repair from the home page.
Testing Insights
After we tested our prototype and had our inception meeting with our stakeholders, the two product managers then gained a team of engineers as I was moved to work on Rental Toolbox.